The Boy Who Bakes

Edd Kimber
  • Home
  • Recipes
  • My Books
  • Blog
  • Recipe Index
  • About
  • Home
  • Recipes
  • My Books
  • Blog
  • Recipe Index
  • About

Recipes

  • All
  • baking
  • Biscuits and Cookies
  • Breads and Quickbreads
  • Bundts
  • Cakes
  • Chocolate
  • Dessert
  • drinks
  • Holidays
  • Pastry
  • Scones and Quickbreads
black sables-3.jpg

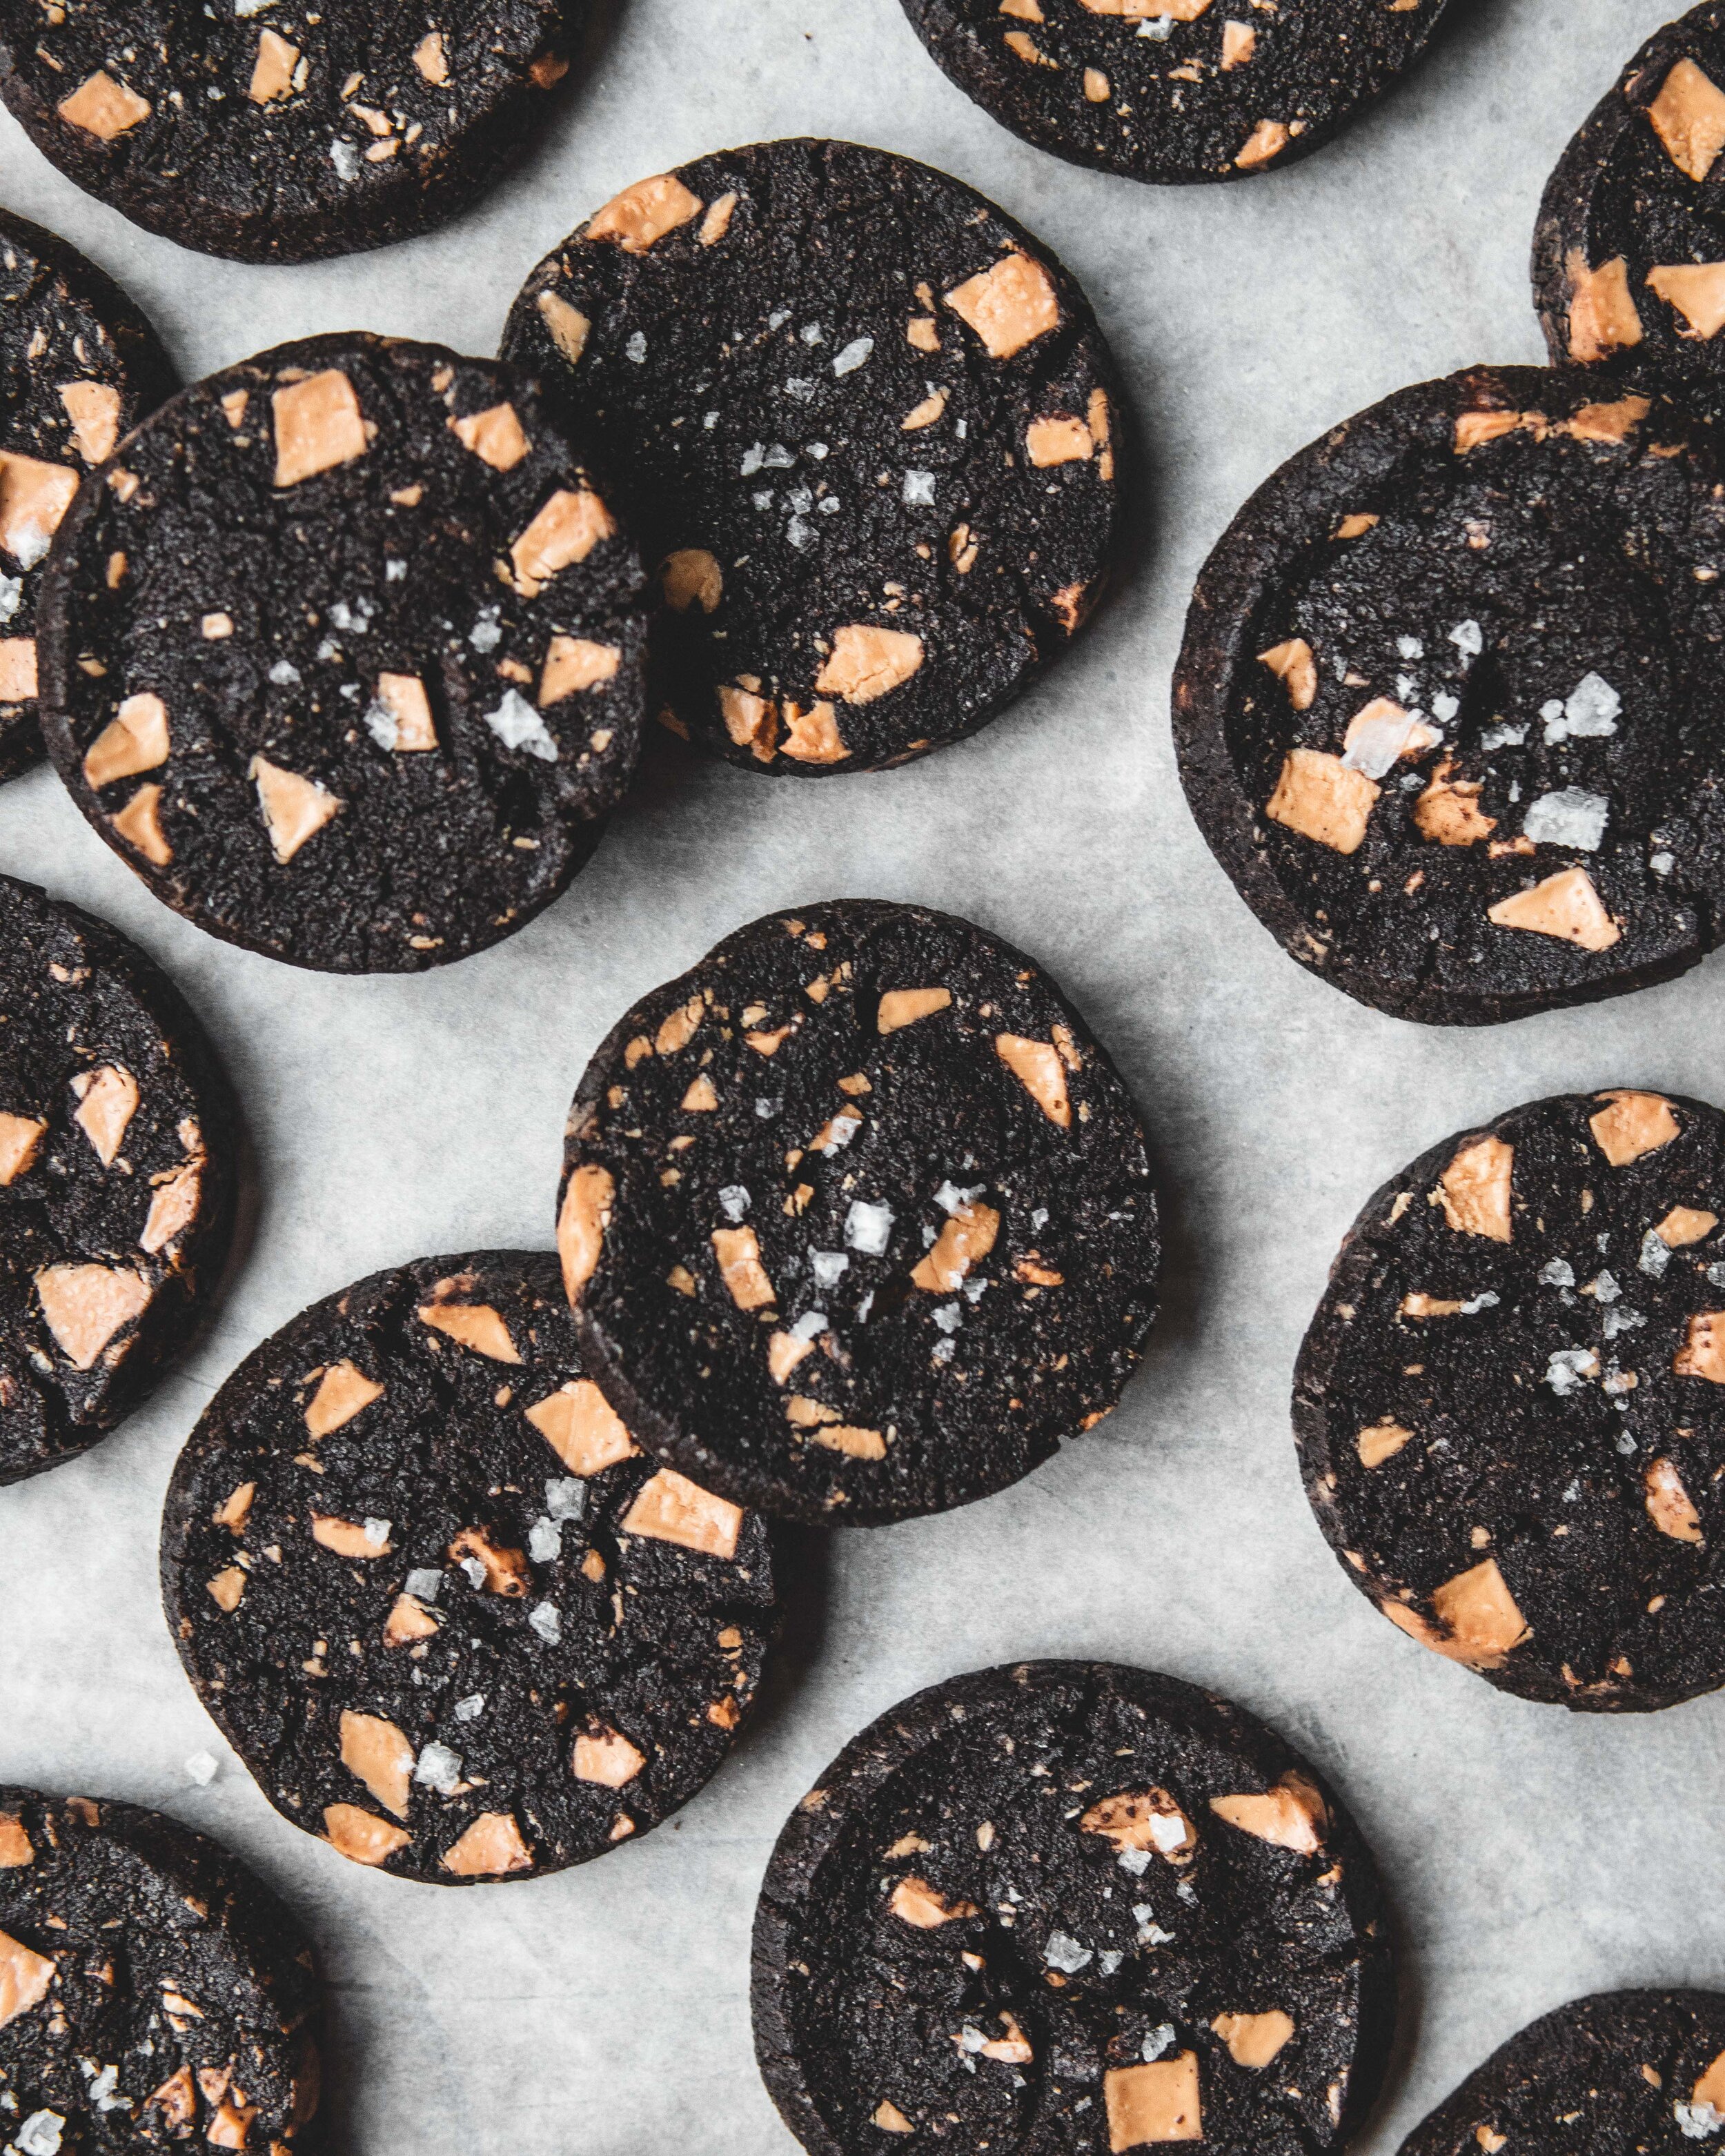
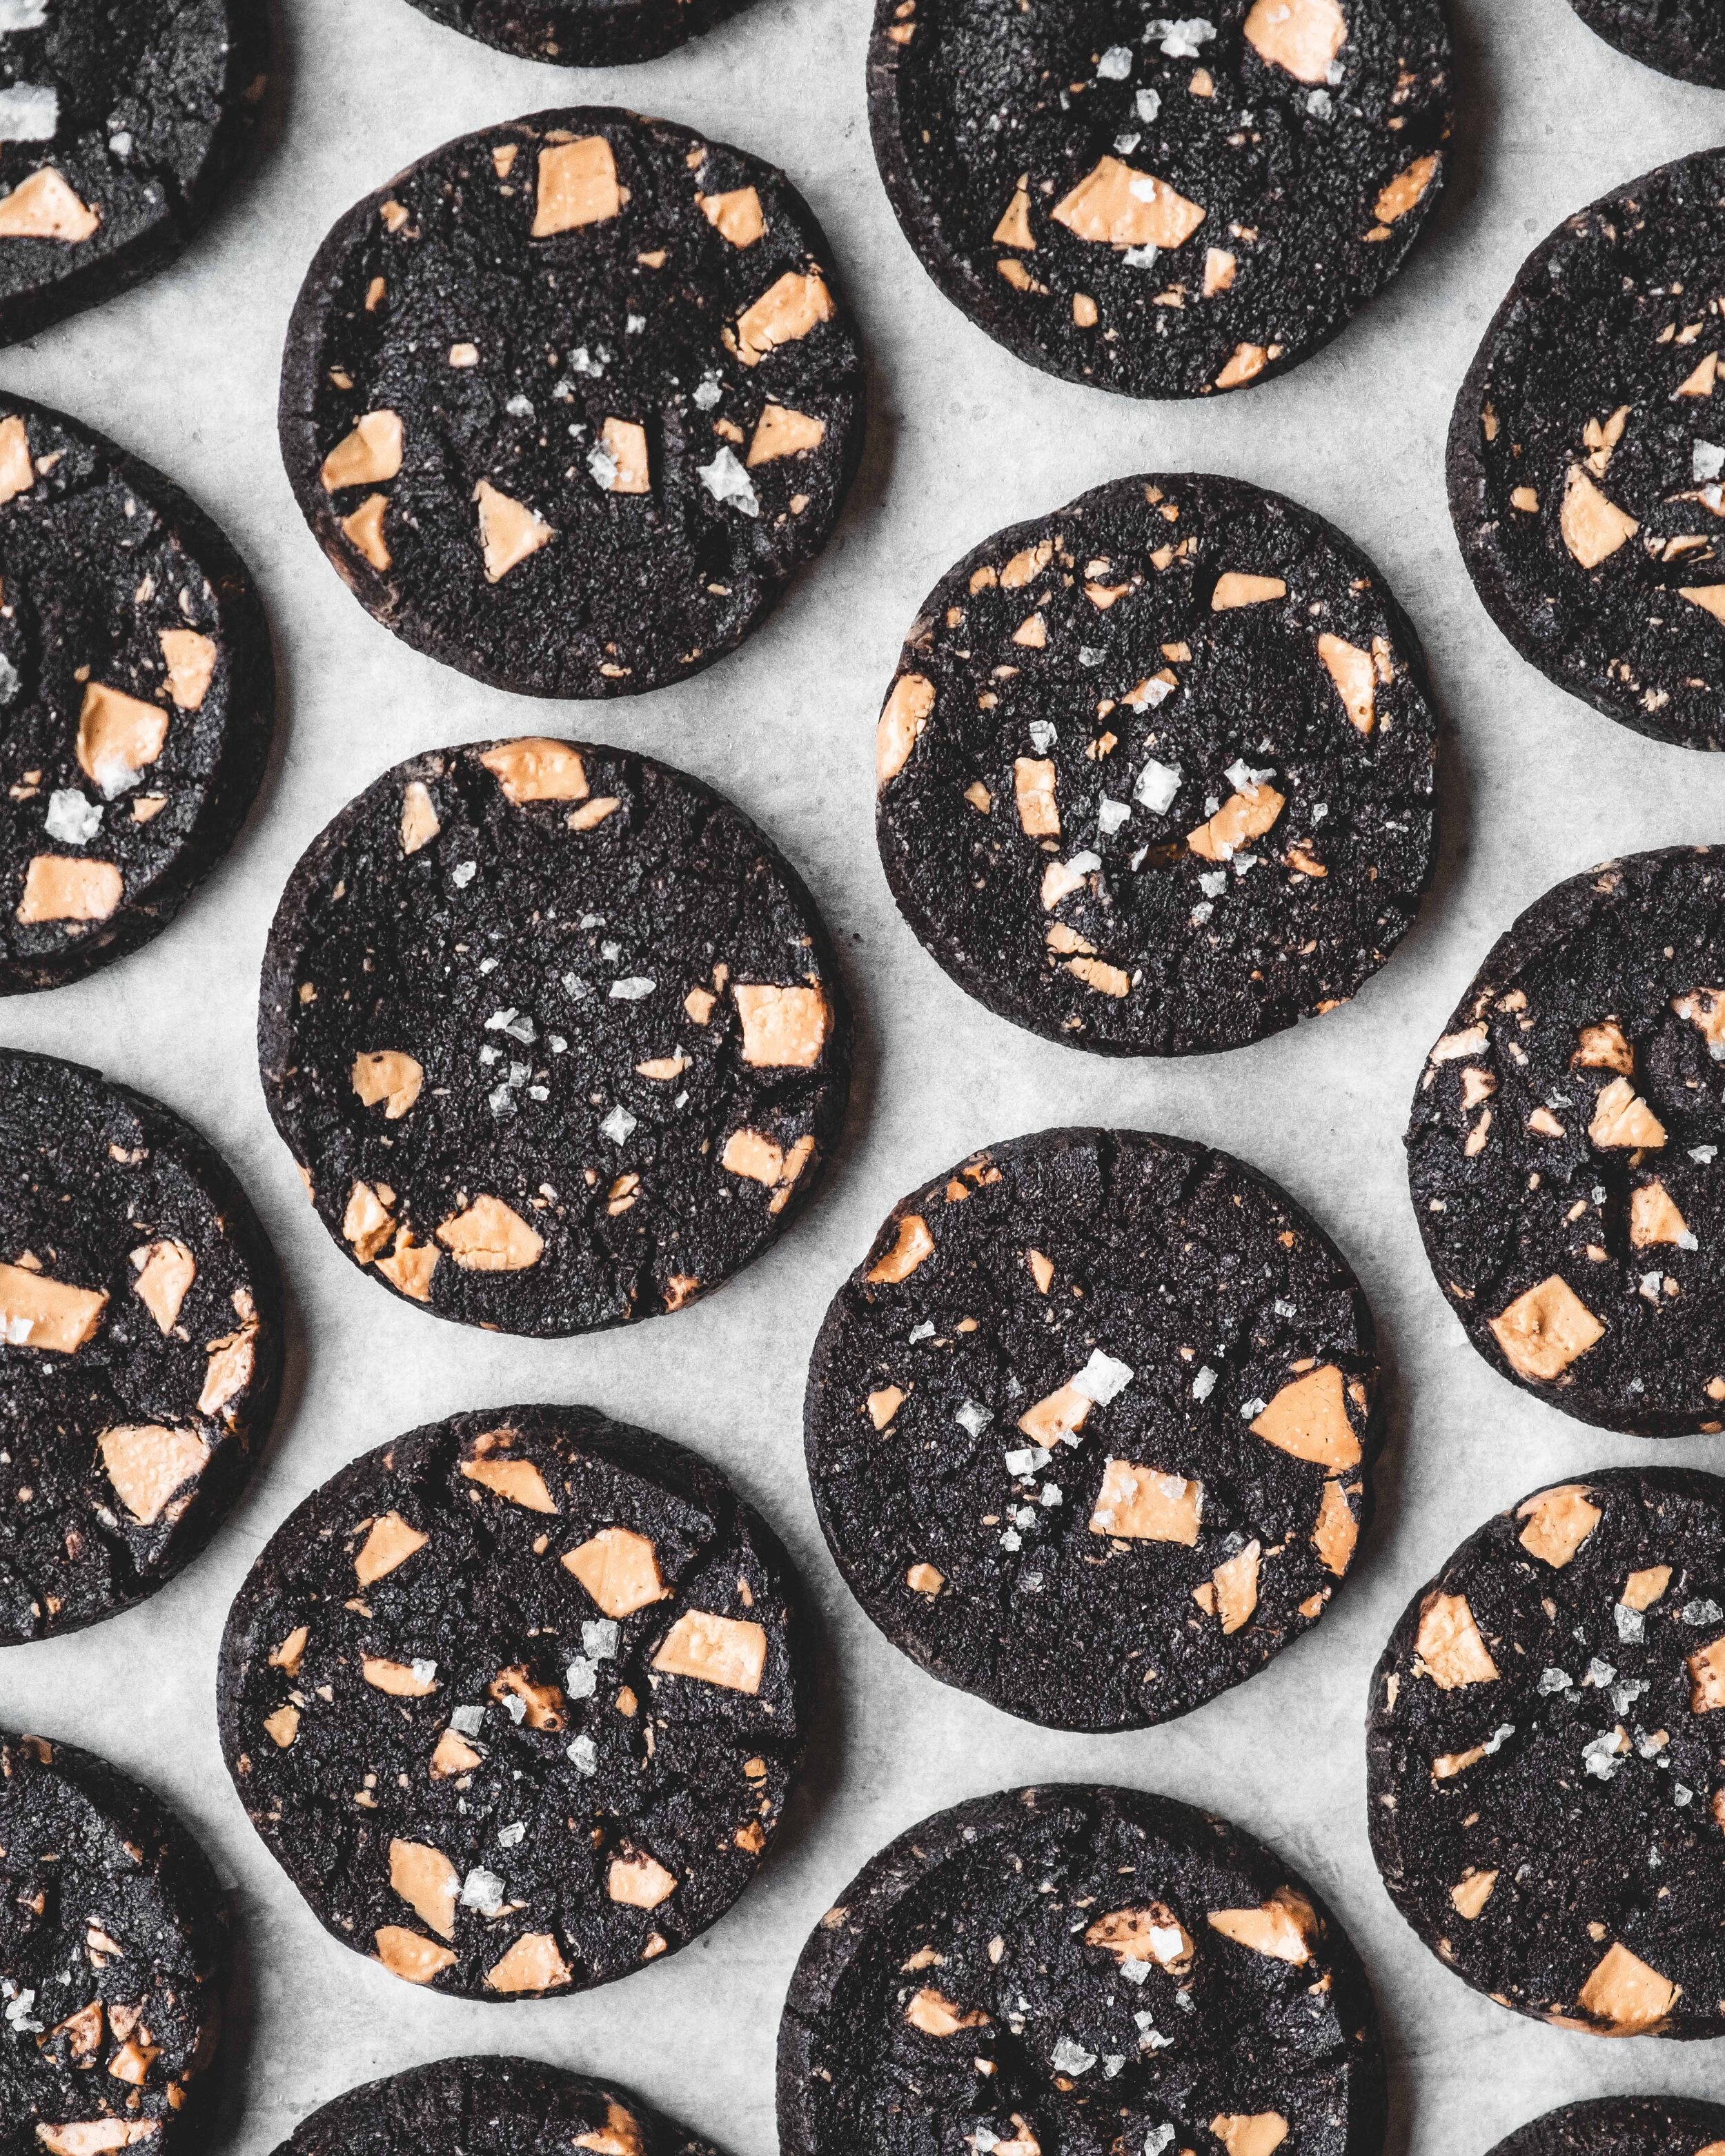
Salted Black Cocoa Sables with Caramelised White Chocolate Chunks

Edd Kimber February 28, 2020

I feel like this post needs to start with an apology to my fellow British bakers because to make this exactly as written will be a little bit tough. Black cocoa, the elusive cocoa used to make Oreos and of course this sable cookie, is a little tough to track down here at home in Blighty Right now, in the UK, there is only one brand of black cocoa availble (over on amazon of course) and I have no idea of the quality. I am lucky to have a stash I bought from King Arthur Flour over in the US and I use it sparingly not wanting to run out anytime soon. The good news is that in this recipe the cocoa is mainly used for look so your favourite cocoa powder will also make for a wonderful cookie, just remember this recipe should you find some black cocoa and want to try a recipe that put its dramatic look to good use. 

I also realise as I am typing this that many of you may also never have heard of black cocoa powder. Simply put it’s just another version of ‘Dutched’ cocoa powder. Cocoa powder comes in two main forms, natural and dutched. Natural cocoa powder is the leftovers after cocoa mass is stripped of its cocoa butter (this form is more common in the US). Dutched cocoa powder goes through one extra step, it is washed in a solution of potassium carbonate to neutralise the acidity found in natural cocoa powder, it also happens to darken the colour of the cocoa powder and give it a deeper more roasted flavour profile (people argue whether natural or dutched has the strongest ‘chocolate’ flavour but I’m not getting into that today). Black cocoa powder goes through a more intense version of this dutching process which gives it an almost entirely black colour. Generally it isn’t seen as having the strongest chocolate flavour compared to the more common cocoa powder varieties so I use it mainly when I want a more dramatic colour, often blending it with a regular ducted cocoa powder to give the best of both worlds. 

In todays recipe I use the black cocoa to make a cookie that looks incredible and also one that gives a chocolate flavour but without overpowering the hero ingredient of this recipe, caramelised white chocolate. If you know me you know I love nothing more than a batch of this magic ingredient. By slowly roasting white chocolate you can caramelise it and add a ton of caramel notes to the chocolate. If you’ve never made it before let this recipe be the reason you finally give it a go. 

If you don’t want to track some black cocoa down this will still taste incredible with regular ducthed cocoa powder so don’t let that stop you from whipping up a batch, 

Salted Black Cocoa Sables with Caramelised White Chocolate Chunks

Makes 30-35
140g plain flour
140g wholemeal rye flour (you can replace with plain flour if you prefer)
40g black cocoa powder
3/4 tsp baking soda
1/2 tsp flaked sea salt
220g unsalted butter, room temperature
125g caster sugar
125g light brown sugar
1 tsp vanilla extract
200g caramelised white chocolate (recipe below), roughly chopped

To make the cookie dough sieve the flours, cocoa powder and baking soda into a large bowl, pushing any lumps of cocoa powder through the sieve. I avoid sieving unless necessary and this is one of those time. Cocoa powder often forms little lumps so it’s always important to sieve it unless you want little dry pockets throughout your recipe. Add the salt and whisk everything together. Place the butter and sugars into the bowl of an electric stand mixer, fitted with the paddle attachment, and on medium speed beat tother for about 2-3 minutes just until smooth and creamy (you can do this with an electric hand mixer too if you want). We don’t want to beat lots of air into the butter we just want to make it soft enough that the flour mixture combines easily so don’t overdo it at this stage. Add the vanilla and mix briefly to combine.

Turn the mixer off and pour in the flour mixture. We don’t want to make a huge mess and have a cloud of flour and cocoa powder cover every surface in your kitchen so cover the bowl of the mixer with a kitchen towel and then gently pulse the mixer on and off just to get the flour combined a little before turning the mixer to low to mix it in properly. We want to mix in the flour just until it disappears into the butter but before the mixture forms a ball of dough, it should still look a little crumbly. Add the chunks of caramelised white chocolate and mix briefly just to distribute. Tip the dough out onto the worksurface and use your hands to briefly bring together as a uniform dough. Cut the dough into two roughly equally sized pieces and set one aside for the moment. Form each ball of dough into a log that is roughly 4-5cm thick. Roll the log of dough in parchment or clingfilm and refrigerate until firm, about 3-4 hours. Repeat with the second piece of dough. 

When ready to bake preheat the oven to 160ºC (140ºC Fan) 325ºF and line a couple baking trays with parchment paper. Unwrap one of the logs of dough and use a sharp knife to cut into slices about 1/2 an inch, just over a cm, thick. Place them onto the prepared baking trays leaving just a little space between. The cookies will spread but not significantly. Sprinkle each with a little extra flaked sea salt, unless you are one of those people that have sent me angry emails about your hatred of salt being sprinkled onto cookies you guys can leave it off and stop emailing me. Bake in the preheated oven for 14 minutes. The cookies wont look done, they’ll be incredibly dark so you cant use visual clues and if you press them they’ll feel too soft but trust the process, as the cookies cool they crisp up leaving you with a wonderful sable texture. Sable is French for sand and these cookies should have a slightly crumbly, almost shortbread like texture. 

Kept in a sealed container these cookies will keep for about 4-5 days.

black sables-5.jpg

Caramelised White Chocolate

300g white chocolate, minimum 30% cocoa butter content

To make the caramelised white chocolate simple roughly chop the chocolate and add to rimmed baking tray. I use an American style quarter sheet pan which is the same size as a regular 9x13 brownie pan so if you own one of those you can also use that. Place the baking tray into an oven that has been preheated to 125ºC. You’re basically going to leave it in there for anything from an hour to hour and half until it has reached your desired level of caramelisation. The one thing you need to do is a lot of stirring. 

Every 10-15 minutes you need to remove the tray and give the chocolate a really good stir. When the chocolate comes out of the oven it may look a little stiff, a little grainy. With a good stir the chocolate will smooth out and become liquid again. To prevent the chocolate from burning or become an unpleasantly grainy mess you must do this stirring very well and every 15 minutes. Don’t be tempted to leave the chocolate any longer between stirs, it will stiffen up to a place from which it cant be rescued. The reason I recommend white chocolate with at least 30% cocoa butter is that it melts thinner and is easier to work with. Once the chocolate has reached a rich golden brown colour remove it from the oven and scrape it into a container. I like to divide it into rectangular plastic trays so it almost resembles the original bar form it came in. Refrigerate until solid and then use however you fancy. You’ll note my cookie recipe only use 200g and my recipe for the chocolate uses 300g of white chocolate. The reason for this is two fold. The chocolate is so good you’ll need extra to account for everything you snack on as you make the cookie dough and secondly making a smaller batch makes it more prone to problems so 300g is the smallest batch I would recommend making. 
In Biscuits and Cookies Tags black cocoa, sable cookies, caramelised white chocolate, theboywhobakes
25 Comments
Banana Pancakes 2.jpg

Banana Pancakes with Passion Fruit Butterscotch Sauce

Edd Kimber February 21, 2020

This post is sponsored by Doves Farm Organic Flour

How can anyone dislike a holiday that is celebrated with the eating of pancakes? I for one can absolutely get behind this day. Pancake Day, Shrove Tuesday, Fat Tuesday, Mardi Gras, the day goes by different names depending on where in the world you live but the one thing that stays the same is we all celebrate the day by eating fatty foods before the fasting of lent begins. Generally this means we enjoy sweeter treats, that might be King Cake, Semla, Malasadas or even…omelettes. Okay I’ll admit that last one doesn’t quite follow the pattern. Here in the UK we generally stick to the classic pancakes. Traditionally this would be in the form of crepes, thin French style pancakes, and quite often the filling would be incredibly simple and, at its most classic, the British version is served with lemon juice and sugar. Now there is absolutely nothing wrong with this classic dish, I love it, it’s nostalgic, it’s what I grew up with. But, when I am making the pancakes myself, I quite often turn to a more American style pancake, thick and fluffy, and topped with all manner of delicious things. For this year’s pancakes I stuck with my favourite fluffy pancakes but I made them with mashed bananas and Khorasan flour giving them a wonderful banana bread flavour and served them with one of my favourite things, a passion fruit spiked butterscotch sauce, a fabulous twist on the classic stack of pancakes. 

What is Khorasan Flour

These pancakes use Doves Farm Organic Stoneground KAMUT® Khorasan Wholemeal Flour to give a boost of flavour. Khorasan (KAMUT® is the registered brand name of the flour) is an ancient grain that is thought to be a distant relative of Durum Wheat (which is maybe why it’s very well suited to making pasta). The flavour is rich and creamy, almost buttery. Like spelt it can produce soft and tender bakes but when used as the sole flour can also make recipes a little crumbly. Khorasan is said to have been found in the tomb of an Egyptian pharaoh, giving it the nickname king tut’s grain, it was also said to have been carried on the ark by Noah, giving it a second nickname of the prophets wheat. Whilst these are likely nothing more than fancy storytelling I love a product with a good backstory and have you ever heard of another flour having nicknames? I certainly haven't. Whilst these stories link the flour to having a middle eastern origin these days the flour is only grown in US and Western Canada, cultivated since the 1970’s. The flour is also higher in protein, fibre and many minerals compared to modern wheat.

How to Bake with Khorasan 

I find that Khorasan is similar in application to Spelt, you can use a relatively high proportion of the flour without any negative issues. Using Khorasan for 50% of the flour called for in a given recipe works well without noticeable problems. Used in bread recipes it can make for tender but more dense loaves. Like with some of the other ancient grains I have been using recently, Khorasan is a little more absorbent than modern wheat flour so you may need to up the moisture content a little. When using a new grain for the first time it can be advisable to substitute the wheat flour with smaller percentages of the ancient grain, testing how it behaves in your recipe. I always suggest using 20% of the overall flour called for in a recipe as a good starting point. 

Doves Farm Organic Stoneground KAMUT® Khorasan Wholemeal Flour is available from Ocado, Sainsbury’s, Tesco and Waitrose & Partners, and direct from Doves Farm

Khorasan Banana Pancakes with Passion Fruit Butterscotch Sauce
Makes 8-10 pancakes (serves 4)

Banana Pancakes
150g Doves Farm Organic Stoneground KAMUT® Khorasan Wholemeal Flour
1/4 tsp salt
2 tsp baking powder
125g bananas, (weighed without the peel)
2 large eggs
40g caster sugar
25g unsalted butter, melted and cooled
150ml whole milk

Passion Fruit Butterscotch Sauce
165g light brown sugar
165g unsalted butter
Pinch of salt
75ml double cream
50g passion fruit pulp

To make the butterscotch sauce, place the sugar and butter into a medium saucepan and cook over medium heat until the butter has melted and the two ingredients have combined into a caramel like sauce. Once bubbling cook for a couple minutes more before adding the salt and cream and cooking for a further 2-3 minutes until slightly thickened. Take of the heat and stir in the passion fruit pulp. Set aside to cool slightly before using. If you like, you can also add sliced banana to the sauce when adding the cream.

To make the pancake batter place the Doves Farm Wholemeal Khorasan Flour, salt and baking powder into a large bowl and whisk together to combine. 

In a separate bowl mash the bananas with a fork until only small lumps remain. Add the eggs, sugar and butter and mix together until smooth. Add the milk and mix until combined. Pour the wet ingredients into the dry ingredients and mix together briefly just until smooth and combined. 

To cook place a non-stick pan over a low/medium heat. Using piece of kitchen roll lightly coat the pan with a little oil. Add a spoonful of dough to the pan and spread into a thin disc. Cook until bubbles that hold their shape when they pop form around the edges of the pancake, flip and cook for about 30 seconds more. After the first pancake you shouldn’t need to grease the pan again. 

Serve warm with a large spoonful of the caramel

Banana Pancakes 4.jpg
In Dessert Tags banana pancakes, american pancakes, passion fruit caramel, butterscotch sauce, khorasan, kamut, theboywhobakes
Comment
ZEC.jpg

Sesame English Muffins and Zhoug

Edd Kimber February 19, 2020

For todays recipe I am taking a trip back to Israel, to recreate a taste of something I became completely enamoured with, Zhoug. I visited the country last year with Vibe Israel on a tour to explore the food and specifically the baking of Israel. We spent time in kitchens with bakers of all stripes, wandering through local markets and eating everything we could get out hands on. There was so many things that stood out to me, the breads, the hummus, the ever present tahini and of course the zhoug. Zhoug is a Yemenite herb and chilli sauce that is incredibly popular across the country and in the wider region. Made with green chillies, parsley and coriander it varied a little every time we tried a different version, and it felt like we tried a different version every day of the trip. Some were made solely with coriander, some were incredibly fiery, some a little tamer. I had it served with falafel, served as a dip for breads, served in sabich (the incredible vegetarian pitta sandwich stuffed with aubergine, egg and seemingly every salad ingredient you could hope for) and as part of an incredible boureka sandwich at Lehamim Bakery in Tel Aviv (I will be recreating these soon). I had tried the sauce once before, back home in London, at the Good Egg restaurant, and their version was a tad sweeter, also excellent. I have been meaning to make a batch ever since I got home but it wasn’t until this idea came to mind that I pushed forward and whipped up a batch.

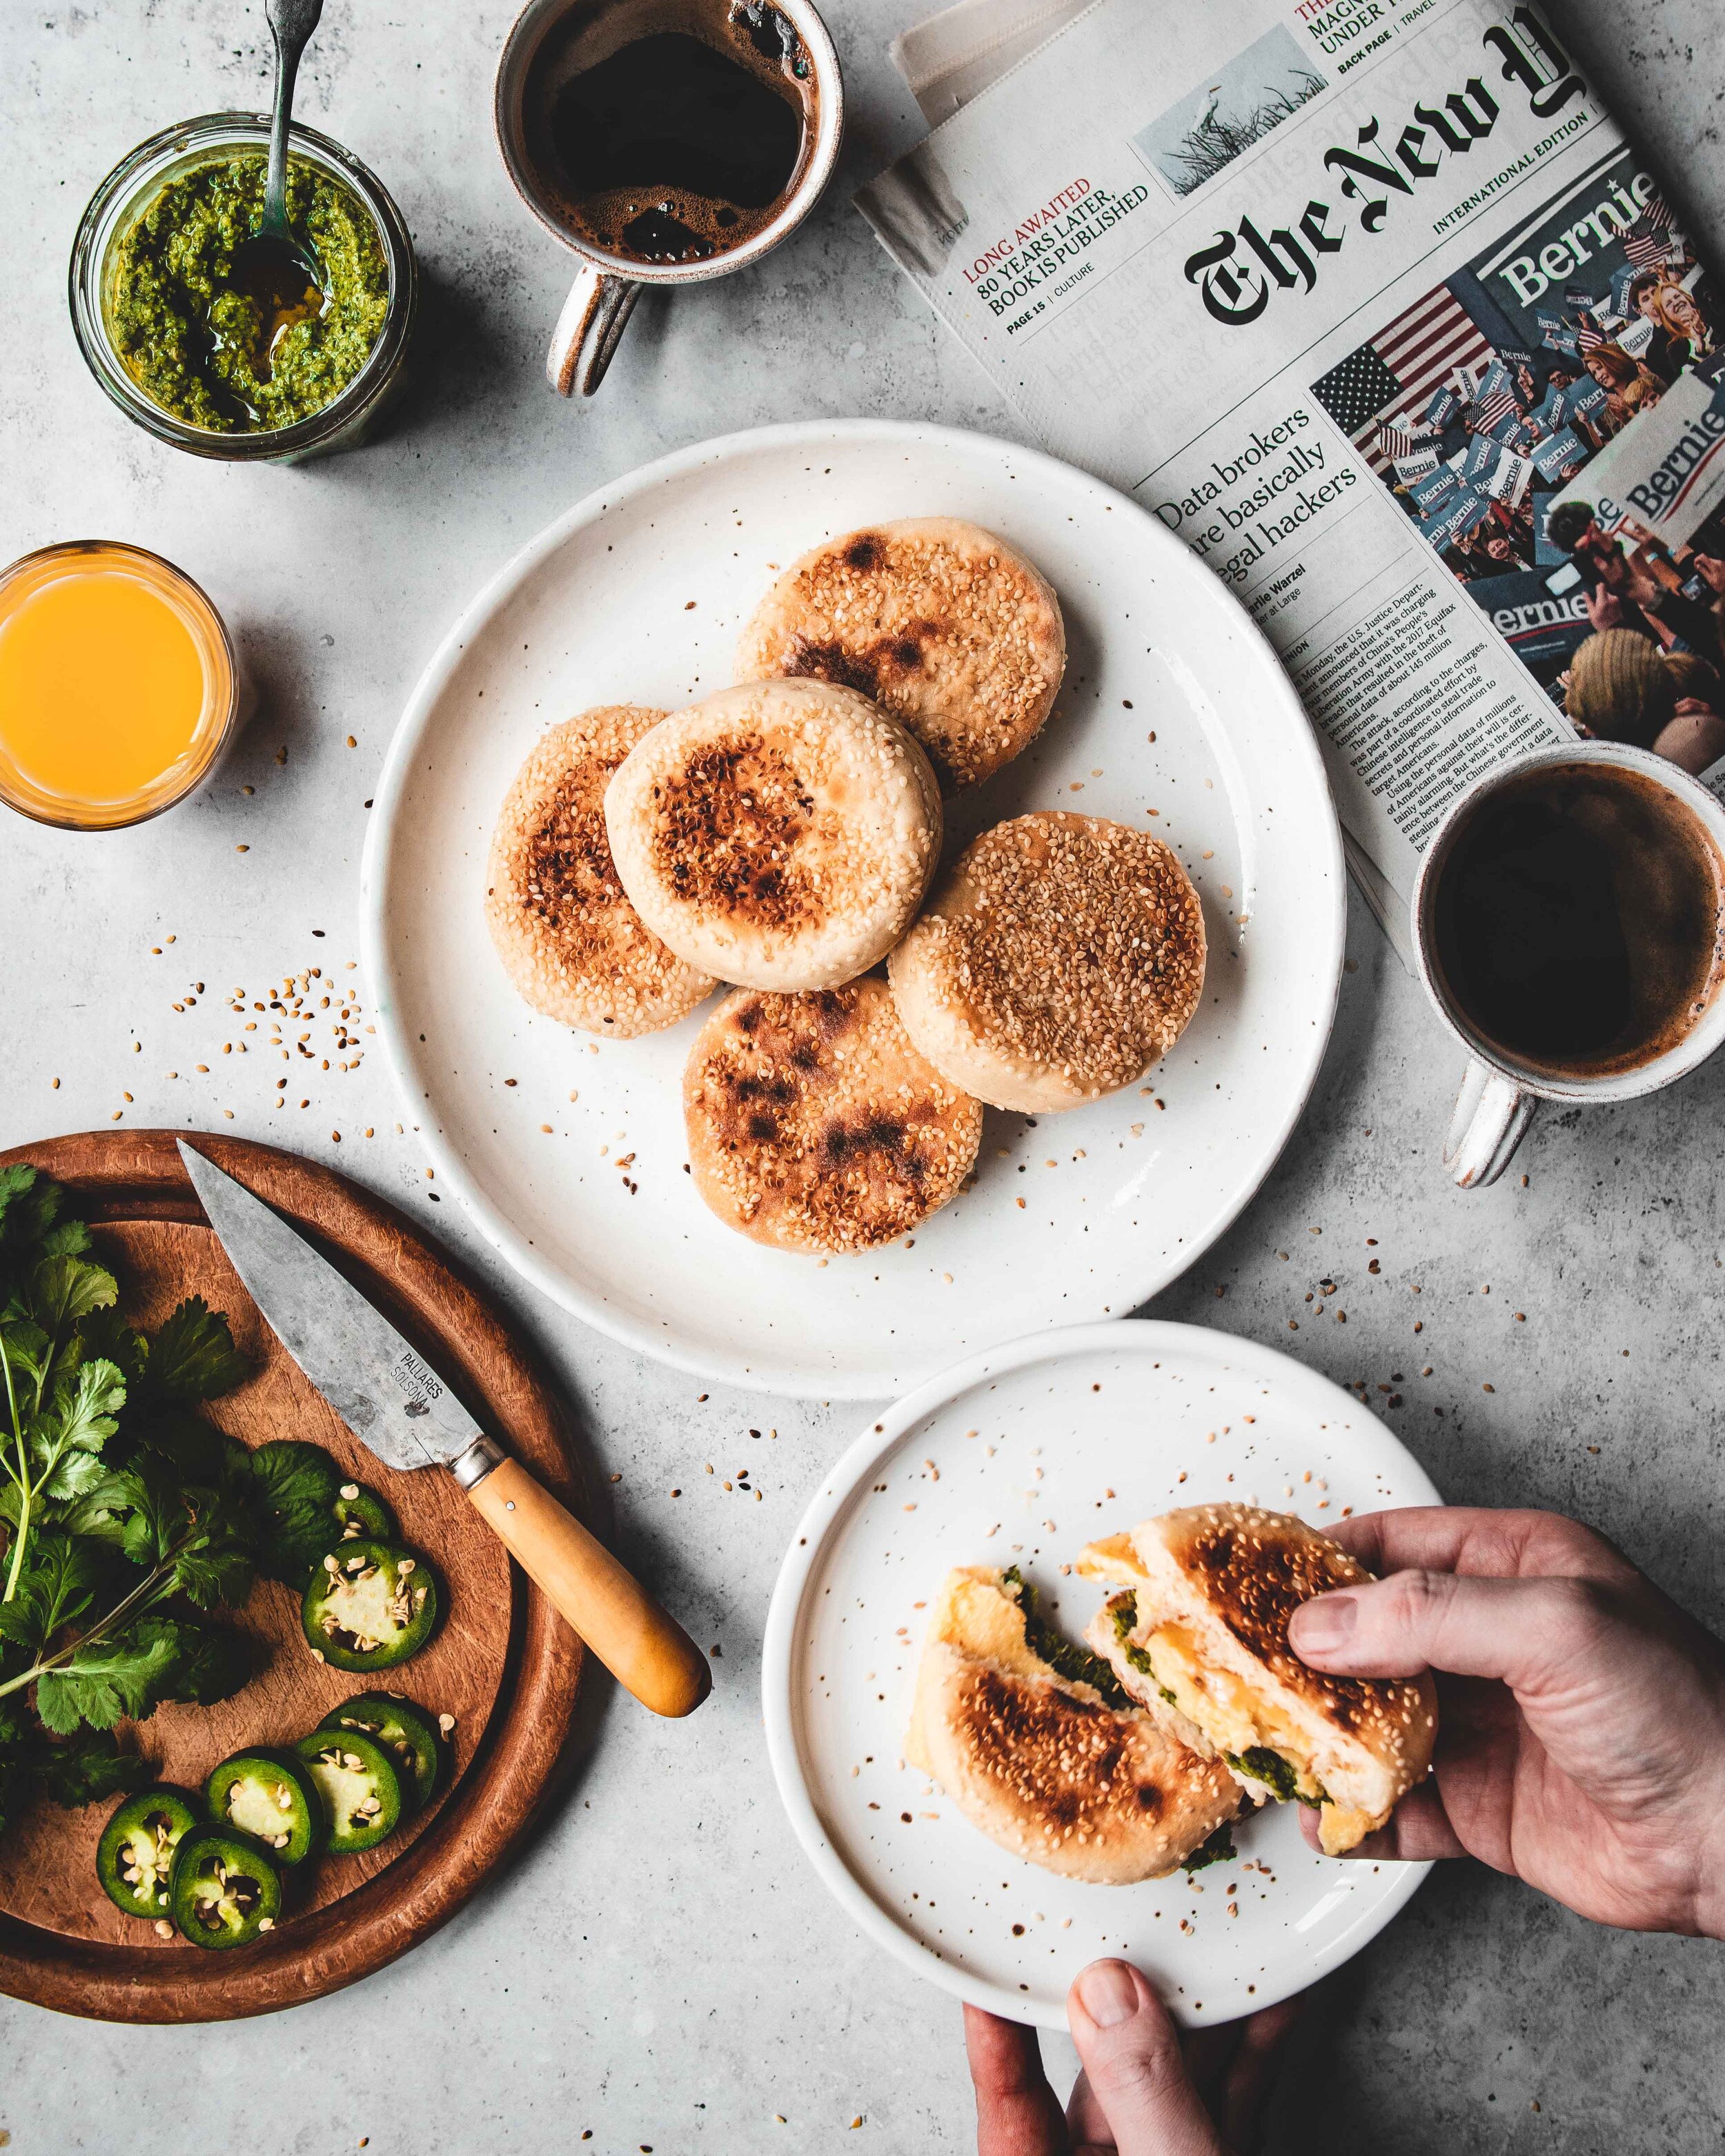
That idea was a breakfast sandwich, specifically a breakfast sandwich made with a sesame encrusted English muffin, zhoug, egg and cheese. It was inspired by my favourite New York breakfast sandwich, a classic BEC, a bacon egg and cheese. It is a staple of New York bodegas and delis and it’s something I almost always get when I’m in the fog of jet lag when im visiting NYC. This version is my Israeli take on that sandwich. Originally I wanted an alternative to the traditional bacon or sausage but the Zhoug has such a punch of flavour it really doesn’t need anything, although this with bacon would be a very good idea. I also cannot tell you just how much I love this sandwich, it’s ridiculously good. 

Zhoug
30g parsley
30g coriander 
3 garlic cloves
1/2 tsp ground coriander 
1 tsp ground cumin
1/2 tsp chilli flakes
3 large jalapeños 
125ml extra virgin olive oil
1 tsp coarse ground salt
2 tsp lemon juice
Pinch or two of sugar

Sesame English Muffins
450g white bread flour
1 tbsp caster sugar
7g fast action dried yeast
1 tsp fine salt
30g unsalted butter, room temperature
325ml whole milk
3 tsp sesame oil
100g sesame seeds

ZEC - Zhoug Egg & Cheese
1 sesame English muffin, lightly toasted and buttered
1 large spoonful of zhoug
1 large egg
Cheddar cheese, grated

To make the zhoug add the parsley, coriander, garlic, ground coriander, ground cumin, chilli flakes and jalapeños (I buy my chillis from the farmers market and they are big boys, if you’re using jalapeños from the supermarket they tend to be much smaller so you may need to use as many as 6 but you can also vary the amount depending on the heat level you prefer). Process until everything is finely chopped and a sauce like consistency has started to form. With the food processor still running pour in the olive oil processing until a smooth bright green sauce has been formed. Add the salt, lemon and a little pinch of sugar and process to combine. Taste and adjust the seasoning as needed. Scrape the mixture into a jar and refrigerate until needed. I find that with the aggression of the food processor the flavour can change after a days rest, it melds together and mellows a little.

To make the the English muffins place the flour, sugar, yeast and salt into the bowl of an electric stand mixer fitted with the paddle attachment and mix briefly to combine. Add the butter, milk and sesame oil (you can leave out if making classic muffins) and mix on low/medium speed until a shaggy dough forms. Continue kneading the dough on low/medium speed for about 10-15 minutes or until the dough is smooth and elastic and passes the windowpane test (you should be able to stretch a piece of the dough nice and thin, without it tearing, so you almost see through the dough. 

Tip the dough out on the worksurface and form into a neat ball, place into a lightly oiled bowl and cover. Set the dough aside for about an hour or until the dough has doubled in size. You can test the dough is ready by lightly pressing the dough with a floured finger. The indentation should spring back slowly, not springing back entirely. If the dough springs back fully and quickly it needs longer, if the impression holds its shape it may be overproofed. Tip the dough out onto a lightly floured worksurface and knock back. Roll the dough out until about 2cm (just under an inch) thick. Use a 8cm round cookie cutter to cut out as many muffins as possible. You can press the offcuts together to reuse but I would do this just once, the more you knead this dough the tougher it will become to work with. You should get around 12 muffins. 

At this point you have a couple options. If you want to make classic muffins you can line a couple baking trays and sprinkle with a thin layer of cornmeal or you if you want to make sesame encrusted muffins you can line the trays with parchment paper and pour the sesame seeds into a small bowl. Most recipes for muffins have you add the muffins straight on top of the cornmeal but after making the sesame encrusted muffins I came up with a new method that I use whatever style of muffins I am making. Take a couple sheets of paper kitchen towels and fold into a square that it just a little larger than the muffins, wet the kitchen towel so its fairly moist. Working with one muffin at a time gently press the moist towel onto both sides to moisten the surface of the muffins. If making the classic version place onto the cornmeal sprinkled baking tray, sprinkling the top of the muffin with extra cornmeal. If making the sesame version sprinkle both sides with a liberal coating of sesame seeds and then place the muffins onto the parchment lined trays.

Lightly cover the trays and set aside for about 45-60 minutes or until the muffins are risen and puffy, but not quite doubled in size. Whilst the muffins are rising preheat the oven to 180ºC (160ºC).

Place a large frying pan (a cast iron skillet works best here) over low/medium heat and, once heated up, place as many muffins as you can fit into the pan. Cook for about 2 minutes per side or until golden brown. At this stage it’s worth noting that sesame muffins won’t get as even browning as classic muffins. Transfer the muffins to a parchment lined baking tray and transfer to the oven for 6-7 minutes, taking them out before they brown on the sides. Remove and set onto a wire rack to cool. Continue this process until all the muffins are baked. Dont be tempted to wait for multiple batches to be finished in the cast iron pan before transferring to the oven, it is better to get the muffins into the oven as soon as they are finished in the pan. 

To assemble the sandwich split open a muffin, toast lightly and spread one side with zhoug. Whisk the egg until uniform then add to a small non-stick pan, greased with a little butter, set over medium heat. Stir the egg very briefly as if making scrambled egg then leave alone. Add a little grated cheddar cheese to the centre of the egg and when it is still a little wet on top fold the edges of the egg over the cheese creating a little egg parcel, cook for a minute more before adding to the zhoug topped muffin. Top with the second half of the muffin and serve. 

2 Comments

Rye Chocolate Gingerbread Cake

Edd Kimber February 14, 2020

This post is sponsored by Doves Farm Organic Flour

I am so excited about this recipe; it combines some of my favourite things and is an incredibly easy recipe to make. Over the last couple of weeks I have loved showing you ways to use the brilliant range of ‘Ancient Grains’ that Doves Farm Organic Flour produce and today’s flour is one of my absolute all-time favourites - rye flour. The cake is a very spice forward gingerbread, perfect for the wet and windy weather we’ve been having the last couple weeks. The cake uses rye which pairs perfectly with both chocolate and ginger, it brings out deeper flavours from the chocolate and gives a boost to the ginger in the cake. The rye gives the gingerbread a slightly denser, more squidgy texture and when it comes to gingerbread I think that makes it sound even more inviting. The cake is made with a blend of rye flour, wheat flour and cocoa powder. Together the cake has a perfectly moist texture and of course a wonderfully rich flavour,. 

What Is Rye Flour

Rye is maybe one of the more recognisable ‘Ancient Grains’ even if you haven’t actually baked with it. At some point we’ve probably all had some form of rye bread, it’s popular across Eastern and Northern European bread baking, plus if you’ve ever eaten a Jewish deli sandwich there is a good chance it was served on rye bread. It has been a popular grain for a very long time. Whilst we often connect it with eastern European cultures, the grain actually originated in Turkey and its popularity in these regions can likely be traced to the fact it’s an incredibly hardy grain that can grow in tougher environments with poor soil quality and with wetter and cooler climates. Rye flour isn’t gluten free but it is comparably lower in gluten, so much so that I generally use it in a blend to get the best of both worlds. The flavour of rye is incredibly rich, a little malty, nutty and also surprisingly fruity. It has been a mainstay of many bakers for years but in the last few years it seems to be going through something of a revival. Personally I became enamoured with the grain maybe five years ago and it has earned a permanent place in my arsenal of favourite ingredients. You can see some more of my recipes using the grain here.

Rye Gingerbread 6.jpg

How To Bake With Rye Flour

Because rye breads are common it is easy to dismiss rye flour as just another bread flour, but really it’s an incredibly useful grain - adding amazing flavour to everything from cookies and cakes to pies and pastry. With breads it can be tricky if you’ve never used it before, especially when using rye in isolation. Breads made with 100% rye flour tend to be dense, closely textured and difficult to handle. The gluten present in the flour is not just minimal it’s also not very good at trapping air, which is why traditional rye breads, using mainly rye flour, tend to be dense and closely textured loaves. If you’re looking for that wonderful bakery style dense bread, rye is the obvious grain to use, but if you’re looking for lighter more open loaves but still want the wonderful flavour of rye you’ll want to try using a much smaller percentage.I find something around the low 20s works when combined with regular wheat flour. When baking with rye for the first time adding even just 5-10% will make a big difference to the flavour of your loaves without affecting the texture. With rye breads, especially those that use mainly rye, you’ll also find that when the loaves are baked they don’t have a huge amount of oven spring. The doughs also tend to be on the stickier side, generally needing less and more gentle mixing (this is true for yeasted doughs and for quick breads). When it comes to deciding what to bake the world really is your oyster, I add small percentages to everything from cookies to pie dough and it really packs a punch of flavour. It is worth noting that if you’re planning on making pastry with it I find it’s best making it fairly close to using. Rye ferments particularly quickly and if you leave the pastry in the fridge for more than a couple of days you may find it starts to develop a few unwanted flavours from its early stages of fermentation. This quick fermentation is also why a lot of people will often include a little of the flour in their sourdough starters, to give everything a bit of a boost. 

Doves Farm Organic Stoneground Wholemeal Rye Flour is available from Ocado, Sainsbury’s and Tesco as well as direct from Doves Farm themselves. Doves Farm also offer an Organic White Rye Flour.

Rye Chocolate Gingerbread
Serves 10

Gingerbread
165ml chocolate stout
165ml golden syrup
1 tbsp freshly grated root ginger
1/4 tsp baking soda
50g plain flour
80g Doves Farm Wholemeal Rye Flour
40g cocoa powder
1 tbsp ground ginger
1/2 tsp ground cinnamon
1/2 tsp ground cardamom 
1/4 tsp ground nutmeg
1 tsp baking powder
1/2 tsp salt
2 large eggs
125g light brown sugar
130ml vegetable oil

Glaze 
100g milk chocolate, roughly chopped
50g candied ginger

Preheat the oven to 180C (160C fan). To make the cake lightly grease a 1ln loaf pan and line with a strip of parchment so that the excess overhangs the two long sides of the pan. Secure the parchment in place with two metal clips. 

Place the stout, syrup and ginger into a medium sized saucepan and place over medium high heat and bring to a boil. Turn off the heat, add the baking soda and whisk to combine. Set aside to allow the bubbling to subside and the mixture to cool a little. 

Place the flours, cocoa, spices, baking powder and salt into a large bowl and whisk together to combine. In a separate bowl whisk together the eggs and sugar until the sugar has dissolved and the mixture has lightened a little. Pour in the oil and whisk until smooth and combined. Pour in the stout mixture and mix to combine. Make a well in the dry goods, pour in the egg mixture and mix together briefly just until smooth, be careful not to over mix this batter. 

Pour the mixture into the prepared loaf pan and bake in the preheated oven for about 60 minutes or until the cake springs back to a light touch and is just coming away from the sides of the pan. Allow the cake to cool in the pan for about 15-20 minutes before using the parchment paper to carefully lift from the tin to a cooling rack to cool completely. As with most gingerbread recipes this cake benefits from a couple days rest which helps mature the flavours a little and make for a stickier cake. 

To decorate melt the milk chocolate and pour over the cooled cake, allowing the excess to drip down the sides of the cake. Sprinkle the cake with a little candied ginger. 

Kept in a sealed container the cake will keep for about 4-5 days. 

5 Comments
  • Recipes
  • Older
  • Newer

Twitter

  • Was 8 original films, 3 spin off films, a two part play not enough. Can we have something new. https://t.co/cBZdGEGeyv
    Apr 4, 2023, 1:46 PM
  • RT @deliciousmag: Cacio e pepe, but make it buns! These seriously cheesy bread rolls from @TheBoyWhoBakes are inspired by his favouri… https://t.co/oDZlaDgnN2
    Apr 2, 2023, 11:08 AM
  • RT @TheDailyShow: Congrats to Donald Trump on finally winning a majority of votes! https://t.co/ezP55HZgl0
    Mar 31, 2023, 12:43 AM

Instagram

This weeks bonus recipe, for subscribers to my newsletter, is this gorgeous sour cherry and coconut gateau basque. The crust is a buttery cross between pastry and cake, think a cakey cookie. The filling is a layer of sour cherry topped with a rich coconut custard. A real fun one to make too! Link to my newsletter can be found in my bio - #gateaubasque #pastrycream #coconut #sourcherry
In this months @olivemagazine (out today) the team came and photographed my petit kitchen and we talked about how we put our stamp on the place, without spending a fortune. We hated the bland kitchen that we inherited but, as it was relatively new an
In this months @olivemagazine (out today) the team came and photographed my petit kitchen and we talked about how we put our stamp on the place, without spending a fortune. We hated the bland kitchen that we inherited but, as it was relatively new and in good condition, it felt a waste to rip it out and we also didn’t want to spend the money it would take to rip out the whole thing and replace it (it’s a howdens shell so we could have done something cheaper like @plykeakitchens @holte.studio @madebyhusk) so instead I painted all of the cabinets, using @makeitrustoleum kitchen cabinet paint, to give it some personality and lighten the whole thing. Check out the magazine for the full run down. - #kitchendesign #kitchenremodel #rustoleumcabinettransformations #rustoleumkitchencupboardpaint #kitcheninspiration #theboywhobakes #olivemagazine
Are you making scones all wrong? Maybe, maybe not? But I do want to show you how I make them! This recipe is based on the method I learnt at @belmondlemanoir 12 years ago when I did a stage, and it makes the absolute lightest scones. And shock horror, it involves kneading the dough, albeit very lightly. You can get the full recipe in this weeks newsletter (free) linked in my bio. - #scones #bakingday #worldbakingday #afternoontea #hightea #englishscones #clottedcream #creamtea #theboywhobakes
facebook
  • Contact

The Boy Who Bakes

Edd Kimber

facebook