The Boy Who Bakes

Edd Kimber
  • Home
  • Recipes
  • My Books
  • Blog
  • Recipe Index
  • About
  • Home
  • Recipes
  • My Books
  • Blog
  • Recipe Index
  • About

Recipes

  • All
  • baking
  • Biscuits and Cookies
  • Breads and Quickbreads
  • Bundts
  • Cakes
  • Chocolate
  • Dessert
  • drinks
  • Holidays
  • Pastry
  • Scones and Quickbreads

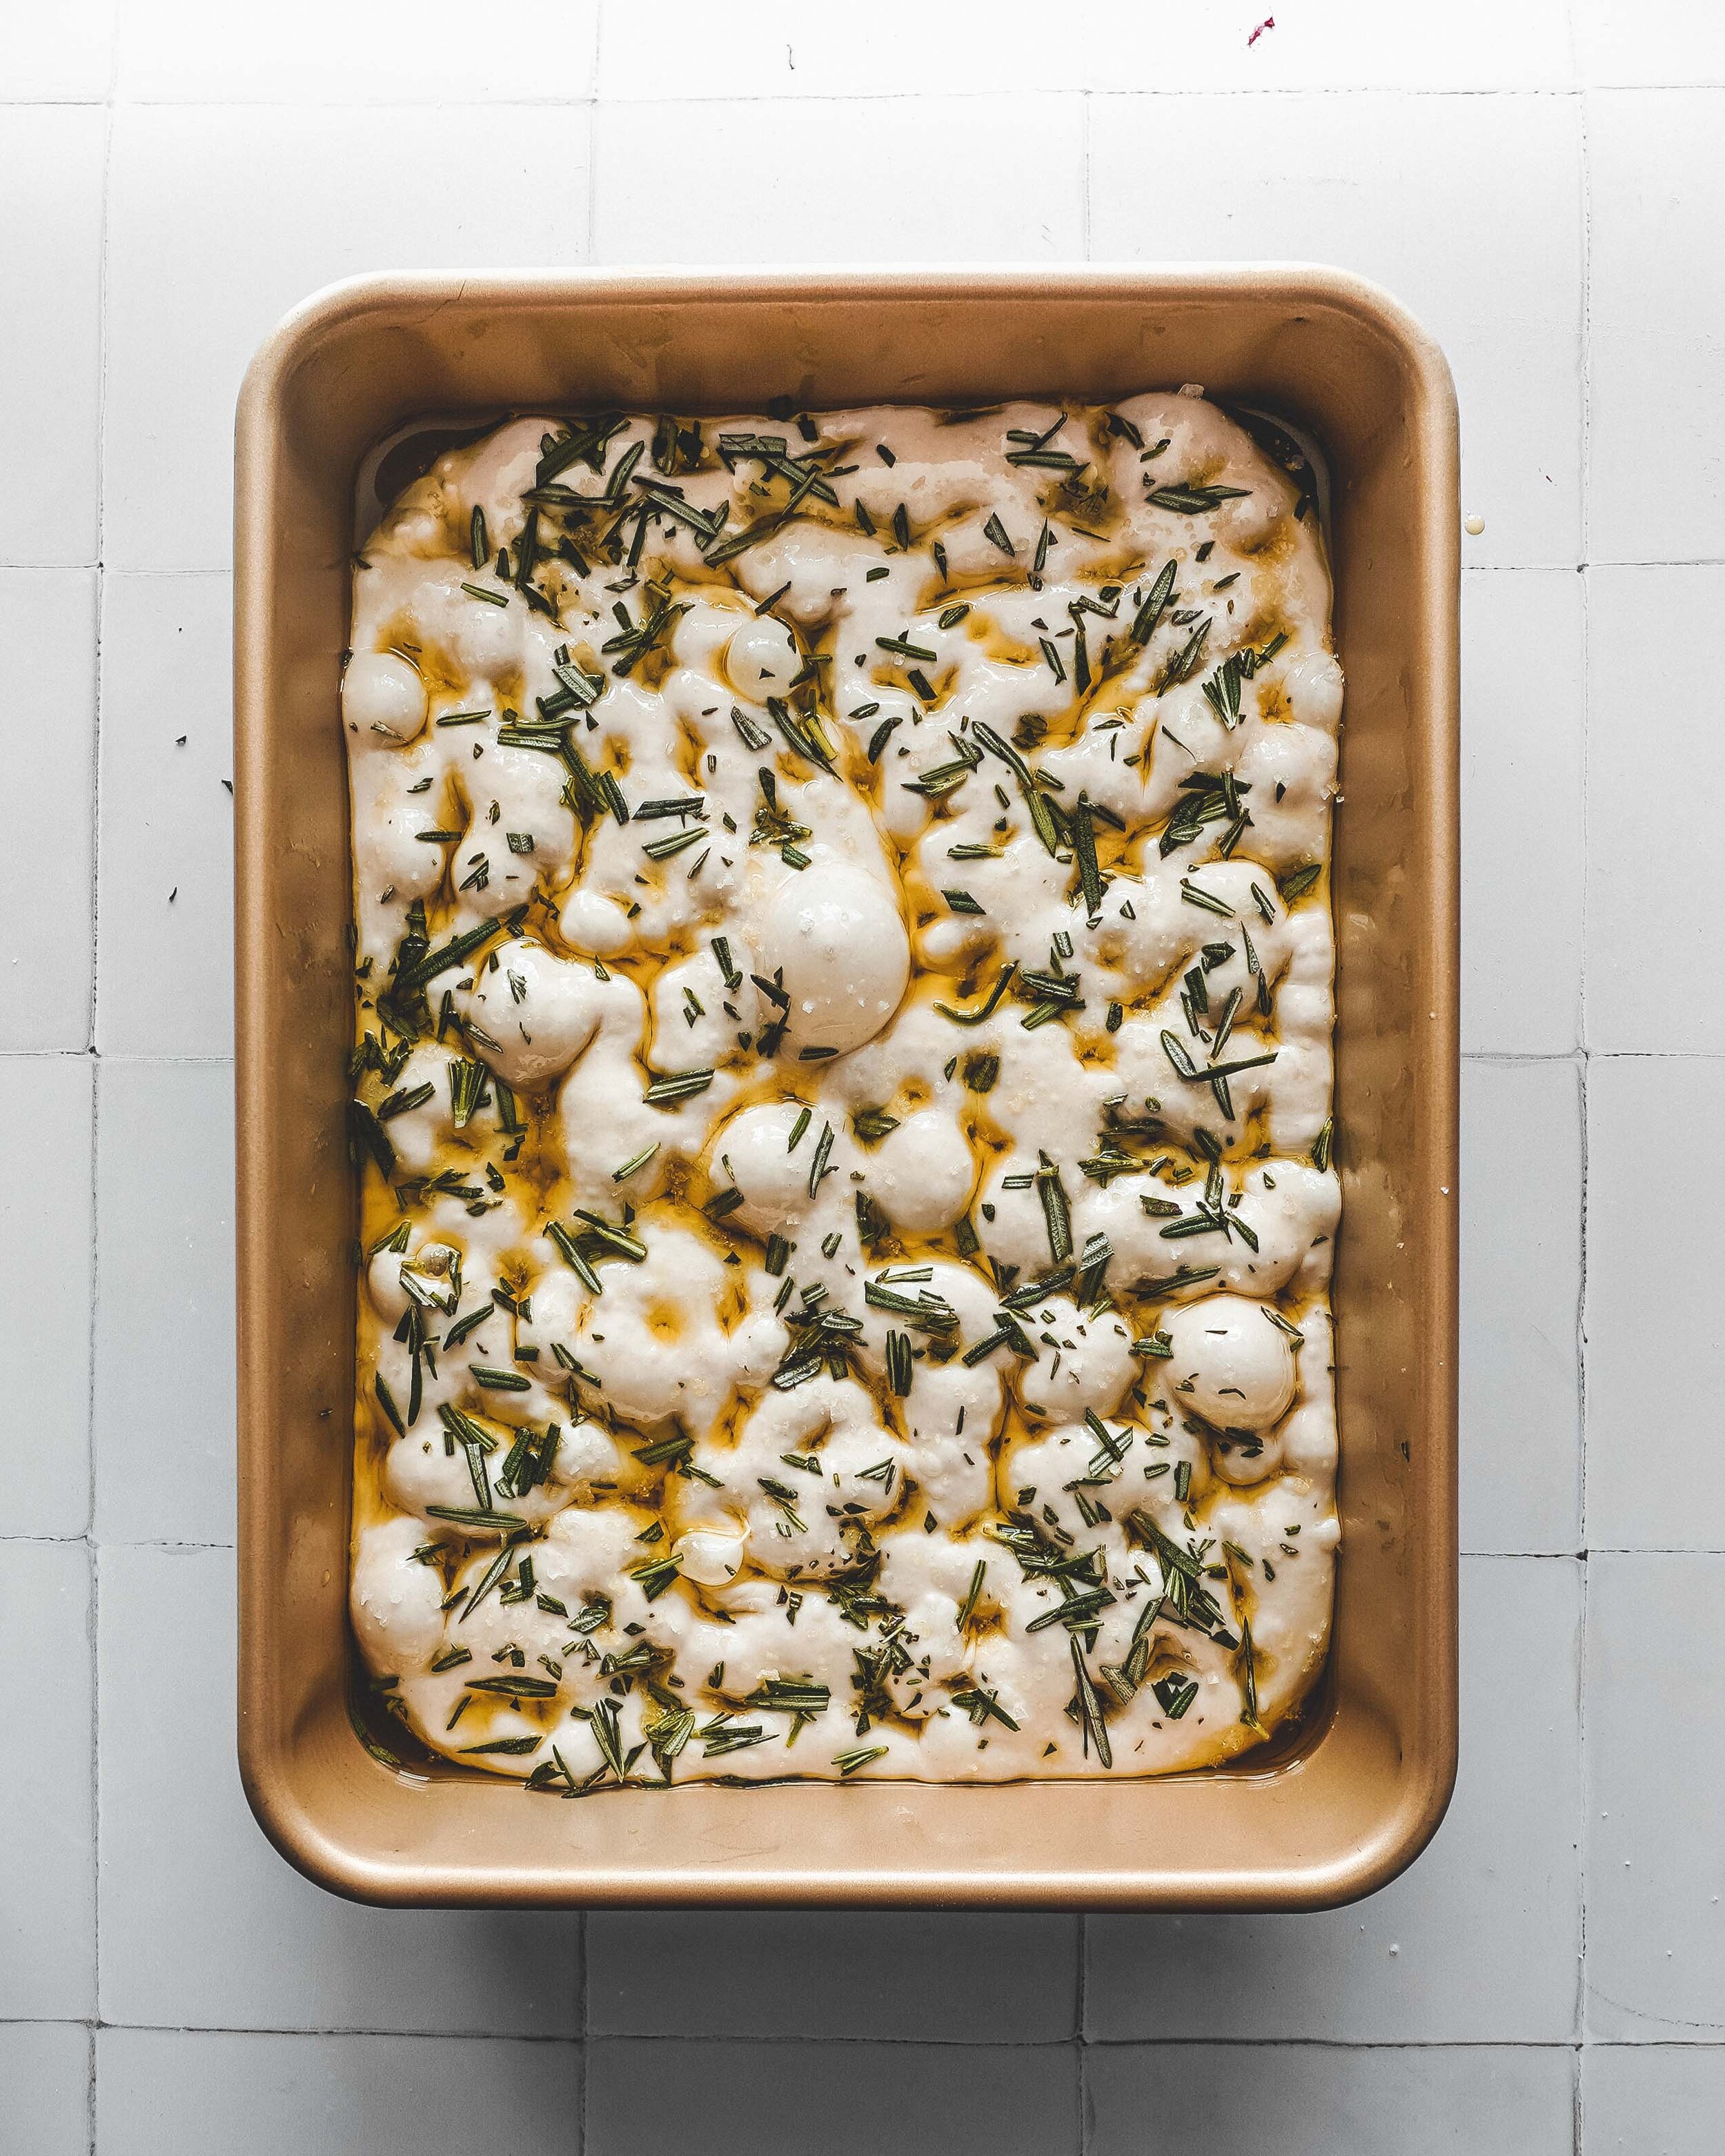
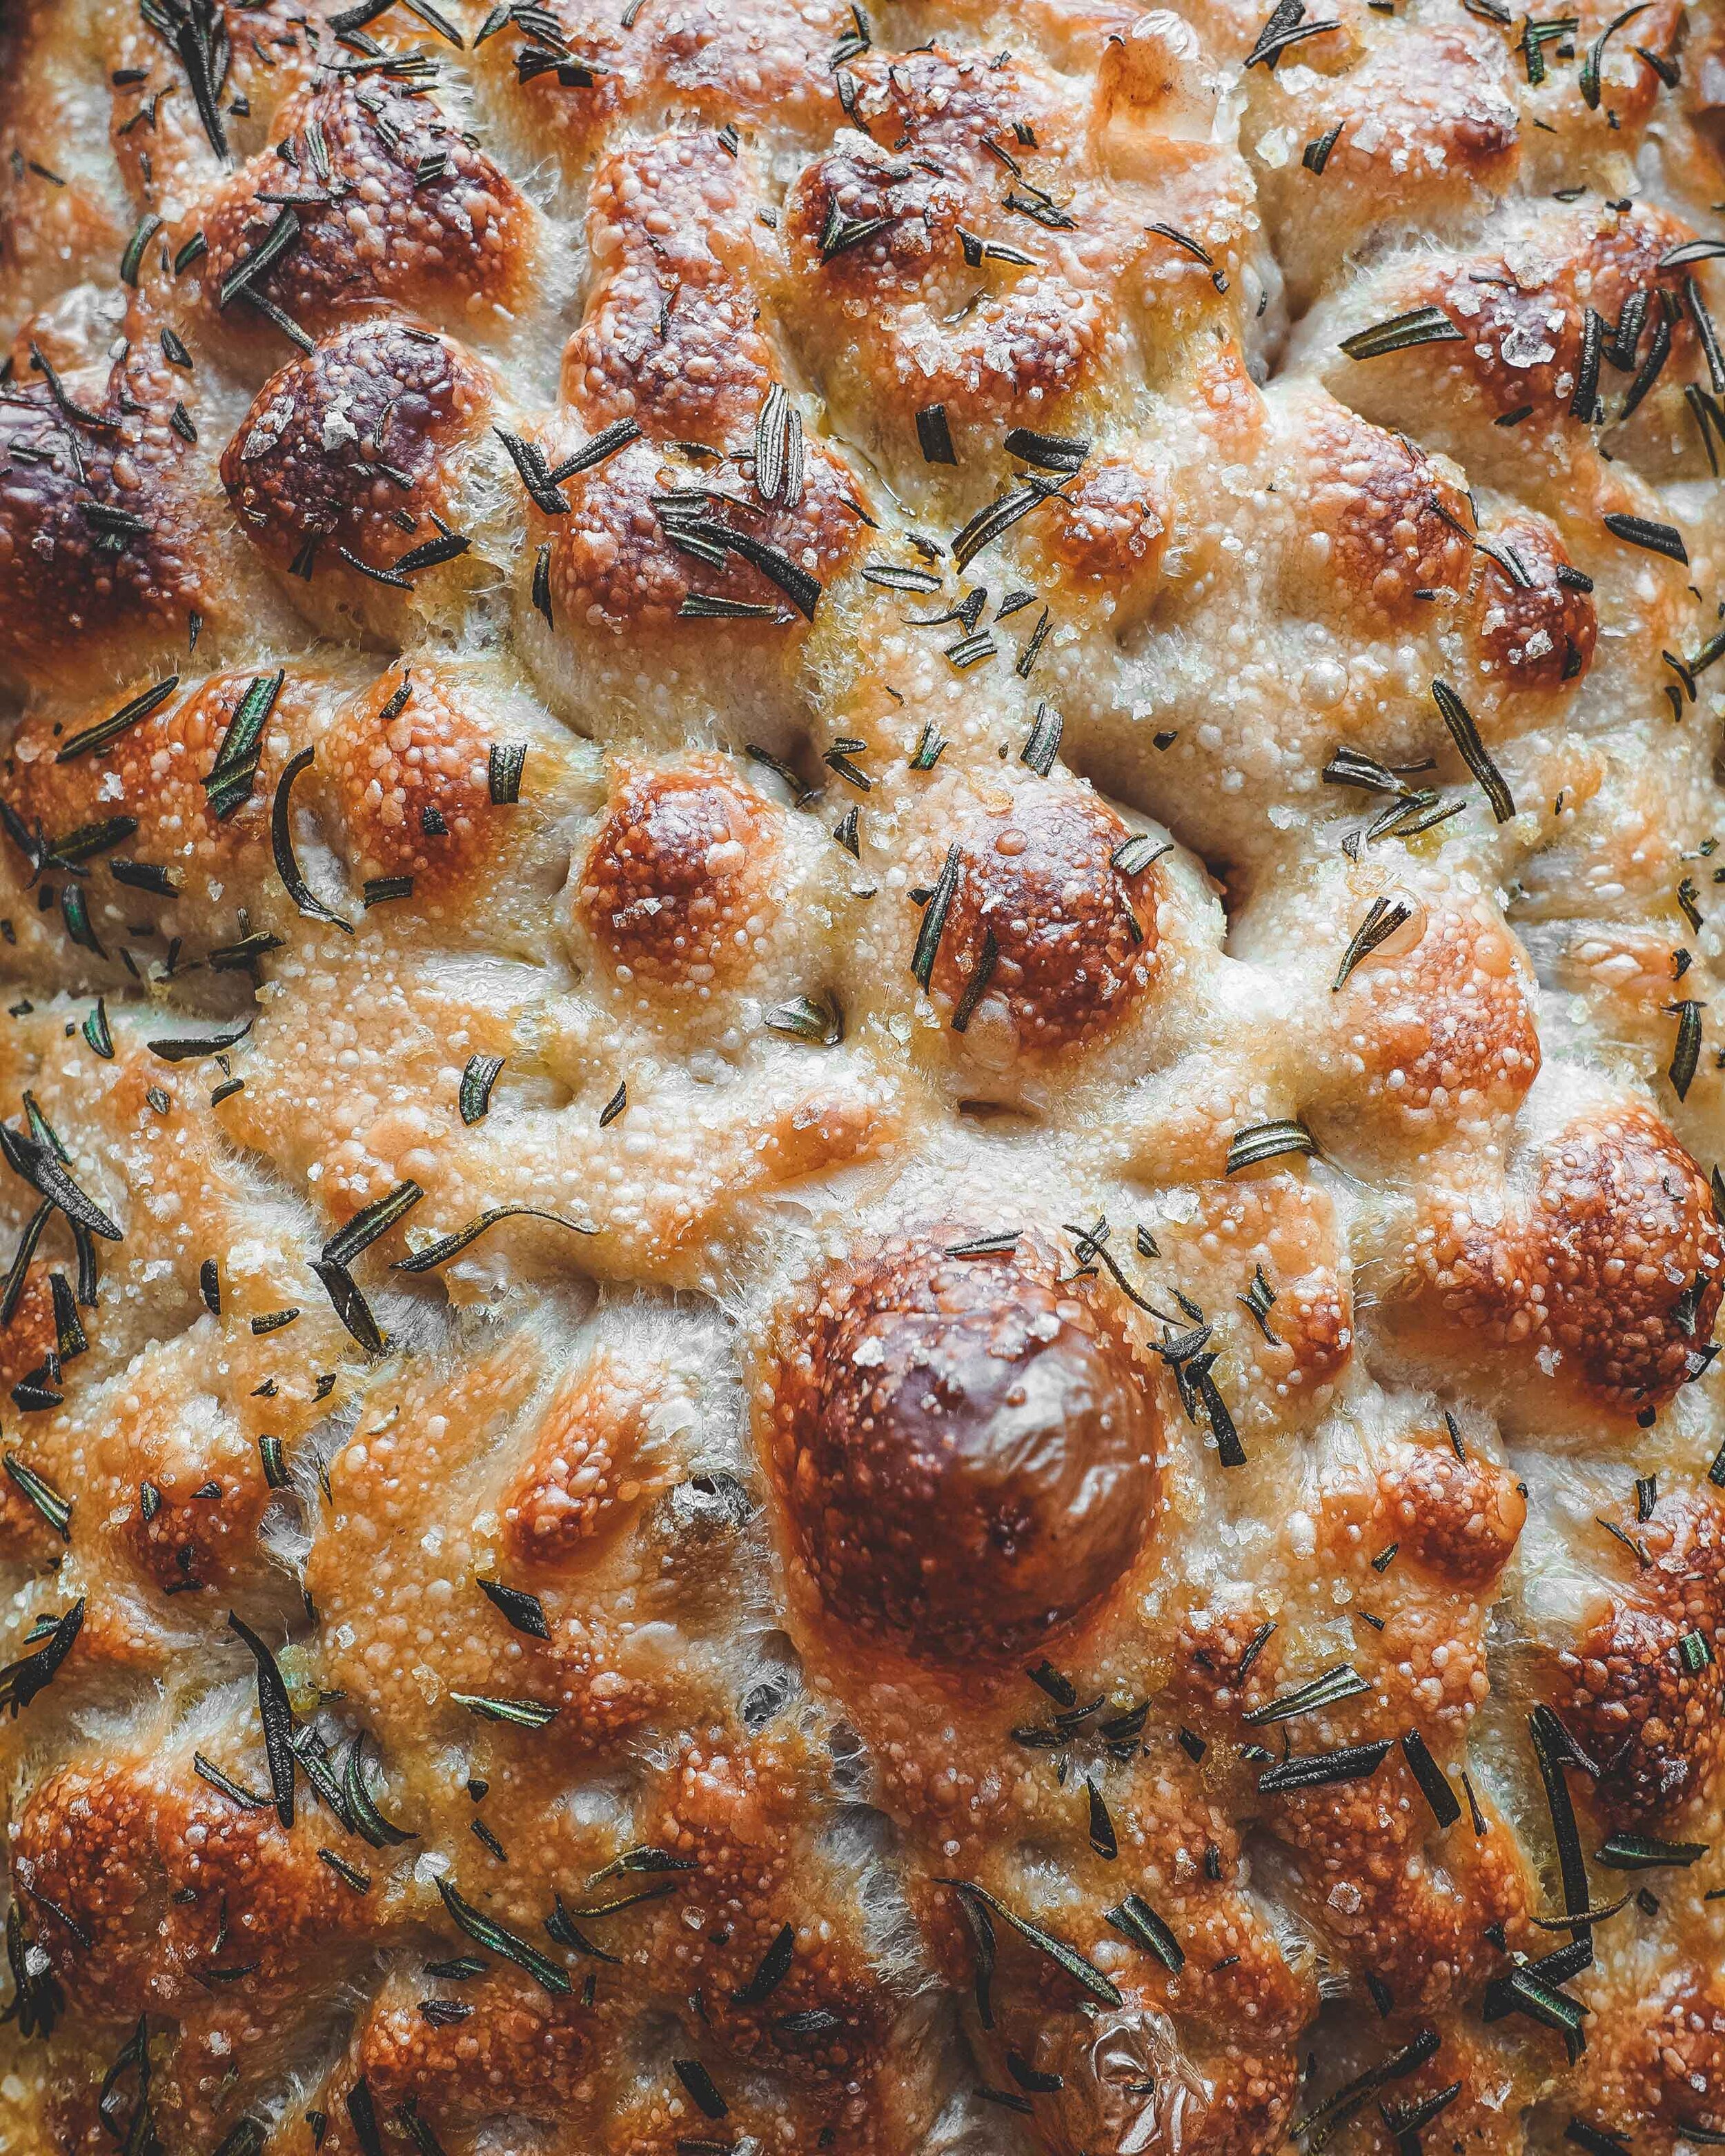
Sourdough Focaccia

Edd Kimber July 19, 2021

I have something shameful to admit. I abandoned my sourdough starter in the back of the fridge for months, forgotten and neglected. After languishing in the fridge for so long I wondered if it could have possibly survived or if could be revived. I am a firm believer that once your starter is properly established it becomes pretty hardy and almost indestructible. Pulling it from the fridge there was a thick dark layer of hooch and underneath was a very thick floury paste, it did not look healthy and it didn’t smell healthy either. I poured off the hooch and discarded all but a tablespoon of the starter that remained. From their I fed the starter as you would normally with a 50/50 mix of flour and water, leaving a day between feeds, and after three days of feeding the starter was back with a bang, it was tripling with each feed. I have made a bunch of focaccia since then and it feels safe to say that this proves even the most neglected starter can be brought back from the brink of death.

The reason I made focaccia instead of traditional country style loaf was a little laziness and a little wanting something different. Most sourdough I make is made with a no knead method, utilising stretch and folds instead of kneading but with focaccia its even easier as there isn’t really any shaping, it really is the easiest sourdough bread. 

A word advice on the pan you use for this bread, make sure it is either very good quality non stick or make sure you line it with parchment, there is nothing worse than your hard work becoming lodged in the pan.

Sourdough Focaccia
500g strong white bread flour
425ml water (25-27ºC)
150g sourdough starter (100% hydration and its peak)
10g salt
Olive oil, lots of it

Toppings
Flaked sea salt
2-3 sprigs fresh rosemary, roughly chopped

To make the focaccia dough pour the water, reserving 25ml for later, into a large bowl and scrape in the starter, mixing briefly to dissolve it into the water. Pour in the flour and use your hands to form a shaggy dough. At this stage you are not looking to knead the dough, simply ensuring all the flour is hydrated. To do this I start by stirring with my hand and when it starts to form a more uniform mass I squeeze the dough between my fingers, doing so until it feels like there is no dry spots. Cover the bowl and set aside for about 30 minutes. At this stage, and until the dough goes into the fridge, I like to keep the dough somewhere warm which helps with the fermentation of the dough.

Sprinkle the salt on top of the dough and pour over the last 25ml water. Dimple the dough, squeeze it through your fingers, fold it over on itself, generally working the dough until the water and salt have been combined. During this process the dough can look separated but just keep working it until it comes back into a uniform mass. Cover and rest again for 30 minutes. 

After 30 minutes we now do our first set of stretch and folds, which is our alternative to kneading and builds strength into the dough. Using a wet hand go under the dough pull a portion and then stretch it up and over the dough, repeating this four times around the bowl. Cover and rest for 30 minutes, repeating this process 3 more times. At this stage I then leave the dough for about 1-2 hours until the dough has risen around 40-50% and the dough is showing signs of fermentation. The dough should have a jiggle and have lots of bubbles on the surface of the dough. Grease a non-stick 9x13 pan (or a traditional 9x13 pan lined with parchment paper) with 3 tablespoons of extra virgin olive oil. Carefully transfer the dough to the tin and top with a little oil to prevent it drying out. Cover the pan and refrigerate for 18-24 hours. 

To bake the focaccia the dough needs brining back to room temperature so remove the tin from the fridge and let it rest for 1-3 hours or until the dough has a jiggle to it. When almost ready preheat the oven to 240ºC (220ºC Fan)

Drizzle the focaccia generously with extra virgin olive oil and then using oiled fingers, dimple the dough all over. Sprinkle generously with flaked sea salt and chopped rosemary, if using. Bake in the preheated oven for 15 minutes then reduce the temperature to 210ºC (190ºC Fan) and bake for a further 15 minutes or until the focaccia is golden brown. 

Remove from the oven and carefully transfer the bread from the tin to a wire rack to cool. 

Focaccia is best on the day made but is also great for a few days after baking. As with most breads focaccia also freezes brilliantly 

In Breads and Quickbreads Tags sourdough, focaccia, no knead, rosemary, bread
17 Comments
mango-1-2.jpg

Mango and Cardamom Ice Cream

Edd Kimber June 24, 2021

Have you ever wondered if buying and cooking with whats in season is really all us food writers make it out to be, is the quality really that much better? All I will say is Mangoes. Buy a mango at the wrong time of the year and you might get okay flavour but without a doubt the texture will be unbelievably hit or miss, coarse or rough, fibrous or crunch. We can all agree that a bad mango is a terribly sad thing. But buy a mango in season is a truly special thing, sweet and fragrant and beautifully soft. 

When I first looked at my house I was intrigued by the mango shop I spotted on the way to viewing, it wasn’t open but I was excited for the idea. When mangoes were in season and the shop finally opened I started buying box after box of incredible Indian and Pakistani mangoes, Alphonso and Kesar being my two favourite varieties, and it was all I could do not to eat the whole box right there and then. Instead, I have been making desserts, ice creams, purees and all manner of applications to try and prolong the mango season. 

This recipe is a glorious homage to mango and a beautiful summer recipe. The ice cream base is fairly classic, rich with dairy and egg yolks, with just one addition, the perfumed fragrance of cardamom which pairs so naturally with mango. When you make any fruit swirl ice cream you have one problem, water. Too much water in the ripple and you end up with a hard icy swirl that wont scoop like the ice cream. To prevent this you can cook the fruit puree with sugar to reduce the water level and make a syrup with a strong enough concentration of sugar that it will stay scoopable after freezing. With mango I vary this method a little as adding too much doesn’t do, the already sweet, fruit any flavours. Instead of traditional white sugar (sucrose) I use liquid glucose which tastes less sweet and as an invert sugar also helps keep the puree soft without becoming too sweet. 

Ripening Kesar Mangoes By Wrapping Them In Newspaper

Ripening Kesar Mangoes By Wrapping Them In Newspaper

Mango and Cardamom Ice Cream

Cardamom Ice Cream
250ml double cream
500ml whole milk
125g caster sugar
50g skimmed milk powder
5 large egg yolks
2 tsp vanilla bean paste
2 tsp ground cardamom 

Mango Swirl
300g diced mango
3 tbsp liquid glucose
Juice of 1 lime

To make the ice cream add the milk, cream, half the sugar the cardamom and vanilla to a large saucepan. Place the pan over medium heat and bring to a simmer. Turn off the heat and pop the lid on the pan, setting aside for an hour so the vanilla and cardamom can do their thing and infuse the dairy.

Once the hour is up place pan back on the heat and bring back to a simmer. Meanwhile place the egg yolks, the remaining sugar and milk powder into a large bowl and whisk together until the yolks are pale. Whilst continuing to whisk slowly pour in the milk mixture. This whisking helps prevent the eggs from scrambling and the slow pour helps gently increase the temperature of the eggs. Pour the custard back into the pan and over low heat, cook stirring constantly with a heatproof spatula, scraping the bottom of the pan, until the custard reaches 75-80C. Pour the custard into a bowl, through a fine mesh strainer to remove any lumps, and place the bowl into a large bowl filled with ice. Stir the custard for a few minutes until cooled to room temperature then press a sheet of clingfilm onto the surface of the custard, to prevent a skin for forming, and chill for at least four hours but preferably over night. This chilling does two things, it allows the flavours to enhance further plus cooling the custard down means when churning the ice cream is formed quicker which improves the texture.

For the mango swirl puree the mango in a blender and pour into a jug, passing through a fine mesh sieve. Add the liquid glucose and stir together, measuring how much puree you start out with. Pour into a small saucepan and over medium heat bring to a simmer and cook, stirring constantly until the volume has reduced by about 1/4. Add the lime juice and then refrigerate until needed. 

When the custard is thoroughly chilled churn using an ice cream machine, referring to the manufacturers instructions. Scrape some of the finished ice cream into a sealable container, drizzle over some of the puree and repeat until all of the ice cream and mango swirl have been used. Freeze for at least 4 hours or until firm. Homemade ice cream is best within a couple weeks.

Tip: If you always find your homemade ice cream a little too hard you can also add 2 tbsp vodka to the custard before churning which will help it stay scoopable

In Dessert Tags mango, ice cream, cardamom, ripple, kesar, alphonso, lime
1 Comment
black cocoa pb cookies-1.jpg

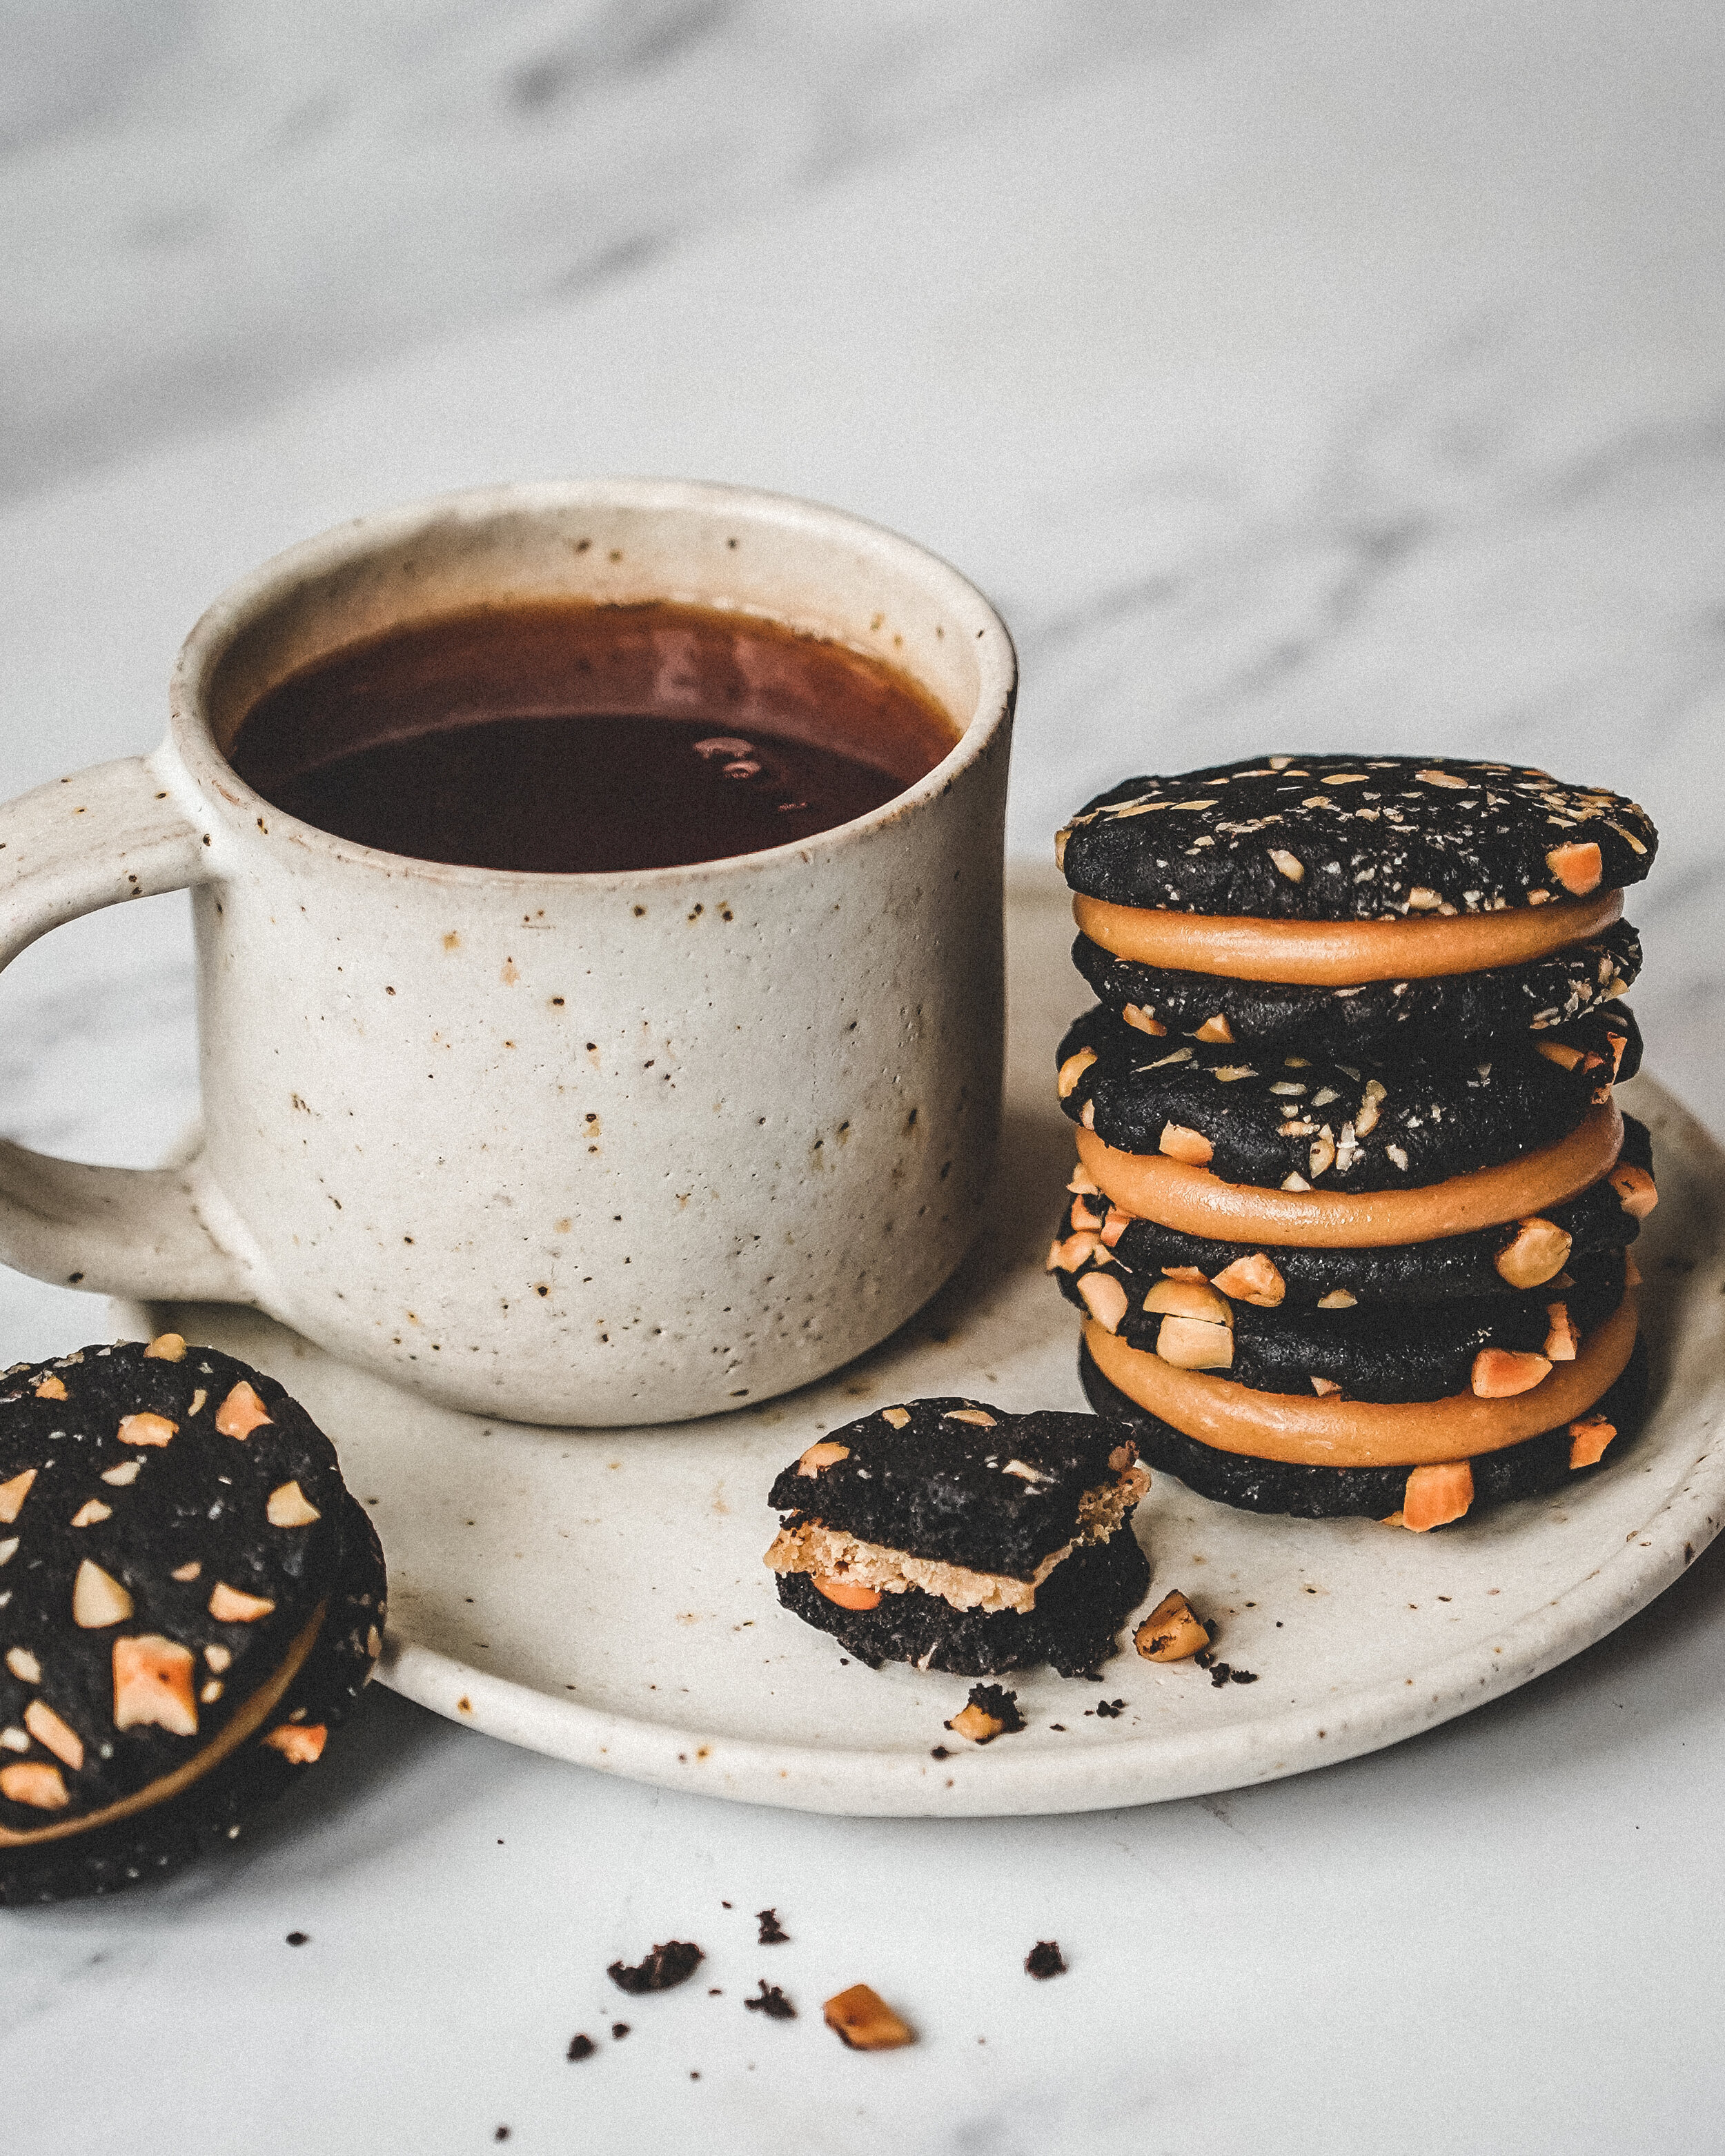
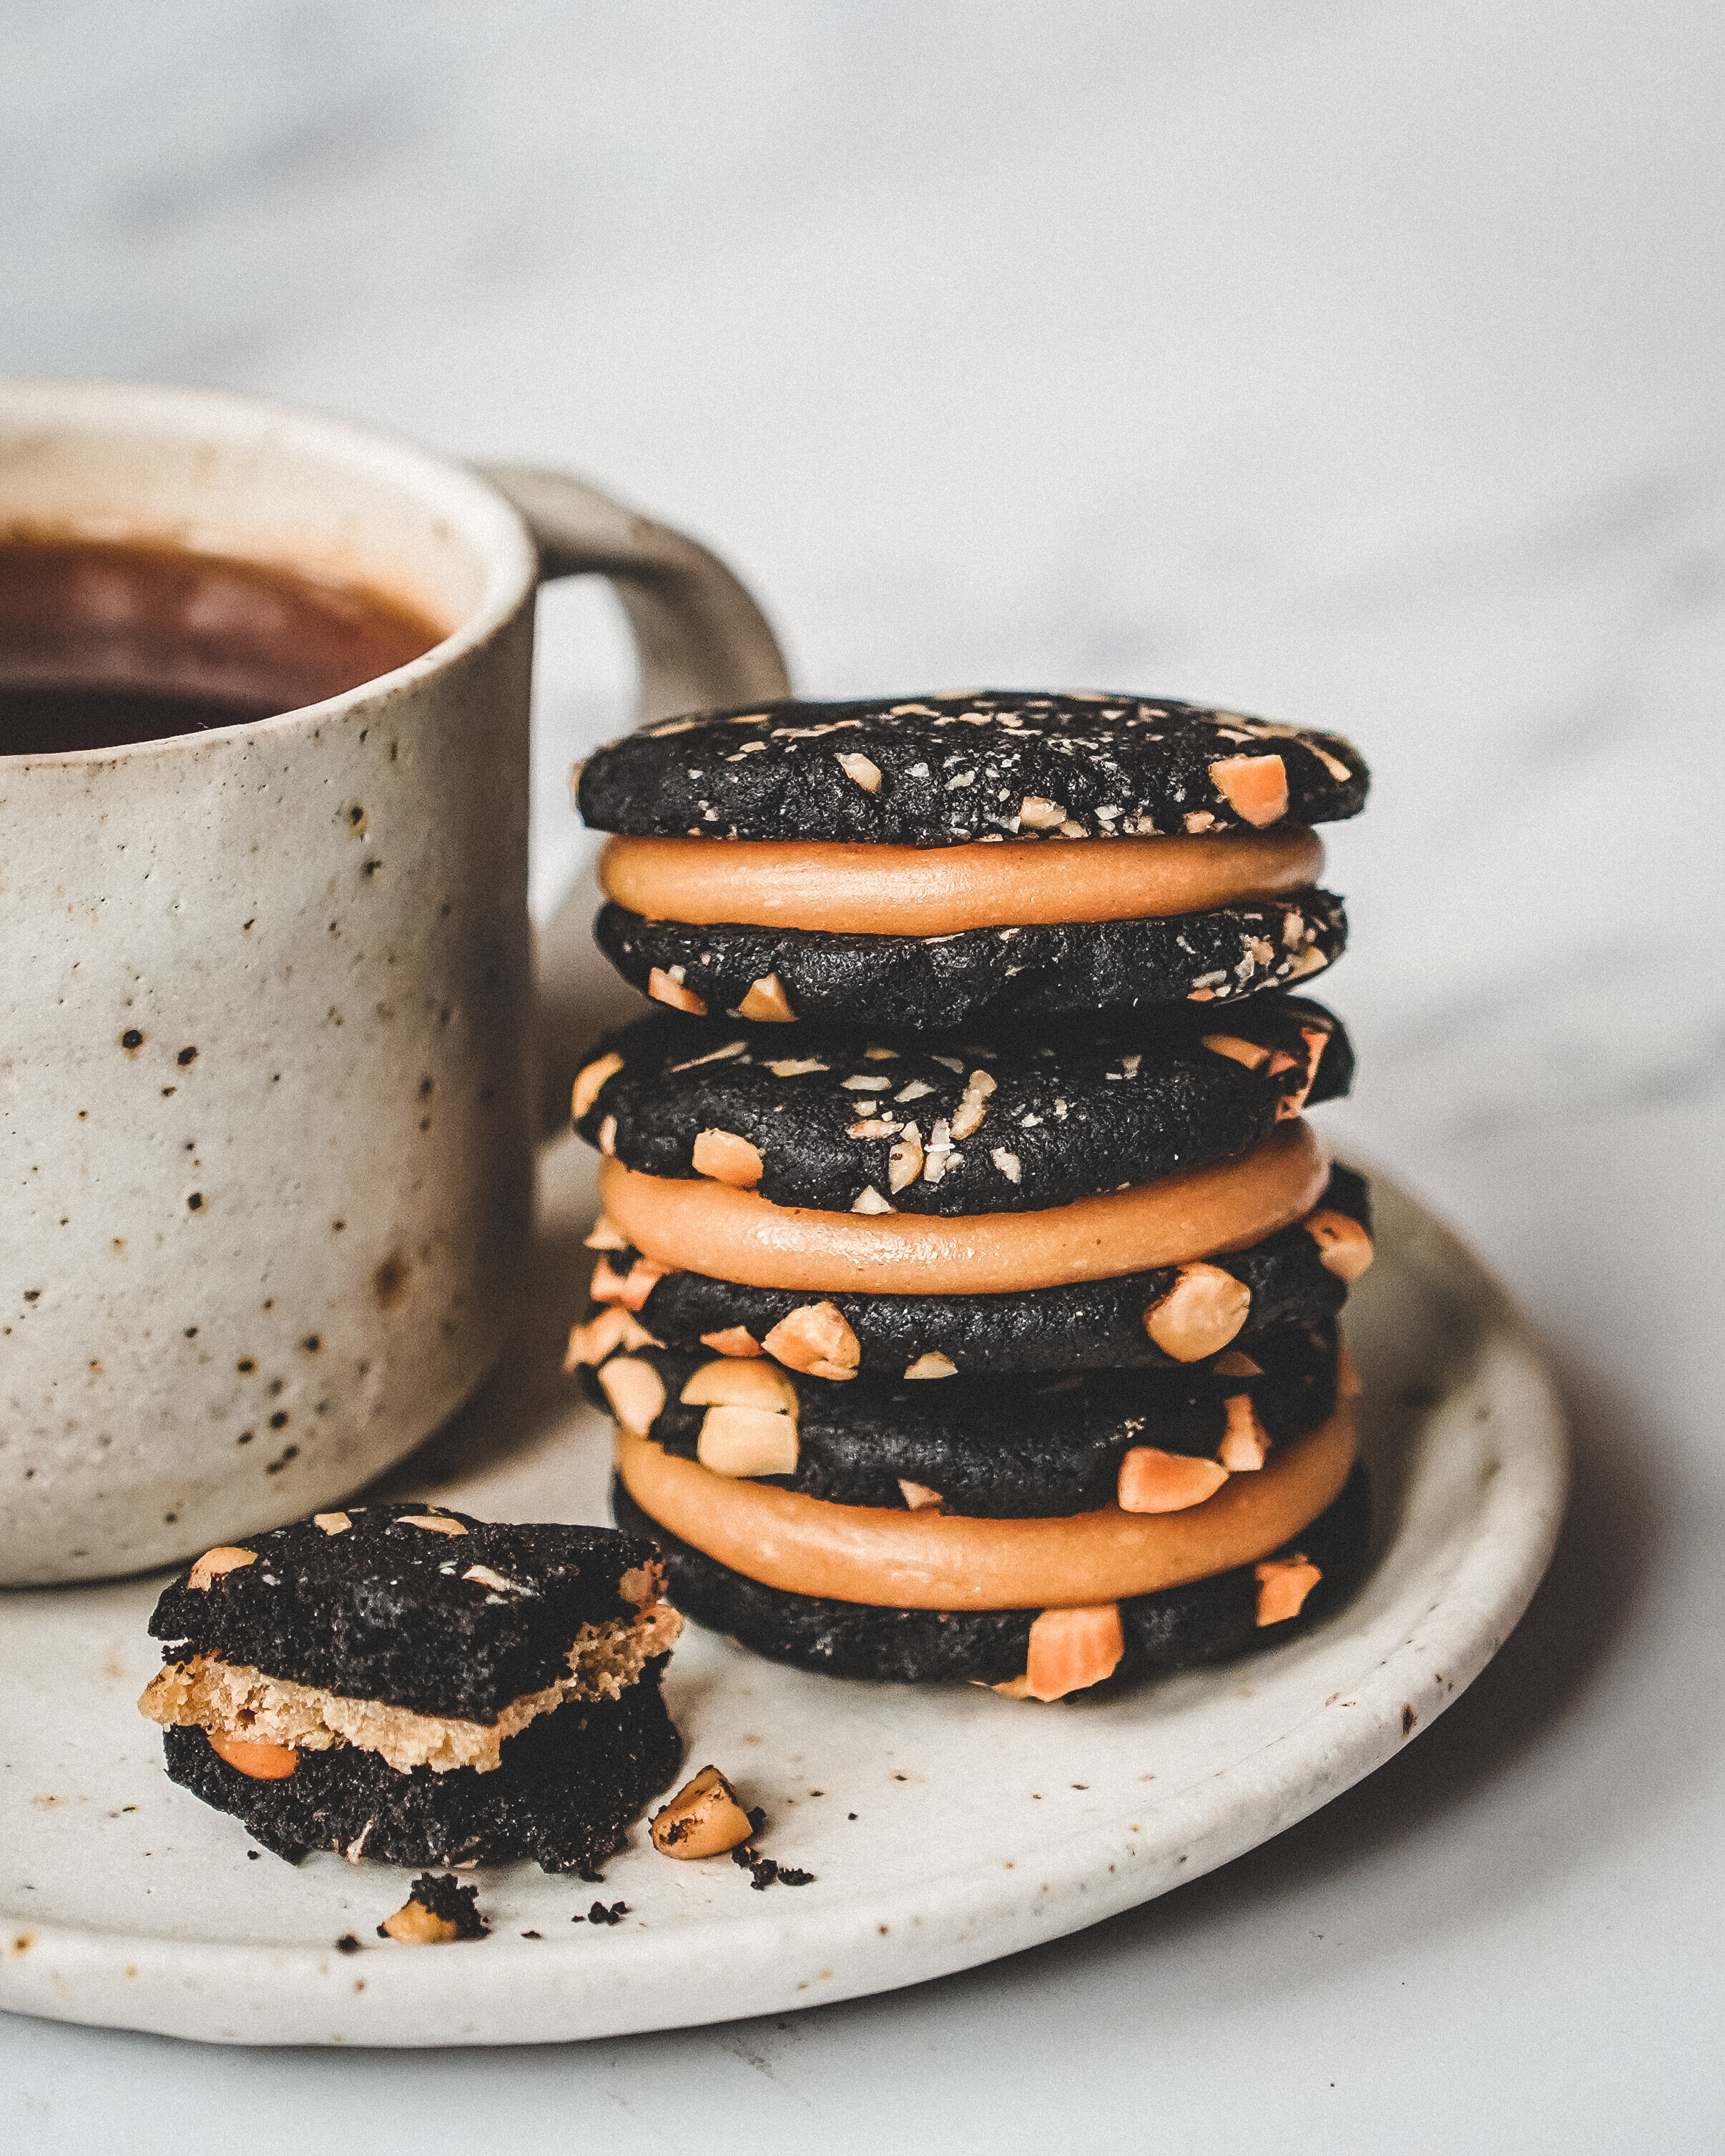
Black Cocoa Peanut Sandwich Cookies

Edd Kimber May 24, 2021

These cookies are so ridiculously simple and so delicious. The cookie element is based around my melting moment recipe, a melt in the mouth, incredibly tender cookie. I use black cocoa but you can also use a regular dutched cocoa powder if thats what you have on hand. The balls of cookie dough are rolled in salted peanuts and pressed into flat discs and then baked. The filling is a simple white chocolate ganache mixed with peanut butter. Its the sort of cookie you want mid morning with a strong cup of coffee. 

Before we get to the recipe lets talk about cocoa powder for a second. Cocoa powder comes from the cocoa pods and specifically the beans inside those pods, so far so obvious. The beans are fermented and then dried. Generally they are then roasted (unless the product is destined to be used for ‘raw’ chocolate or cocoa powder but I wont be talking about that process here). The beans are then cracked open and the nibs are ground into what is called cocoa liquor and then, using a hydraulic press, the liquor is pressed under great pressure to extract most of the cocoa butter leaving behind a product known as a cocoa cake. This cake is dried once again and then ground into cocoa powder. 

Why then is there such a variety in cocoa powders, what is the difference between natural, dutched and black? Natural is the cocoa powder made as above with no additional processing, it is a light almost dusty brown colour and is bright and acidic in flavour. Dutched cocoa goes through an alkalisation process which lessens the acidity and makes a deeper richer tasting cocoa powder with a darker colour. In the UK and Europe this is traditionally the main type of cocoa powder available although natural and raw cocoa have become more popular over the last few years. Black cocoa, with its characteristic charcoal black colour, is a variation of dutched cocoa powder, the process of alkalisation taken to its limit to make an intensely dark and slightly bitter cocoa powder, if you’ve ever eaten an oreo you’ve had black cocoa. I like black cocoa for its colour and its flavour but its not suitable for everything, the flavour isn’t a pronounced chocolate flavour its much more roasted than that so if you want classic chocolate flavours I would a traditional dutched powder.

Whenever I use black cocoa I am always asked where to buy it as in the UK it is a relatively unknown product, at least until recently. I would always bring some home from the US when there on holiday or for work, King Arthur Baking sell my go-to version. Someone imports that brand into the UK but it is criminally expensive so I am thankful that a few new brands have sprung up to make it easier, and cheaper, to buy. Van Houten was the first brand more widely available, selling on Amazon, but I am yet to test this brand out. When I buy the cocoa myself I get it from De Zaan, a commercial cocoa powder producer that have recently started selling in a more direct to customer facing way. You can find there cocoa powder on Amazon and on from HB ingredients. 

Before we get to the recipe a brief note on peanut butter. When baking with peanut butter you need to be careful about what style you use. Generally you want to be using a commercial peanut butter and this is for the simple reason that it is less likely to split creating odd textures in the finished recipes. By all means you can use a natural peanut butter but be aware the result might not look like you envisioned or like the images of the recipe. 

Black Cocoa Peanut Melting Moments with Peanut Butter Ganache
Makes 15 Sandwich Cookies

Cocoa Melting Moments
250g unsalted butter, room temperature
1/2 tsp vanilla extract
200g plain flour
60g black cocoa powder
85g icing sugar
30g cornflour
175g salted peanuts, roughly chopped

Peanut Butter Ganache
100ml double cream
125g white chocolate
75g smooth peanut butter 

Preheat the oven to 160ºC (140ºC Fan) and line a couple baking sheets with parchment paper.

For the cookies place the butter into a large bowl and use an electric mixer to beat until soft and creamy. Add the vanilla and beat briefly to combine. In a separate bowl whisk together the flour, cocoa, icing sugar and cornflour. Add the flour mixture to thee butter mixture and mix on slow speed just until a dough is formed. 

Divide the dough into 20g portions and roll them into balls. Roll the balls in the chopped peanuts, your not looking to fully coat the balls just get a decent amount of peanuts on each cookie. Place the balls onto parchment lined baking trays leaving a little space between each cookie. Using a glass or measuring cup press each ball into a flat disc. Spraying the glass with a little oil can help prevent them sticking. 

black cocoa pb cookies-1-2.jpg

Bake the cookies in the preheated oven for about 20-25 minutes or until the edges are set and dry.

Remove the trays from the oven and allow the cookies to cool fully. 

To make the ganache place the chocolate and cream into a small saucepan and place over low heat. Stir constantly, making sure to scrape the bottom of the pan to prevent anything from scorching, until the chocolate has melted. Pour the ganache into a small bowl and stir to make sure everything is combined. Set aside for 10 minutes before adding the peanut butter and using a small whisk to combine into the ganache. The ganache needs to be a little cool before adding the peanut butter as the heat can make the mixture split. Refrigerate the ganache until thickened enough to hold its shape but still spreadable, 60-90 minutes. Pipe or spread a small amount of ganache onto half of the cookies and sandwich together with a second cookie. Refrigerate for 30 minutes or until the ganache has fully set. 

Kept in a sealed container these will keep for 3-4 days.

In Biscuits and Cookies, Chocolate Tags black cocoa, melting moments, sandwich cookies, ganache, white chocolate, peanut butter, peanuts, easy, easy baking
4 Comments
Nordicware 75th-14.jpg

How To Prevent A Bundt Cake From Sticking

Edd Kimber May 2, 2021

This post is sponsored by Nordicware UK

Bundt cakes are very special cakes, easy to make and great for any occasion, but whenever I post a recipe for a new Bundt I get the same question. How do I stop my cake from sticking? Thankfully it’s not difficult at all, you just need to follow a couple simple easy guidelines.

Bundt pans are very detailed, and the sometimes intricate designs means there can sometimes be more potential for sticking, especially if the pan is not properly prepared. Obviously you can’t line the base of the pan with parchment paper so what do we do instead. Well you have three options, each with their own pros and cons.

Butter and Flour

Greasing the pan with softened butter and dusting with flour is the most traditional way of preparing this sort of pan. The butter should not be melted as the pans already have a coating to help the cake release and if a liquid fat like melted butter or oil is used it will bead and not actually coat the pan evenly, so use soft butter. Brush the tin with a thin layer of butter, making sure every nook and cranny is coated, especially the central core as this seems to be the most overlooked part of the pan. Once coated, dust the entire tin with a thin layer of flour (or cocoa powder for chocolate cakes). Turn the pan over and tap on the work surface allowing any excess flour to fall out, you want this layer to be as thin as possible. 

Pro: ingredients always on hand and cheap, no special ingredients or equipment needed

Cons: Can leave a floury coating on your cakes and isn’t always a fail safe method of preventing sticking

Spray Oils

For many years using a cake release spray was my go to way of preparing my Bundt pans, an aerosol coats the pan evenly in fat and cakes always released very easily. Nordicware’s own advice is to be careful about the choice of spray oil as some are not designed for cakes and can actually damage the lining of the pans over time. Look for oils that are designed for cakes and not for cooking. General advice with a spray is to hold the pan over the sink, the oils can be hard to direct and can leave a layer of oil on your countertops or floor, and hold the can about 15-20cm away from the tin to ensure an even coating. With these sprays you don’t generally need to add flour as they formulated to work without it, although some brands actually include flour in their formula. 

Pros: quick, easy and reliable

Cons: comparatively expensive and you have to buy an additional product, can also be messy

Cake Goop

This is by far my favourite method, since switching a few years ago I have never had a cake stick, and in fact I now use this for all of my baking, not just bundt cakes. It is basically a homemade version of cake release spray that is much cheaper to make than to buy and it is less fussy to use and wont coat everything in a thin layer of oil. To make you simply beat together an equal amount, by volume, of vegetable oil, shortening (this is Trex in the UK) and plain flour. To do this I use an American cup measure but you can use any container you want to measure out the ingredients, you simply want an equal volume of each. Scrape your cake goop into a sealable container and store in the fridge, it will keep for months and months. To use you simply brush the pan you are using with an even coating of the cake goop.

Pro: easy and cheap to make, plus it is the most failsafe method I have used to date

Con: you have to make it yourself and you may need to buy shortening if you don’t use regularly use it

Nordicware 75th-2.jpg

So now you know how to prepare the tin that is it right? Nope, the second step is the most ignored step but maybe the most important. When you take a cake out of the oven the cake continues to bake for a few minutes and if turned out immediately the cake is likely to break into pieces because it hasn’t fully set and is delicate. This is why I always advise to allow the cake to cool for exactly 10 minutes before turning out onto a wire rack to cool completely. If you leave the cake too much longer you will encounter the sticking issue. As the cake cools the crust will start to become sticking and it will glue itself to the pan, turning out after 10 minutes is the sweet spot where the cake will slide right out of the pan without issue. 

Following these simple steps should ensure you never have another Bundt cake stick

Tags bundt, bundt pan sticking, bundt pan preperation, bundt pan tips
6 Comments
  • Recipes
  • Older
  • Newer

Twitter

  • Was 8 original films, 3 spin off films, a two part play not enough. Can we have something new. https://t.co/cBZdGEGeyv
    Apr 4, 2023, 1:46 PM
  • RT @deliciousmag: Cacio e pepe, but make it buns! These seriously cheesy bread rolls from @TheBoyWhoBakes are inspired by his favouri… https://t.co/oDZlaDgnN2
    Apr 2, 2023, 11:08 AM
  • RT @TheDailyShow: Congrats to Donald Trump on finally winning a majority of votes! https://t.co/ezP55HZgl0
    Mar 31, 2023, 12:43 AM

Instagram

This weeks bonus recipe, for subscribers to my newsletter, is this gorgeous sour cherry and coconut gateau basque. The crust is a buttery cross between pastry and cake, think a cakey cookie. The filling is a layer of sour cherry topped with a rich coconut custard. A real fun one to make too! Link to my newsletter can be found in my bio - #gateaubasque #pastrycream #coconut #sourcherry
In this months @olivemagazine (out today) the team came and photographed my petit kitchen and we talked about how we put our stamp on the place, without spending a fortune. We hated the bland kitchen that we inherited but, as it was relatively new an
In this months @olivemagazine (out today) the team came and photographed my petit kitchen and we talked about how we put our stamp on the place, without spending a fortune. We hated the bland kitchen that we inherited but, as it was relatively new and in good condition, it felt a waste to rip it out and we also didn’t want to spend the money it would take to rip out the whole thing and replace it (it’s a howdens shell so we could have done something cheaper like @plykeakitchens @holte.studio @madebyhusk) so instead I painted all of the cabinets, using @makeitrustoleum kitchen cabinet paint, to give it some personality and lighten the whole thing. Check out the magazine for the full run down. - #kitchendesign #kitchenremodel #rustoleumcabinettransformations #rustoleumkitchencupboardpaint #kitcheninspiration #theboywhobakes #olivemagazine
Are you making scones all wrong? Maybe, maybe not? But I do want to show you how I make them! This recipe is based on the method I learnt at @belmondlemanoir 12 years ago when I did a stage, and it makes the absolute lightest scones. And shock horror, it involves kneading the dough, albeit very lightly. You can get the full recipe in this weeks newsletter (free) linked in my bio. - #scones #bakingday #worldbakingday #afternoontea #hightea #englishscones #clottedcream #creamtea #theboywhobakes
facebook
  • Contact

The Boy Who Bakes

Edd Kimber

facebook