The Boy Who Bakes

Edd Kimber
  • Home
  • Recipes
  • My Books
  • Blog
  • Recipe Index
  • About
  • Home
  • Recipes
  • My Books
  • Blog
  • Recipe Index
  • About

Recipes

  • All
  • baking
  • Biscuits and Cookies
  • Breads and Quickbreads
  • Bundts
  • Cakes
  • Chocolate
  • Dessert
  • drinks
  • Holidays
  • Pastry
  • Scones and Quickbreads
PBJ Dodgers-6.jpg

PBJ Jammy Dodgers

Edd Kimber September 28, 2021

PBJ Jammy Dodgers
Sponsored By Lyle’s Golden Syrup

Jammy Dodger, a supermarket classic, a favourite of the biscuit tin. Two crisp biscuits sandwiched together with jam, simple, nostalgic, delicious. I say delicious but a shop bought biscuit like this can almost always be made better at home, using better tasting ingredients and less industrial textures. This recipe is clearly not for a classic dodger but is in the form of and inspired by the classic biscuits. The cookie itself has added flavour and texture in the form of salted peanuts. The dough also uses a little Lyle’s Golden Syrup which adds a warm caramel tone to the biscuit which goes wonderfully with the peanuts.

The filling is a classic jam but with added jazz hands in the form of a peanut butter buttercream. The flavour is balanced nicely again with the addition of the Lyle’s Golden Syrup which also adds a really nice creamy texture to the filling. 

Do These Freeze?

Sandwich cookies like this are not the best candidates for freezing once baked but the dough itself can be frozen for up to a couple months.

Do you have to use peanuts?

I know some people are allergic to peanuts or just don’t like them and the good news is you can happily change the nut to a different flavour in the cookie and for the filling you could either make a traditional buttercream or simply use jam without a secondary filling.

What Type of peanut butter should you use to bake with?

Generally when it comes to baking it is better to use a commercial smooth peanut butter, unless otherwise advised. Natural peanut butter, the type that sometimes separates and has a layer of oil on top, can cause issues with texture and doesn’t always blend with other ingredients very well.

PBJ Dodgers-9.jpg

Tips on Rolling

This a dough with a high percentage of butter which can mean the dough is a little tricky to handle. To get around this make sure the dough has been thoroughly chilled before using. When you take the dough out of the fridge it will be cold and firm and hard to roll. Instead of leaving it for 10 minutes and then rolling (which can lead to a soft and sticky dough) simply bash it a little with a rolling pin. This might seem counter intuitive but this action makes the dough pliable without warming it up too much, making it easier to roll before the butter softens too much. If you are worried about the dough becoming too sticky or warm you can also roll the dough between parchment paper and transfer to the fridge if it becomes too hard to handle

PBJ Dodgers-12.jpg

PBJ Jammy Dodgers
Makes 25-30

Peanut Biscuit
325g plain flour
75g salted peanuts
150g caster sugar
225g unsalted butter, diced and chilled
1 large egg
1 large egg yolk
50g Lyle’s Golden Syrup

Peanut Butter Filling
100g unsalted butter, room temperature
100g smooth peanut butter
150g icing sugar
50g Lyle’s Golden Syrup
150g raspberry jam

To make the biscuit dough add a little of the flour and the peanuts to the bowl of a food processor and pulse until the peanuts are finely ground. Add the remaining flour and salt and process briefly to combine. Add the butter and pulse until the mixture resembles breadcrumbs. In a jug whisk together the egg, yolk and the Lyle’s Golden Syrup, whisking together until the syrup has dissolved into the egg. Pour this into the food processor and pulse just until the dough starts to clump together.

Turn the dough out onto a lightly floured work surface and use your hands to gently form into a uniform dough. Divide into two equal portions and press into discs, wrapping in cling film and then refrigerating until firm.

PBJ Dodgers-10.jpg
PBJ Dodgers-11.jpg

When you’re ready to roll out the cookies preheat the oven to 160C (140C fan) and line a couple baking sheets with parchment paper. On a lightly floured work surface roll out a portion of dough until it is about 3mm thick and then using a 7cm round cookie cutter cut as many cookies as possible, setting the scraps aside. Place the cookies onto the prepared baking trays and refrigerate for 15 minutes. Repeat this process with the second portion of dough. Take the cookies from the fridge and use a 3cm round cookie cutter to remove the middle from half of the cookies. Gently reform the scraps of dough into a ball and then refrigerate as before whilst you bake off the cookies. This dough can be rolled out again for more cookies.

Bake in the preheated oven for about 15-18 minutes or until just starting to turn golden on the edges. I bake the cookies lower than usual as it crisps the cookies evenly throughout without over browning them. Allow to cool on the baking tray for a couple minutes before transferring to a wire rack to cool completely.

To make the peanut butter filling place the butter and peanut butter into a large bowl and using an electric mixer beat together until smooth and creamy. Add the icing sugar and Lyle’s Golden Syrup along with a small pinch of salt and beat together until light and fluffy. If the mixture feels a little stiff add a tablespoon or so of double cream.

PBJ Dodgers-7.jpg

To assemble the cookies pipe a ring of the peanut butter filling around the edge of each base cookie and spoon a little jam into the centre. If you like a little added texture you can also sprinkle with a little extra chopped peanuts. Dust all the ring cookies with icing sugar then place one on top of each bottom cookie, sandwiching together. Once assembled the cookies are best within a day or two.

In Biscuits and Cookies Tags sandwich cookie, jammy dodger, linzer cookie, pbj, peanut butter, sable, golden syrup
Comment

Baileys Apple Pie Custard Slices

Edd Kimber September 23, 2021

Sponsored by Baileys

When Baileys sent me a bottle of their new limited edition Baileys Apple Pie flavour I knew exactly what I wanted to make. I made a batch of caramelised apples, a cinnamon custard to which I added 50ml (0.9 units) of the Baileys and it may just be my new favourite version of the humble custard slice, they were pure autumn!

When making this recipe the key to getting them neat is simple, chill the custard for at least four hours, it needs the time to fully set so the slices come out without the custard smooshing everywhere. The second tip is optional but it really helps. When you cut the slices use a serrated knife to gently saw through the top layer of pastry and then use a chefs knife to cut through the custard and bottom layer of pastry. This helps prevent the pastry from breaking into big chunks.

Once made the slices can be refrigerated for a couple days but the pastry will be at its crispest when served as close to making as possible. 

Baileys Apple Pie Limited Edition is available from major supermarkets now, but be quick, as once it’s gone, it’s gone!

Caramelised Apples
2 granny smith apples, peeled cored and diced
20g unsalted butter, diced
20g light brown sugar

Custard Slices
500g block of puff pastry
500ml whole milk
125g caster sugar
35g custard powder (or cornflour)
1-2 tsp cinnamon (depending how strong you prefer the flavour)
1 large egg
1 large egg yolk
35g unsalted butter
50ml Baileys Apple Pie Limited Edition (0.9 units)

To prepare the apples place the diced apple, butter and sugar into a small roasting tray and bake, at 200ºC (180ºC Fan), for about 15-20 minutes or until there is no liquid remaining and the apples are golden. Remove and set aside to cool.

For the pastry roll out the puff pastry on a lightly floured worksurface, rolling into a rectangle a little bigger than 18x9inches. Trim the pastry to size and cut out two 9 inch squares. Place each square onto its own parchment lined baking tray and dock with a fork. Top each piece of pastry with a second sheet of parchment and another baking tray, preferably one that nests neatly with the first. This prevents the puff pastry from rising too much, creating nice neat layers. If you don’t have spare baking trays you can also weigh down the parchment and pastry with metal cutlery. 

Bake in the oven for 20 minutes before removing the top baking tray and parchment paper, exposing the pastry, and placing back into the oven for another 5-10 minutes or until golden brown. Make sure you bake the pastry to a nice rich golden brown, it helps the pastry stay crisp when sandwiching the custard but it also gives the pastry flavour. Once cool use a serrated knife to trim to 8 inches. 

Line a 8-inch square baking pan with a single piece of foil and place one of the pastry pieces into the bottom. 

For the custard place the milk into a saucepan and bring to a simmer. Meanwhile place the sugar, custard powder and cinnamon into a large bowl and whisk to combine. Add the egg and yolk and whisk until smooth. Once the milk is at temperature pour the milk over the egg mixture while continuing to whisk. Scrape the custard back into the pan and cook, over medium heat, whisking constantly, until thick and starting to bubble. Cook for a minute or two more to ensure the starch of the custard powder is fully cooked. Remove the pan from the heat and add the butter, Baileys Apple Pie and caramelised apple pieces and whisk to combine. Scrape the custard into the tin and spread into an even layer and top with the second piece of puff pastry, pressing gently onto the custard to secure it in place. Refrigerate the custard slices for at least four hours before serving. 

To serve use the foil to carefully lift the slices from the tin. Peel away the foil from the sides and transfer the slices to a chopping board. Use a serrated knife to mark and cut the slices into into 10 pieces. Dust with icing sugar and serve. 

In Pastry Tags custard slice, custard, puff pastry, baileys, easy, rettro, apple pie
Comment
Sourdough Cardamom Buns-2.jpg

Sourdough Swedish Cardamom Buns with Spelt

Edd Kimber September 16, 2021

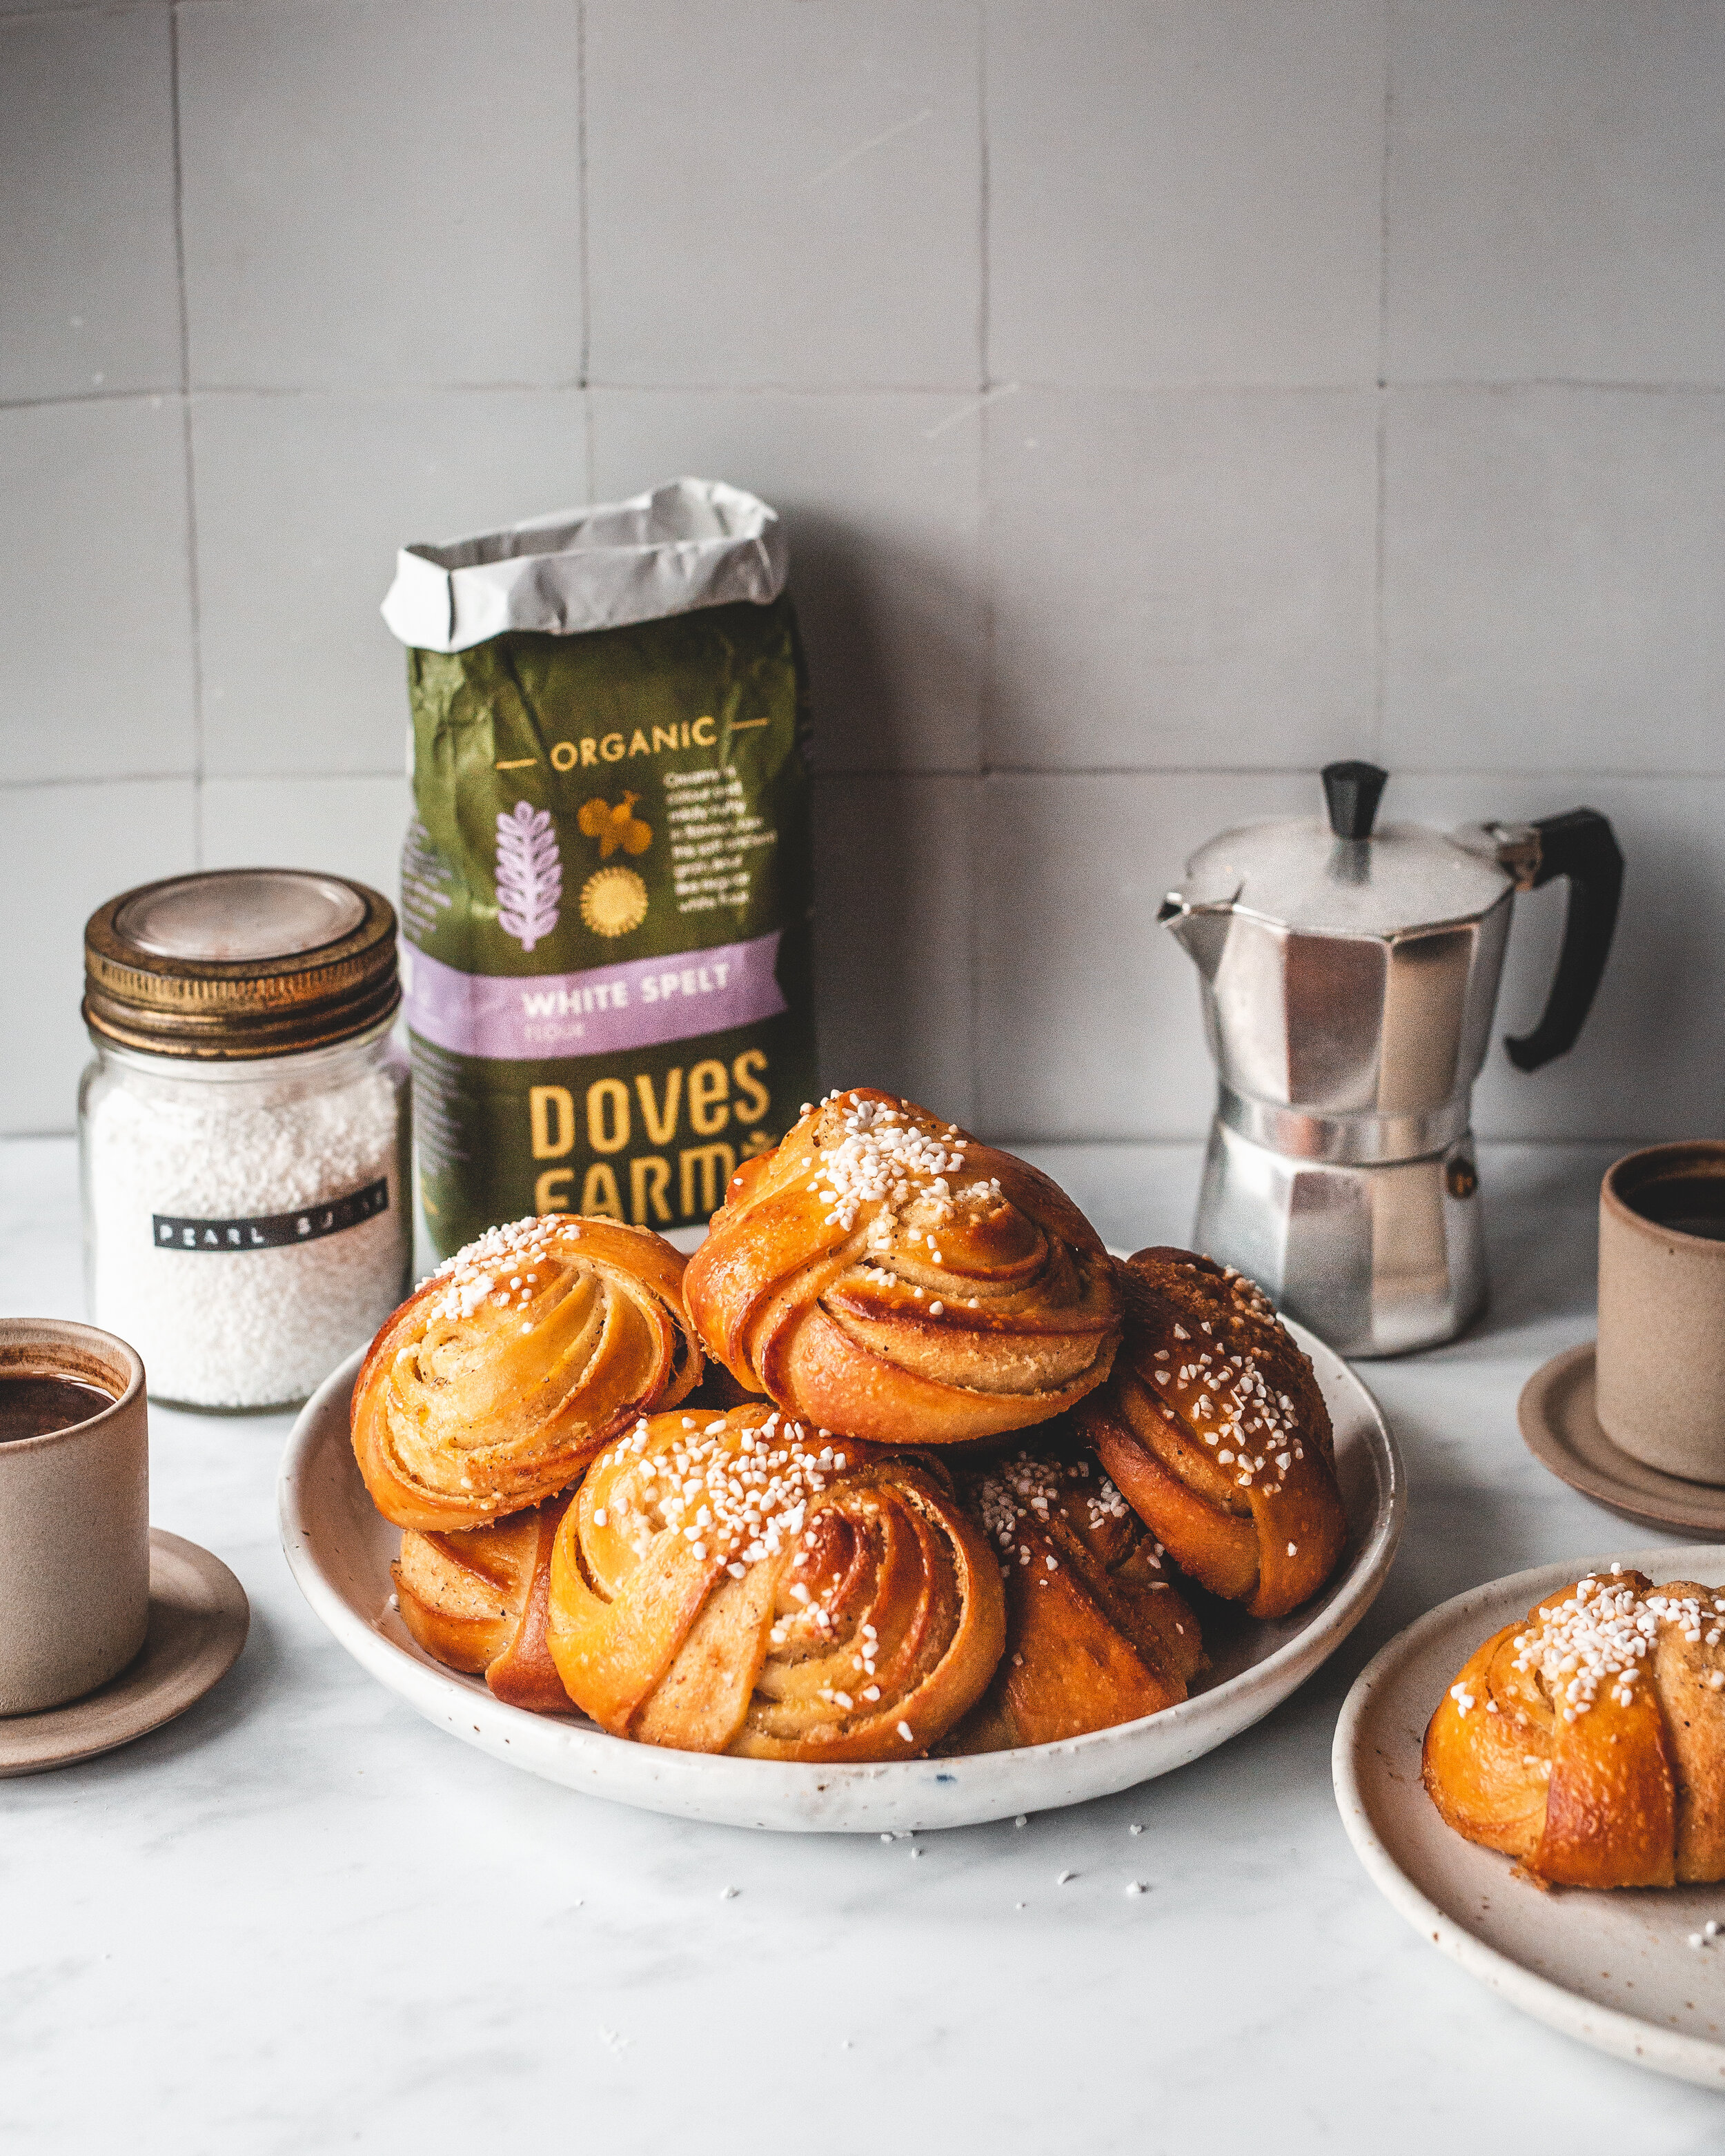
Did you know it’s currently Sourdough September? A month celebrating and advocating for real sourdough, bread made with nothing but flour, water and salt (a campaign spearheaded by the Real Bread Campaign). You probably already know that I love baking with sourdough, check out my sourdough series here if you’ve not read it before, but what you don’t get from me very often is sweet sourdough recipes, enriched doughs, brioche recipes etc. Well today, in collaboration with Doves Farm Organic Flour, and in celebration of Sourdough September, I am showing you one of my all-time favourite sourdough recipes; Swedish cardamom buns.

The base dough in this recipe is an enriched dough, made with milk, eggs and of course butter. For the flour I chose to go with a mix of Doves Farm Organic Strong White Bread Flour and their Organic White Spelt Flour. Doughs made with spelt tend to be softer than when made purely with bread flour and it adds a mild nutty flavour. September is also Organic September and Doves Farm’s flour range is all organic. I find organic flours taste better and make a better loaf of bread.

Baking with sourdough is a slower process. These buns are made stretched over two days but do not let that put you off, the hands-on work is short and sweet. Once you’ve learnt to make this dough you also have a great base for other similar recipes. One important thing to note about baking with sourdough, and this is the case for all sourdough breads, is that the starter needs to be at its peak when it is used. This means that the starter has been recently fed and has doubled in size. You want to use the starter before or just after it starts to fall, but well before it has sunk. 

If you’ve ever had a Swedish cinnamon bun you know how fabulous they are, sweet sticky and incredibly fragrant and my favouritesfrom Fabrique Bakery are the inspiration for this recipe. The key to the flavour is good quality cardamom and freshly grinding it so the flavour is fresh and bright. You can either break open the pods removing the seeds and grind these, or if this is too time consuming you can simply grind the whole pod, although you’ll need an electric spice grinder to do this. If you aren’t a fan of cardamom this recipe and method would also work great flavoured with cinnamon like a classic cinnamon bun you could also use the dough to make buns in the style of babka, with a chocolate filling and a syrup glaze.

Doves Farm Organic Strong White Bread Flour is available from Sainsbury’s, Ocado, many independents and www.dovesfarm.co.uk.
Doves Farm Organic White Spelt Flour is also available from Tesco.
Right now, there is 20% off these flours on www.dovesfarm.co.uk until the 30 September.

cardamom-5.jpg


Sourdough Swedish Cardamom Buns
Makes 12
225g Doves Farm Organic Strong White Bread Flour
225g Doves Farm Organic White Spelt Flour
50g caster sugar
Zest of 1 lemon
1 tsp fine sea salt
150g mature sourdough starter, recently fed and doubled in size
185ml whole milk
2 large eggs
1 tsp vanilla bean paste
75g unsalted butter, diced and at room temperature

Filling
150g caster sugar
185g unsalted butter, very soft
2-3 tbsp ground cardamom
1/4 tsp fine sea salt

To make the dough place the flours, sugar and lemon zest into the bowl of a stand mixer, with the dough hook attached, and mix briefly to combine. Add the sourdough starter, the milk, eggs and vanilla and on low/medium speed knead until everything is moistened. Cover the bowl and set aside for 30 minutes. This stage helps to hydrate the flour and kick starts the gluten development. Add the salt and then on low/medium speed knead the dough for about 10 minutes or until the dough is smooth, elastic and forming a ball that clings to the dough hook. Add the butter one piece at a time and continue kneading until all the butter has been absorbed and the dough has become smooth and elastic again. Form the dough into a ball and place the dough into a lightly greased bowl and cover. Set the bowl aside for about 6 hours or until the dough has almost doubled in size. Transfer the bowl to the fridge and leave overnight, this firms up the dough and makes it easier to handle. At this stage the dough can be refrigerated for 24-48 hours.

Before you remove the dough from the fridge make the filling. Beat all the ingredients until soft and well combined. On a lightly floured work surface roll out the dough into a 30x60cm rectangle. Spread the filling over one half of the dough and then fold the uncovered half over, creating a square of dough. Roll out to slightly extend so the finished shape is roughly 30x40cm. Cut the dough into 12 equal sized strips. 

To form the buns gently stretch out each strip of dough and grip one end with your thumb and forefinger. Fold the dough around your first three fingers and before you run out dough fold the tail end over the ring of dough and tuck the end underneath. Place the buns onto two parchment lined baking trays and cover, setting aside for 3-4 hours or until risen and puffy. 

When ready to bake preheat the oven to 190ºC (170ºC Fan). Brush with a beaten egg and sprinkle liberally with pearl sugar. Bake the buns for about 20 minutes or until golden brown. Remove from the oven and set aside to cool. 

Kept in a sealed container the buns will keep for 2-3 days but are best on the day made, they will also freeze brilliantly. 


In Breads and Quickbreads Tags sourdough, sourdough cardamom, cardamom buns, brioche, cardamom, pearl sugar, swedish
5 Comments

Boston Cream Bundt Cake

Edd Kimber August 25, 2021

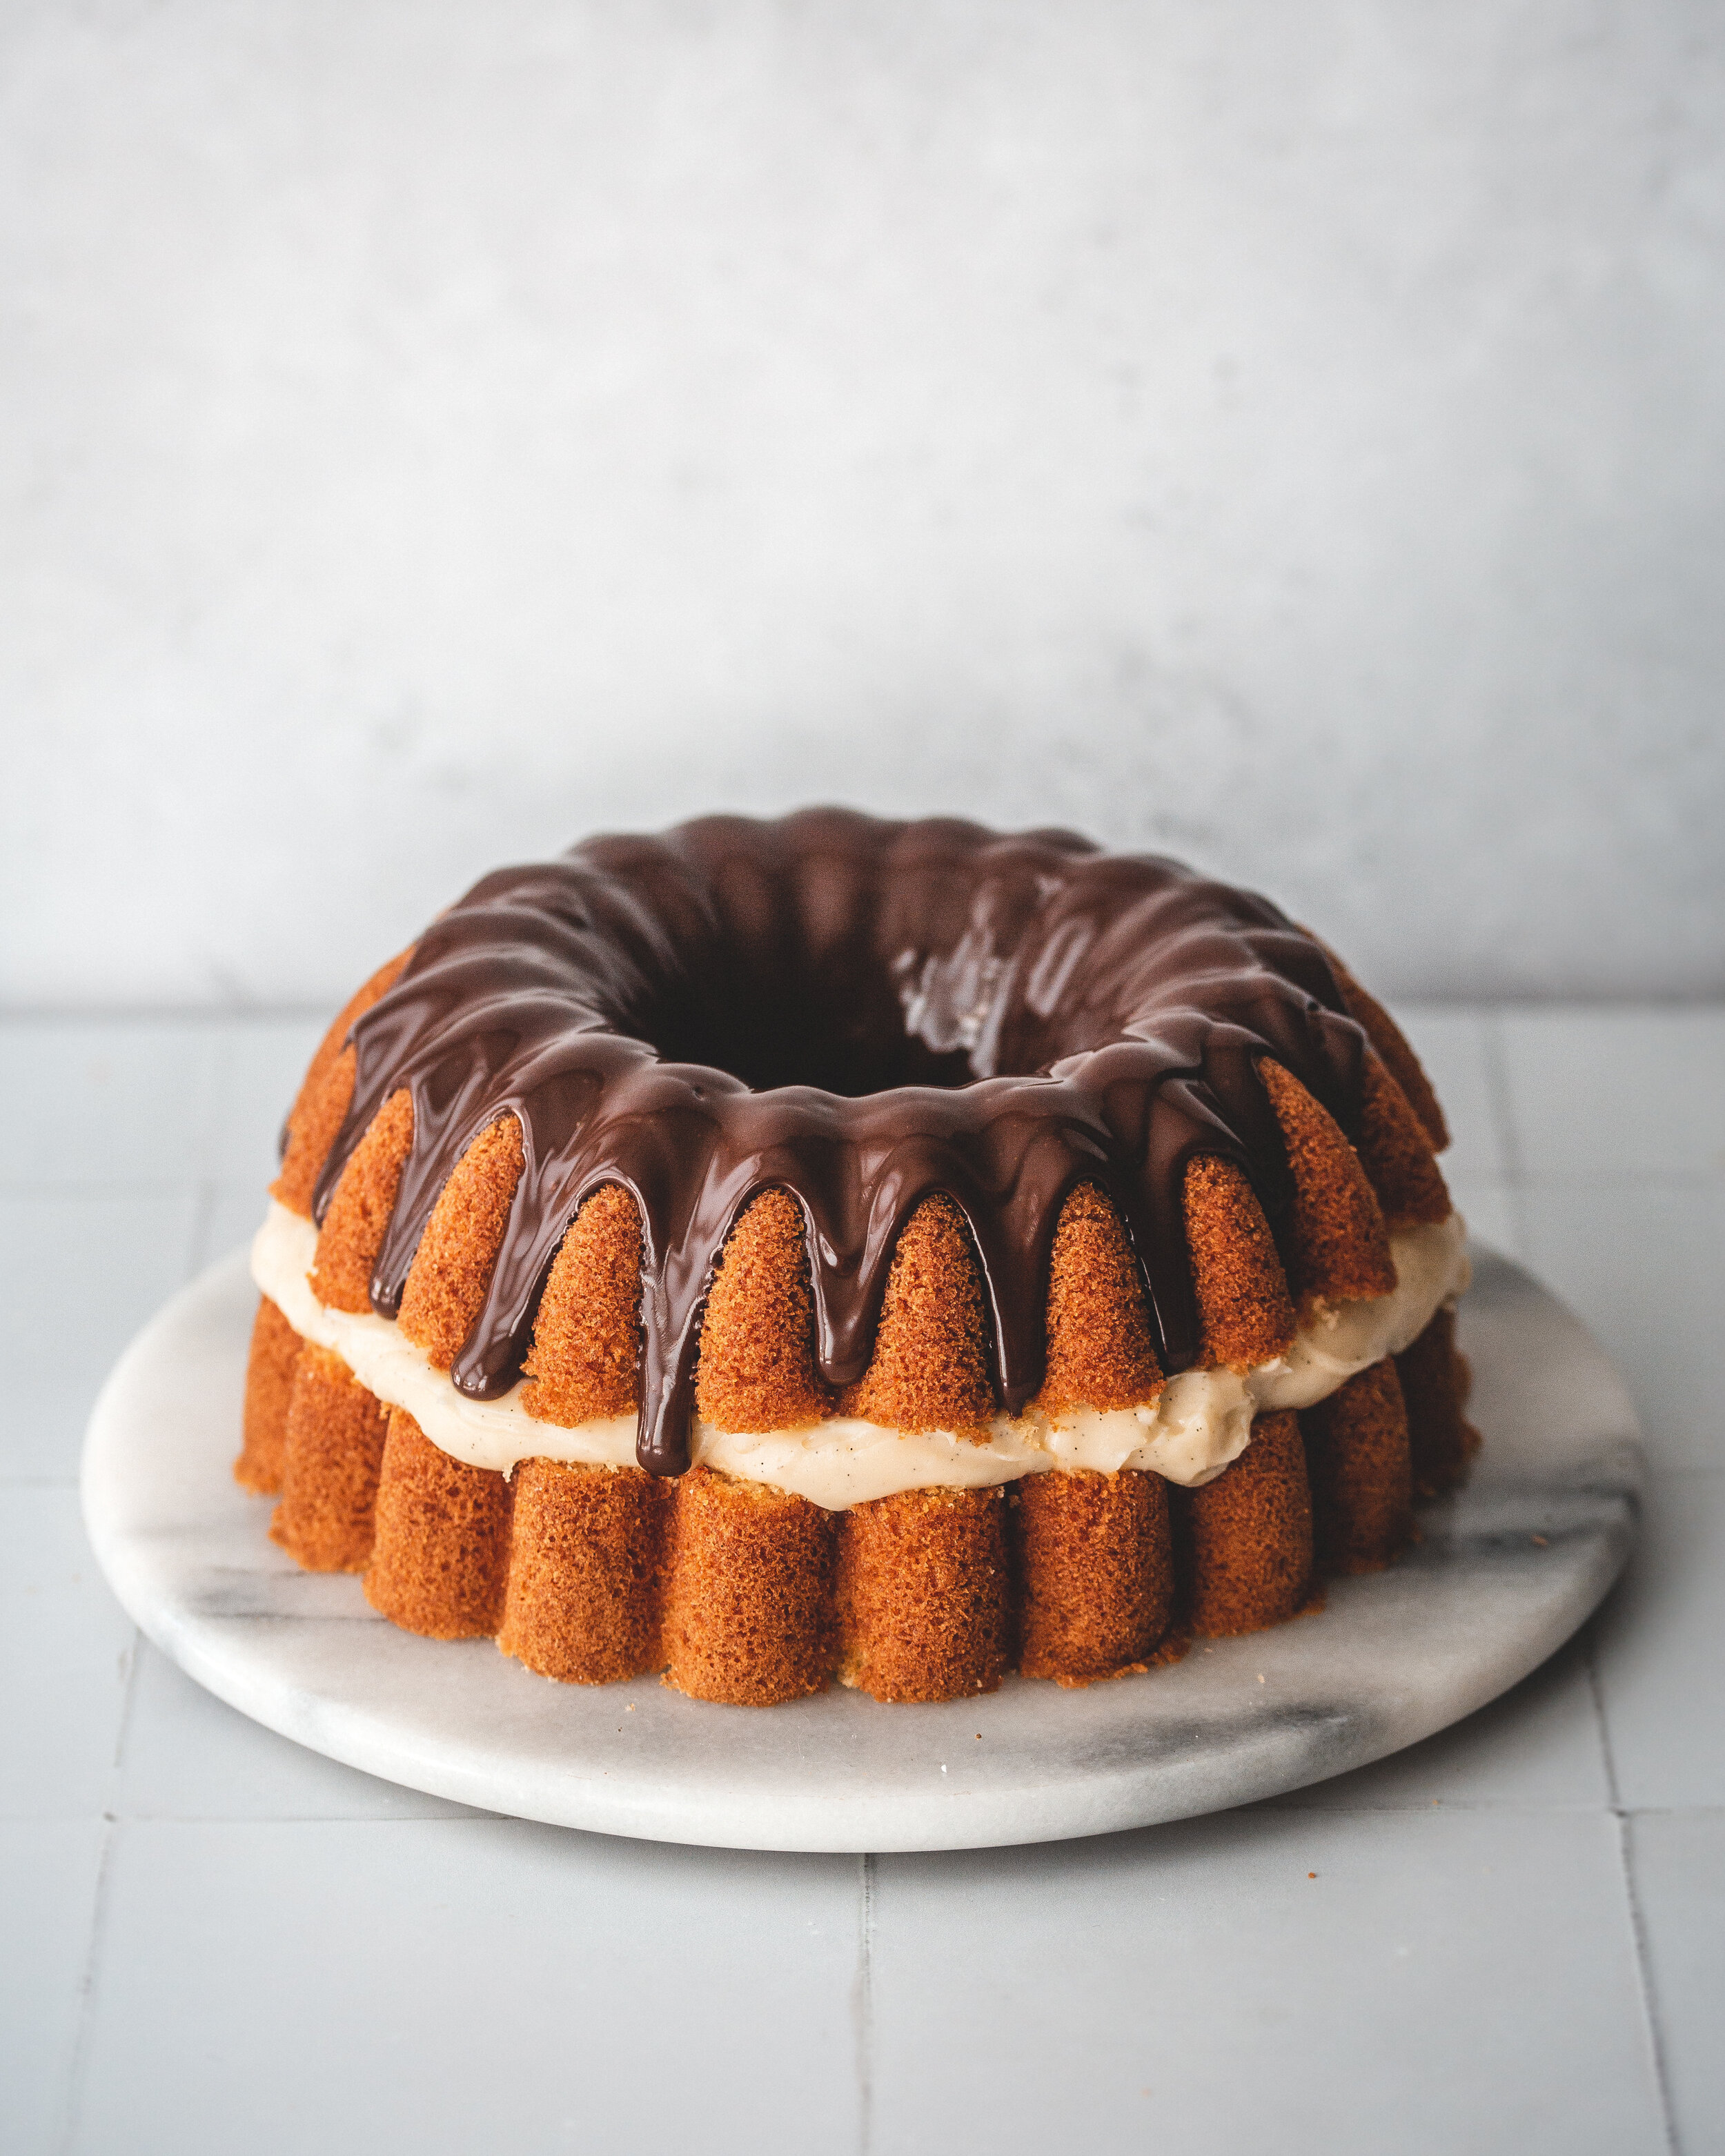
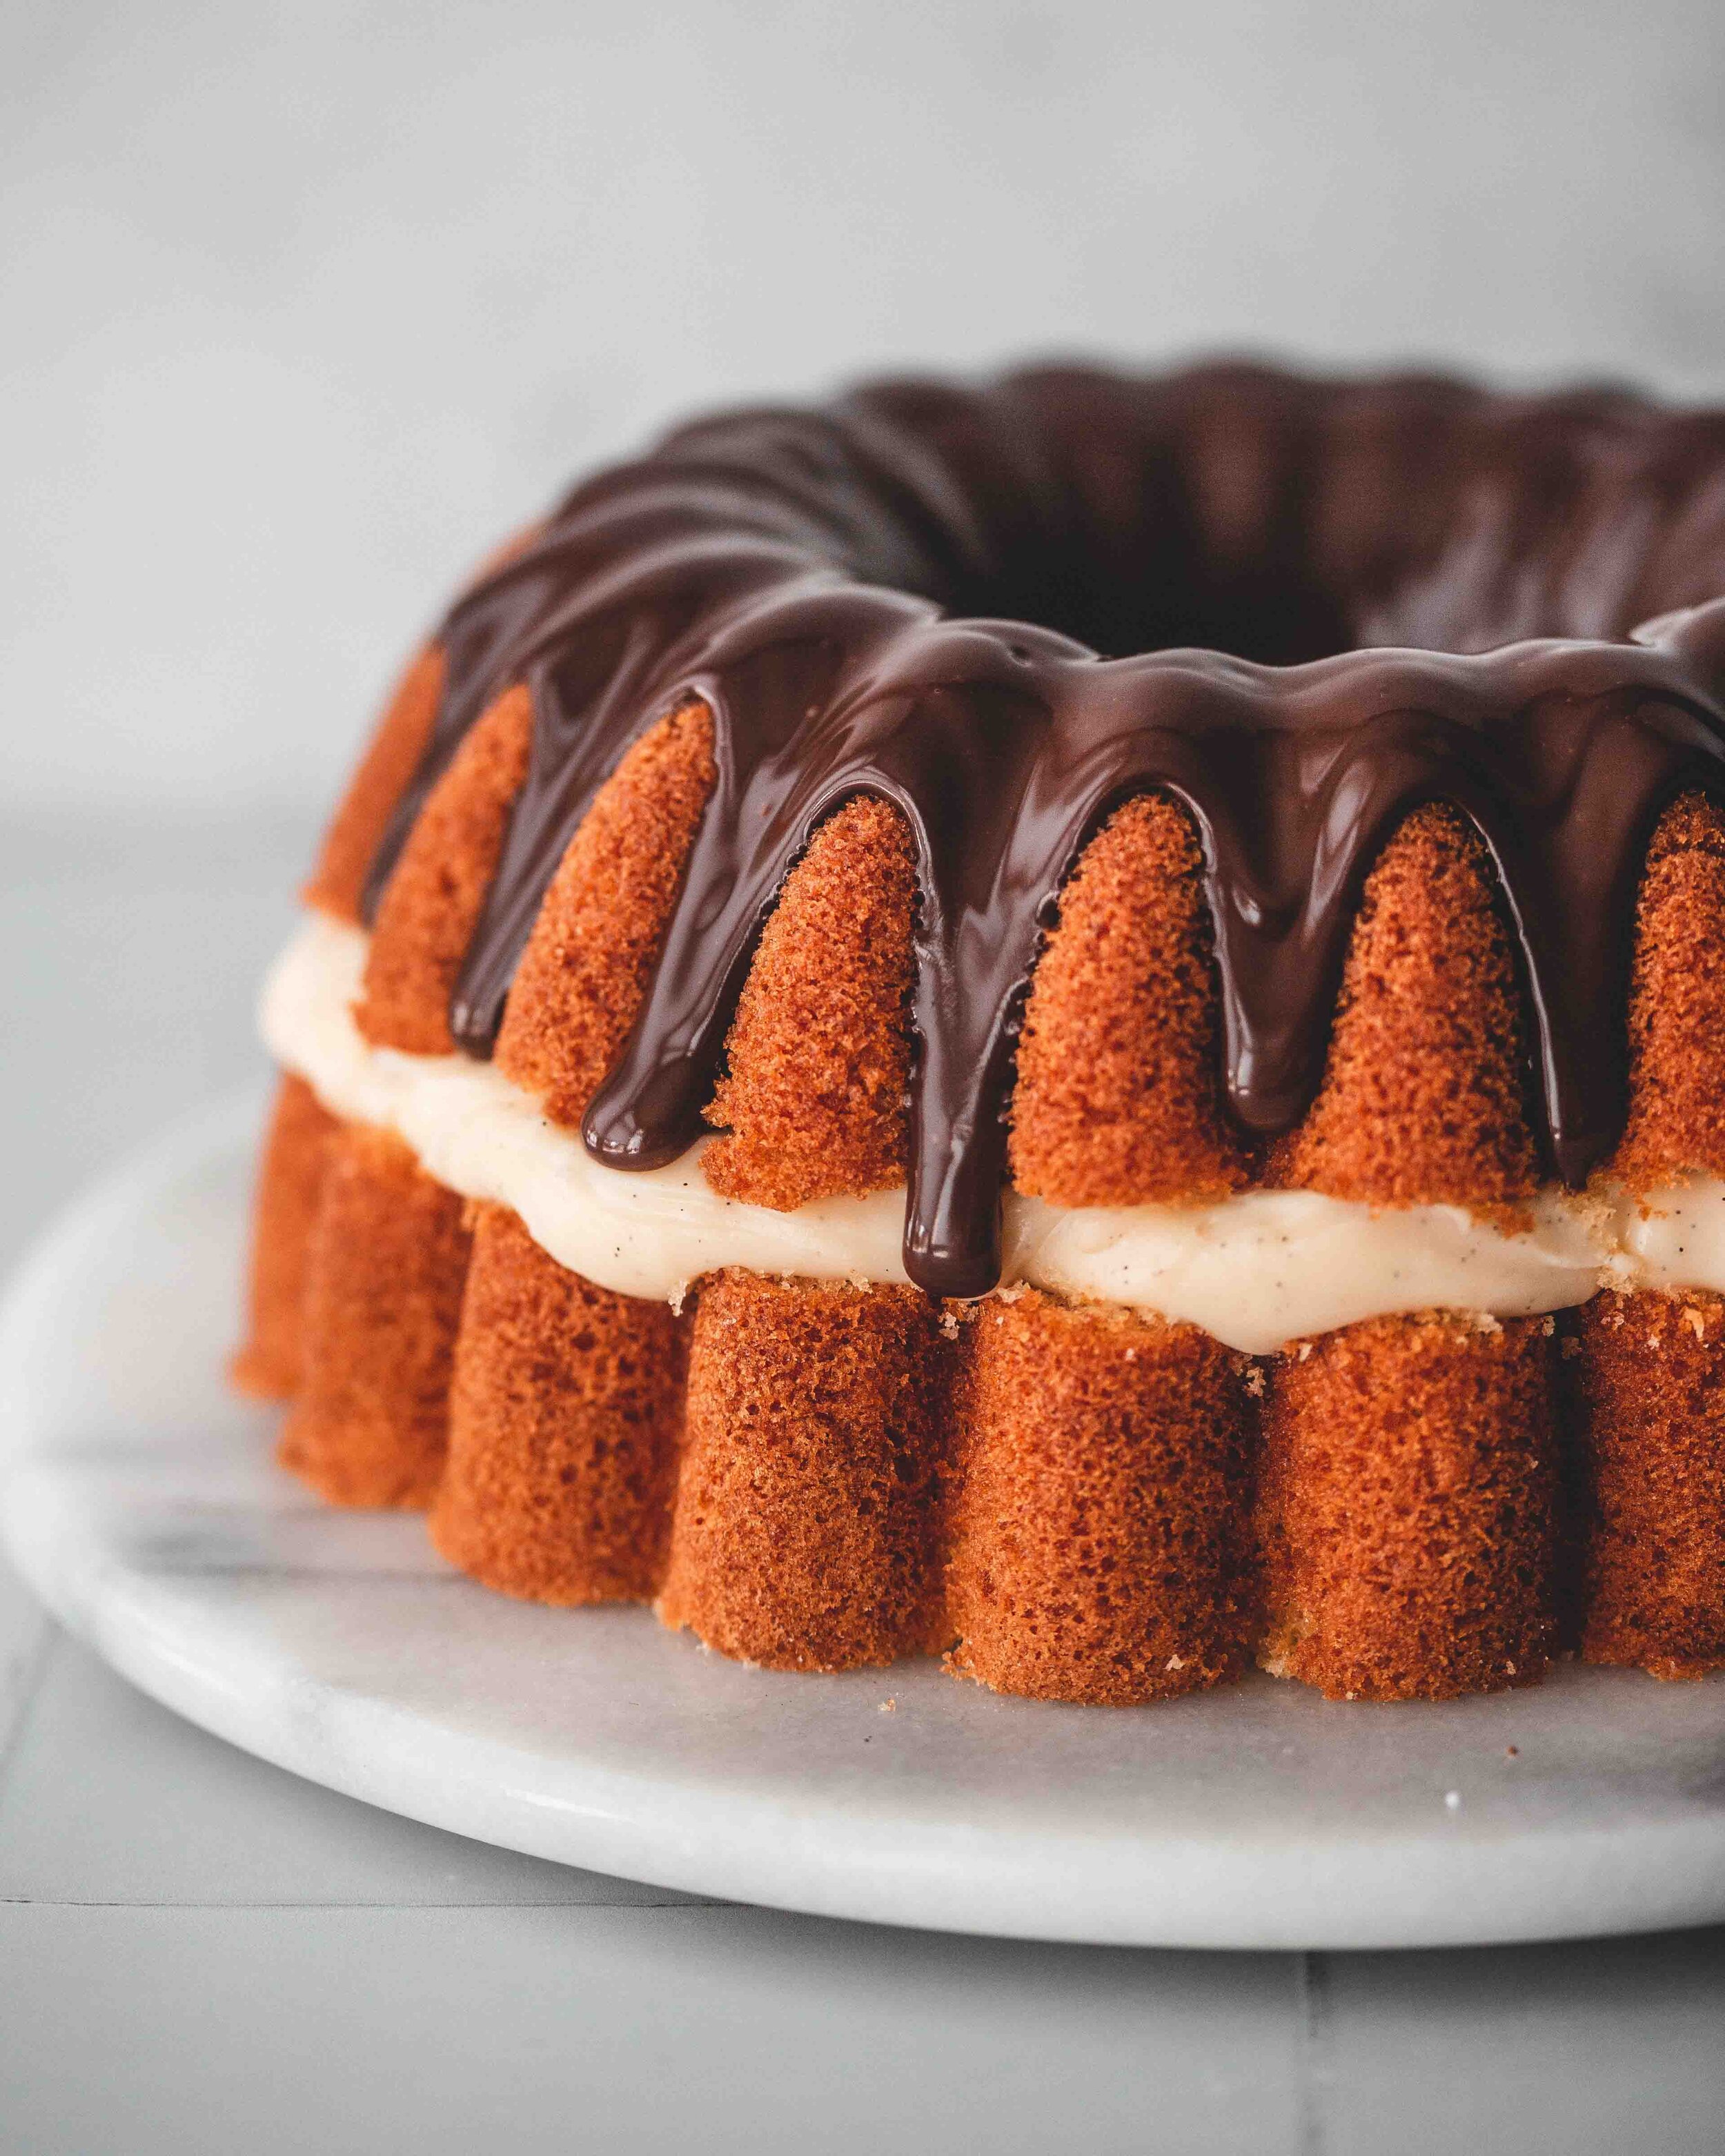
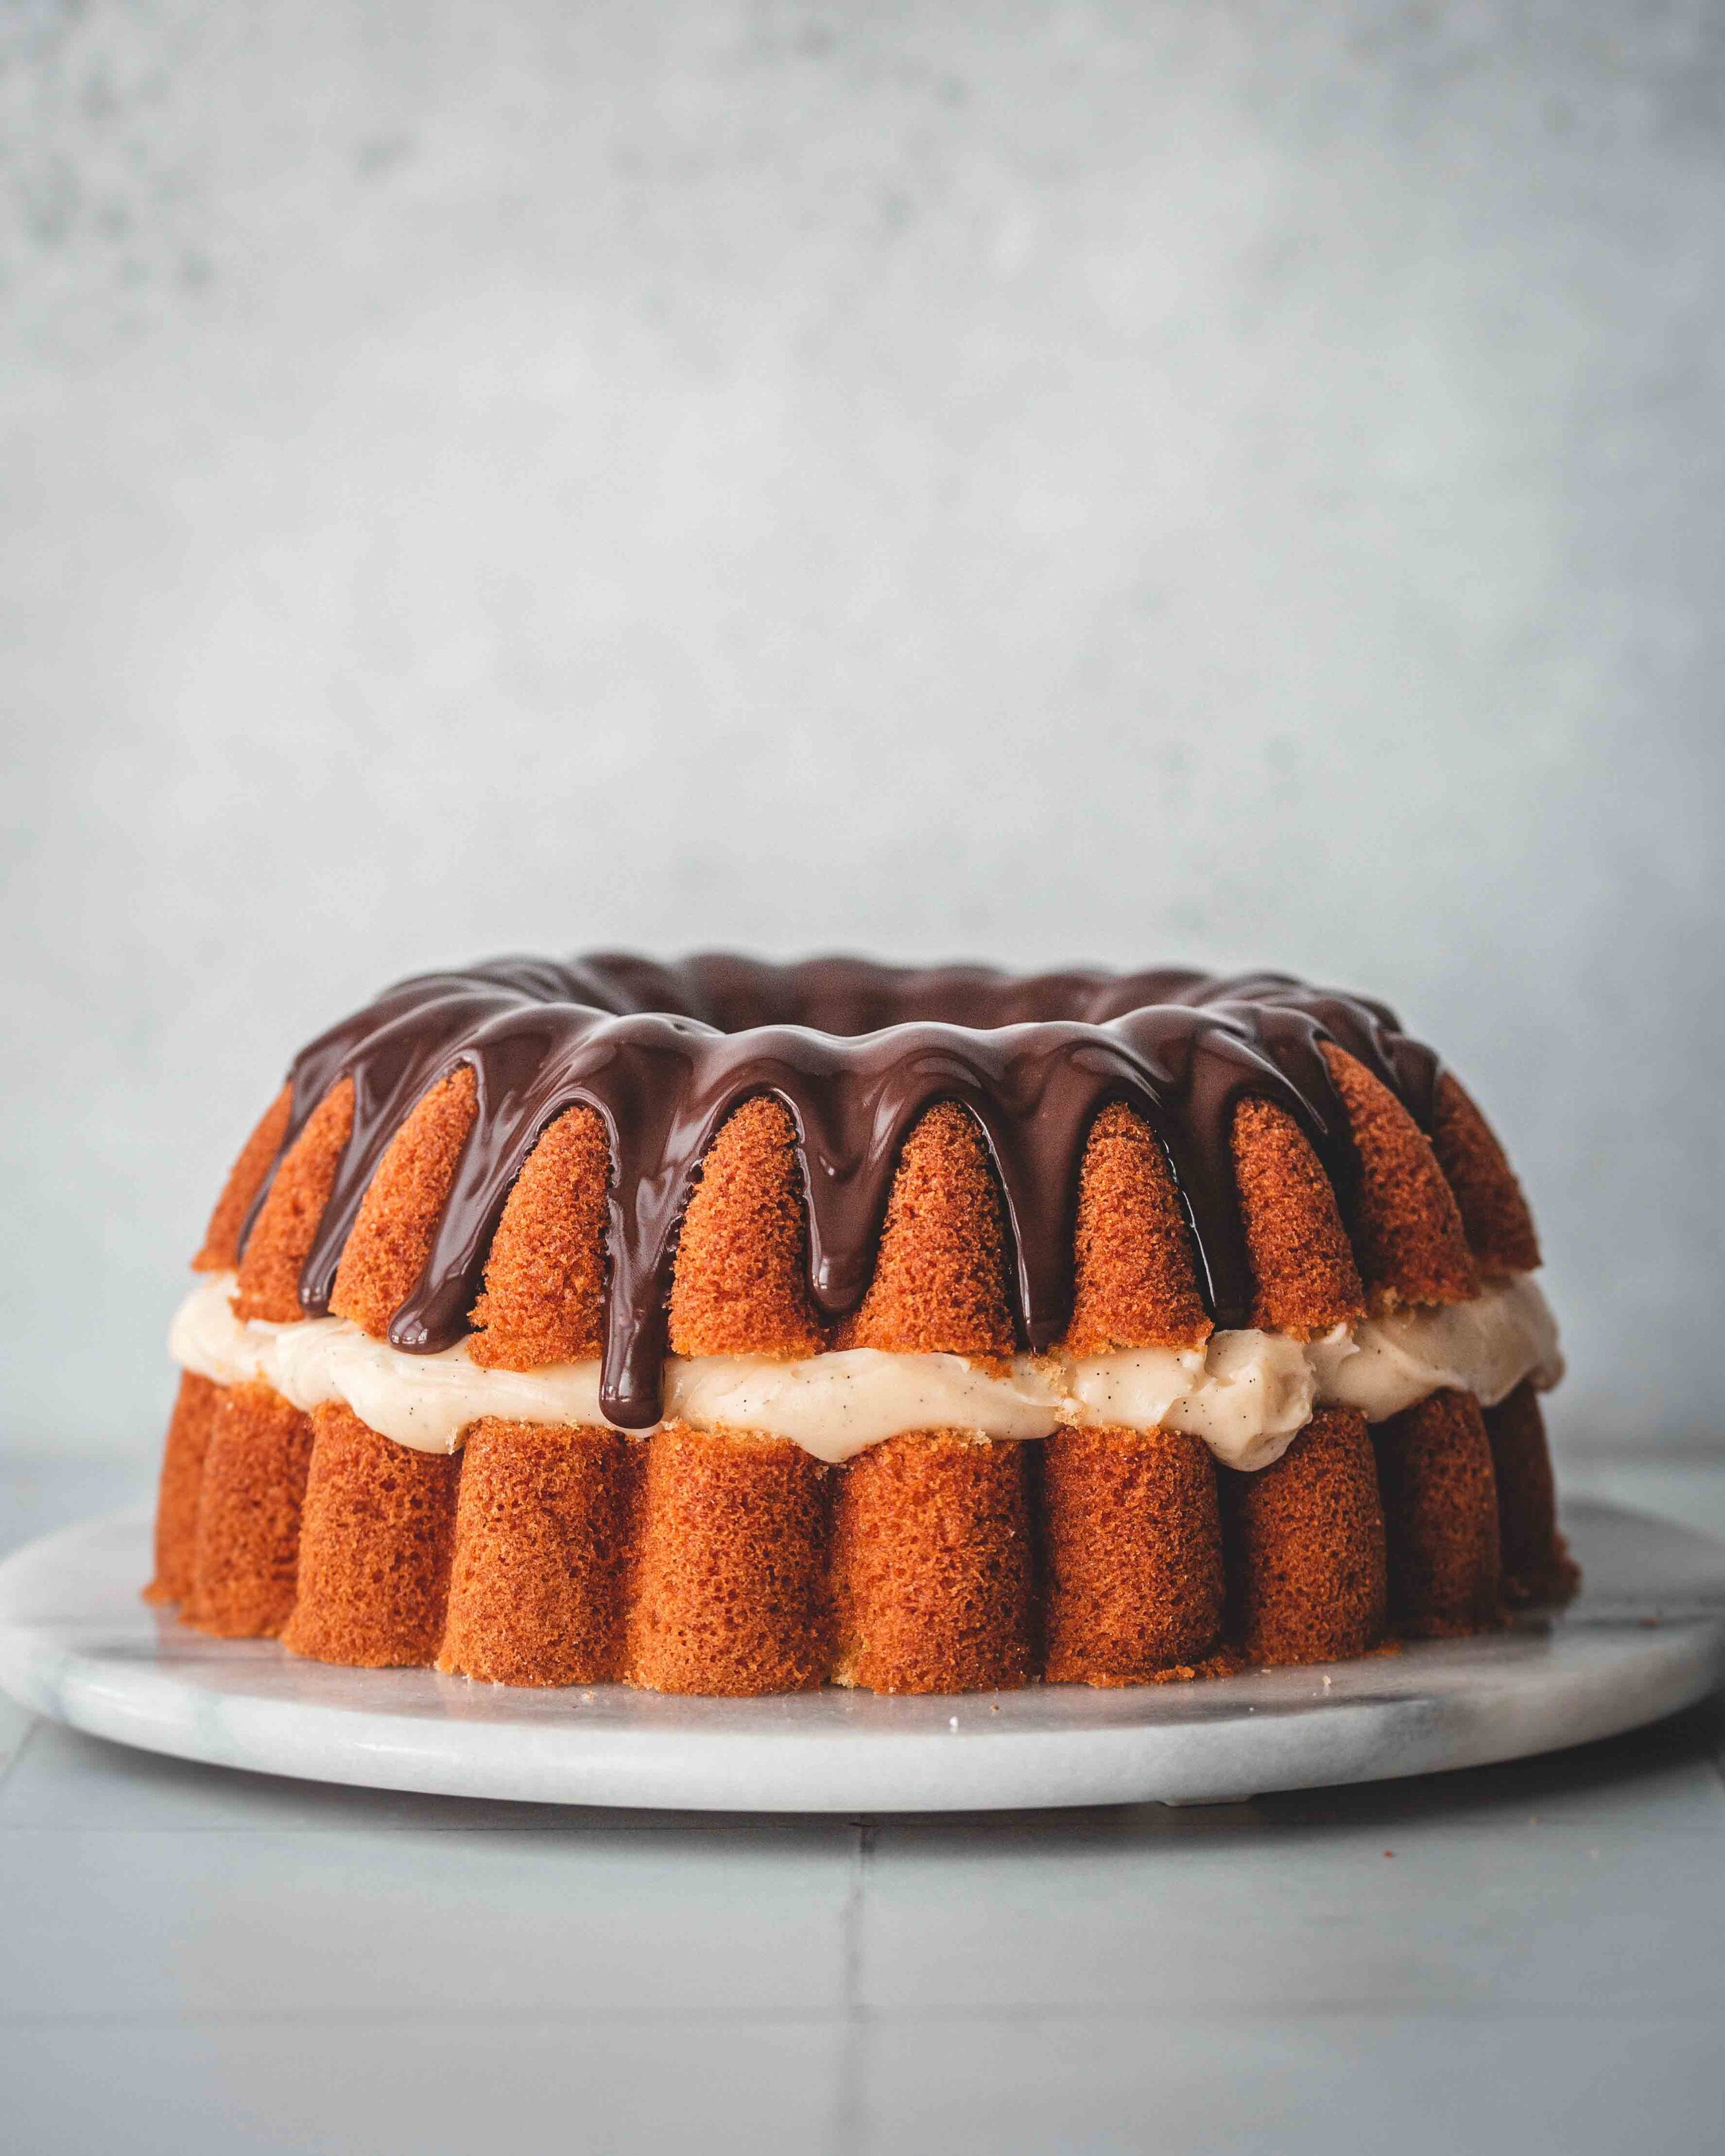
Boston Cream Pie, as it is traditionally called, is a bit of a misnomer in that it is clearly a cake and not a pie. The name, supposedly, harks back to the 1800’s when the line between what was a cake and what was a pie was blurred somewhat, the names being used in more of an interchangeable manner. Either way, what is known about the origins of the cake are murky at best, with the Parker House Hotel claiming they invented the cake but food historians saying its origins are much more likely older than the hotel itself. Traditionally the cake would be made with either a rich butter cake or a lighter whisked sponge, the latter being the version I am more au fait with. The filling was always a rich pastry cream but the topping, which used to be a chocolate fondant, has morphed into a more common chocolate ganache glaze. My version sticks very close to this formula with a whisked sponge in the style of a chiffon cake, filled with a vanilla rich pastry cream and topped with a silky ganache glaze. The only thing I have omitted in this version is the traditional sliced almonds that coat the outside of the cake. Feel free to scatter almonds over the finished cake if you wish.

Boston Cream Bundt Cake
Serves 12-15

Bundt Cake
250g caster sugar
4 large eggs
2 tsp vanilla bean paste
120ml olive oil
80ml whole milk
200g plain flour
1 + 1/2 tsp baking powder
1/2 tsp fine sea salt

Custard Filling
300ml whole milk
1 tsp vanilla bean paste
100g caster sugar
25g cornflour 
2 large egg yolks
1 large egg
30g unsalted butter
Pinch of fine sea salt

Chocolate Glaze
70g dark chocolate, finely chopped
100ml double cream

For the custard filling place the milk, vanilla and roughly half the sugar into a saucepan and place over medium heat and bring to a simmer. Meanwhile, place the remaining sugar and the cornstarch into a mixing bowl and whisk together until combined. Just before the milk is at temperature add the egg yolks and whole egg to the sugar and cornflour mixture and whisk together until smooth. 

When the milk is at temperature remove from the heat and slowly pour over the egg mixture, whisking as you do you. Pour the custard back into the pan and place on the heat and whisk constantly until the custard is very thick and has bubbled. Immediately scrape the custard into a bowl and stir in the butter and a pinch of salt, mixing until smooth. Press a sheet of clingfilm onto the surface of the custard and refrigerate until needed. 

Preheat the oven to 180ºC (160ºC Fan). Grease a 10-cup bundt pan, using either a cake release spray or brushing with softened butter and then dusting with flour. My preference is using a homemade ‘cake goop’ made from an equal volume measure of shortening, neutral oil and all purpose flour, mixed to a paste. 

Place the sugar, eggs and vanilla into the bowl of a stand mixer, fitted with the whisk attachment. On medium/high speed whisk for about 7 minutes or until ribbon stage. Turn the mixer to medium/low and slowly pour in the olive oil and then the milk. Sieve in the flour, baking powder and salt and fold the flour until the batter is smooth and no signs of flour remain. Pour the batter into the prepared pan and then give the pan a couple firm taps on the work surface to pop any large bubbles. 

Bake in the preheated oven for about 35 minutes or until the cake springs back to a light touch. Remove from the oven and set aside for 10 minutes before inverting the cake onto a wire rack to cool completely. 

Once cooled use a serrated knife to cut the cake into two layers. Remove the custard from the fridge and beat to loosen. Place the bottom layer of the cake onto a cake stand or plate and spread the custard over the cut surface. Top with the second cake layer and refrigerate while you make the glaze. 

Place the chocolate into a jug and set aside for the moment. Place the cream into a small milk pan and over medium heat bring to a simmer. Pour into the jug with the chocolate and set aside for a couple minutes before stirring with a small sauce whisk to form a silky ganache. Remove the cake from the fridge and then pour over the glaze, allowing it to drip down the sides of the cake.

The cake is best used within a day or two


In Bundts, Cakes Tags bundt, bundt cake, chocolate, chocolate glaze, pastry cream, creme patissier
9 Comments
  • Recipes
  • Older
  • Newer

Twitter

  • Was 8 original films, 3 spin off films, a two part play not enough. Can we have something new. https://t.co/cBZdGEGeyv
    Apr 4, 2023, 1:46 PM
  • RT @deliciousmag: Cacio e pepe, but make it buns! These seriously cheesy bread rolls from @TheBoyWhoBakes are inspired by his favouri… https://t.co/oDZlaDgnN2
    Apr 2, 2023, 11:08 AM
  • RT @TheDailyShow: Congrats to Donald Trump on finally winning a majority of votes! https://t.co/ezP55HZgl0
    Mar 31, 2023, 12:43 AM

Instagram

This weeks bonus recipe, for subscribers to my newsletter, is this gorgeous sour cherry and coconut gateau basque. The crust is a buttery cross between pastry and cake, think a cakey cookie. The filling is a layer of sour cherry topped with a rich coconut custard. A real fun one to make too! Link to my newsletter can be found in my bio - #gateaubasque #pastrycream #coconut #sourcherry
In this months @olivemagazine (out today) the team came and photographed my petit kitchen and we talked about how we put our stamp on the place, without spending a fortune. We hated the bland kitchen that we inherited but, as it was relatively new an
In this months @olivemagazine (out today) the team came and photographed my petit kitchen and we talked about how we put our stamp on the place, without spending a fortune. We hated the bland kitchen that we inherited but, as it was relatively new and in good condition, it felt a waste to rip it out and we also didn’t want to spend the money it would take to rip out the whole thing and replace it (it’s a howdens shell so we could have done something cheaper like @plykeakitchens @holte.studio @madebyhusk) so instead I painted all of the cabinets, using @makeitrustoleum kitchen cabinet paint, to give it some personality and lighten the whole thing. Check out the magazine for the full run down. - #kitchendesign #kitchenremodel #rustoleumcabinettransformations #rustoleumkitchencupboardpaint #kitcheninspiration #theboywhobakes #olivemagazine
Are you making scones all wrong? Maybe, maybe not? But I do want to show you how I make them! This recipe is based on the method I learnt at @belmondlemanoir 12 years ago when I did a stage, and it makes the absolute lightest scones. And shock horror, it involves kneading the dough, albeit very lightly. You can get the full recipe in this weeks newsletter (free) linked in my bio. - #scones #bakingday #worldbakingday #afternoontea #hightea #englishscones #clottedcream #creamtea #theboywhobakes
facebook
  • Contact

The Boy Who Bakes

Edd Kimber

facebook