The Boy Who Bakes

Edd Kimber
  • Home
  • Recipes
  • My Books
  • Blog
  • Recipe Index
  • About
  • Home
  • Recipes
  • My Books
  • Blog
  • Recipe Index
  • About

Recipes

  • All
  • baking
  • Biscuits and Cookies
  • Breads and Quickbreads
  • Bundts
  • Cakes
  • Chocolate
  • Dessert
  • drinks
  • Holidays
  • Pastry
  • Scones and Quickbreads
Choux bun with craquelin filled with a coffee cream

Coffee Choux Buns

Edd Kimber January 31, 2022

Happy New Year! I know I am a month late whisking you all a happy 2022 but I unexpectedly ended up having a a slow start to the year. No, not covid related thankfully. I simply had finished a big project, which had get me busy most of the previous year, and I was a little burnt out, I needed a break. What pulled me back to the kitchen was however something simple, a petit little choux bun. Scrolling through instagram I stumbled across someone enjoying a week in Paris, and of course I was following along wishing I could be there too. They had posted a picture of a choux bun, topped with craquelin and a simple disc of chocolate for decoration. It was incredibly simple but beautiful and it reminded me just how much I love this type of choux pastry. So here we are.

Choux is the only twice cooked pastry, cooked first on the hob and then baked in the oven. Depending on how it’s cooked it can be soft or crisp and it can be used in both sweet and savoury applications. In my mind it is the easiest pastry to make but a tricky one to perfect, there are a lot of key little details which are key to a successful bake. If you’ve ever tried to make a picture perfect eclair that is straight and without cracks you’ll understand what I’m talking about. Thankfully, so long as you don’t burn the choux pastry, it will always taste the same no matter how ill-shaped it may be. To get a perfectly formed choux bun there are a number of tips and tricks that can be employed, the one I want to talk about today is craquelin, a crumble like dough that is rolled out thin and frozen before cutting into discs and placing atop the choux. As the pastry bakes the craquelin melts and covers the pastry. This does three things. Firstly it adds an additional crisp texture to the buns, like a thin crisp cookie coating the pastry, secondly it allows the pastry to expand as much as it possibly can, resulting in hollow choux ready to be filled. Finally, the craquelin helps the pastry keeps it shape. If you bake a choux bun or eclair with craquelin on top the pastry you will keep them neat and evenly shaped. It’s a little bit of a miracle worker. Thankfully it is also super easy to make. 

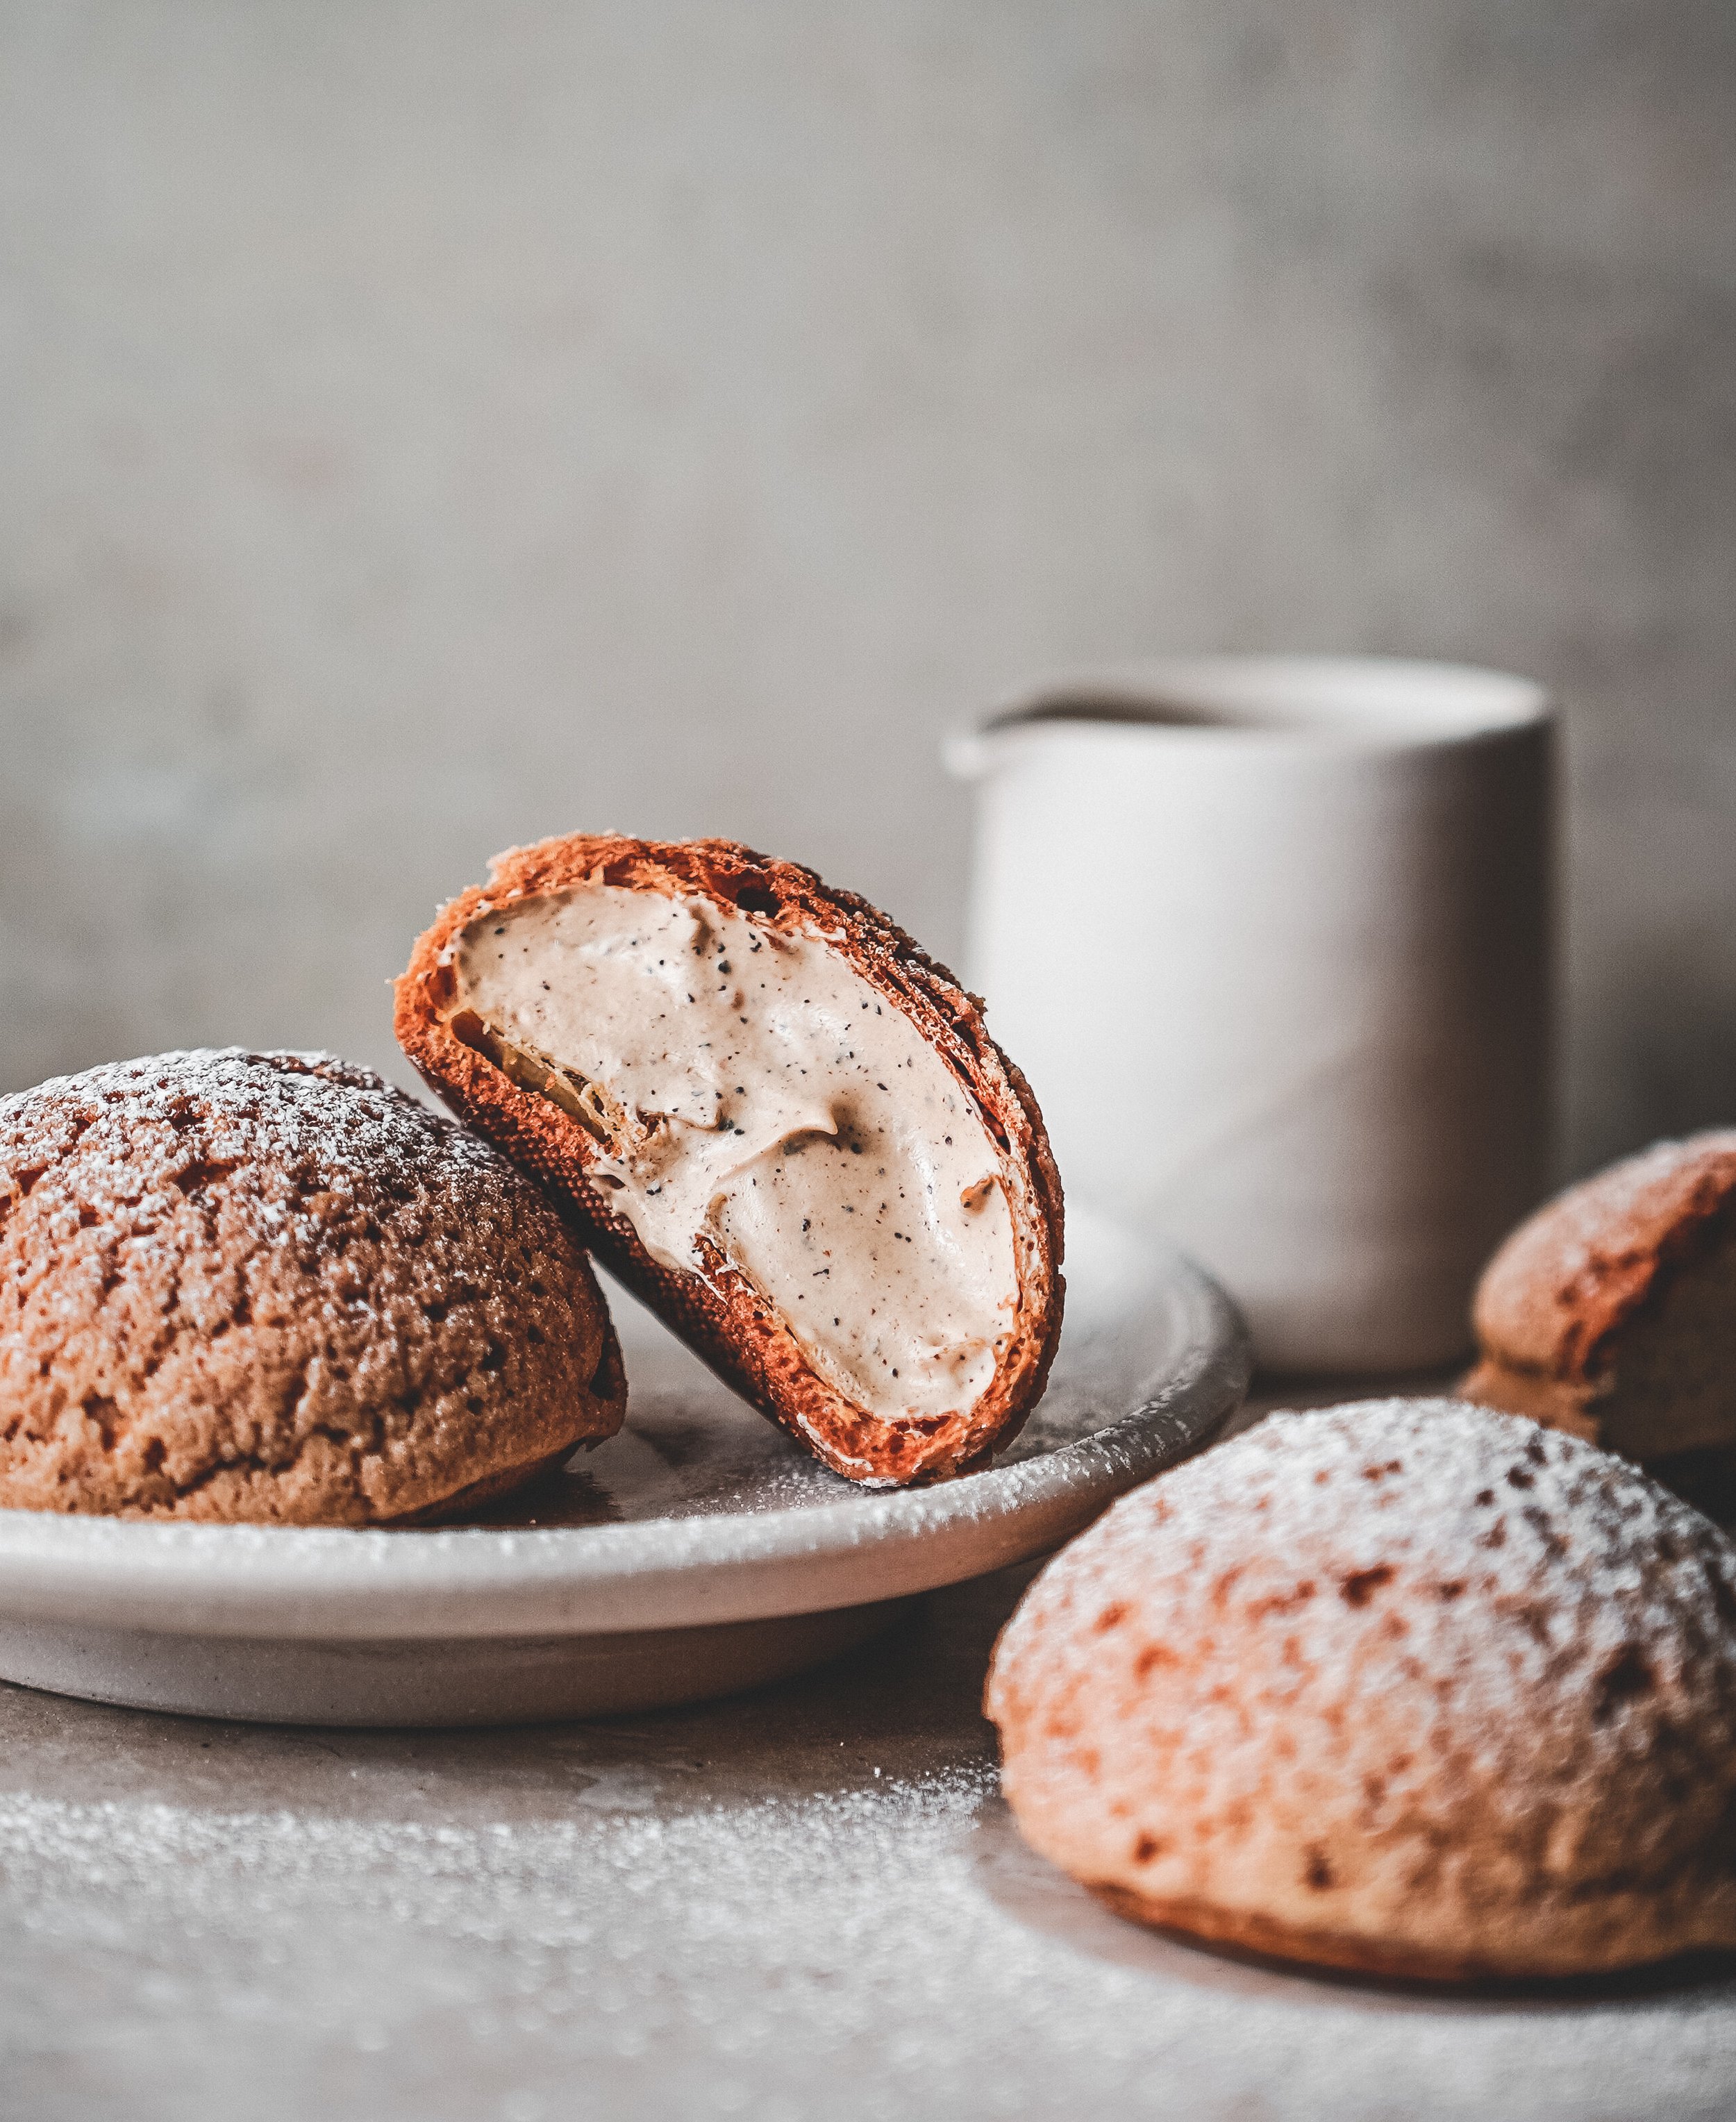
These choux buns are simple but I cant tell you how much I love them. The pastry is light and crisp but the filling, oh the filling! An easy whipped cream flavoured strongly with coffee and sweetened with condensed milk. The resulting flavour is like the best coffee ice cream you’ve ever had. 

If you like the look of this recipe and want to take it to the next level, over on my Patreon this week there is a fabulous rhubarb and custard choux bun that I am in love with.

Coffee Choux Buns
Makes 12-14

Coffee Cream Filling
300ml double cream
2 tbsp ground coffee
100ml condensed milk
1 tsp vanilla bean paste

Craquelin
50g unsalted butter, diced and at room temperature
50g caster sugar
50g plain flour

Choux Pastry
70ml water
70ml whole milk
1/2 tsp fine sea salt
1/2 tsp sugar
70g unsalted butter, diced
70ml plain flour
2 large eggs

To make the coffee cream filling place the cream and ground coffee into a saucepan and place over a medium heat. Bring to a simmer then remove from the heat, cover with a lid and set aside for an hour. Pour the cream into a sealable container and refrigerate overnight. This long infusion helps to draw out a lot of flavour, resulting in a very strong coffee flavour.

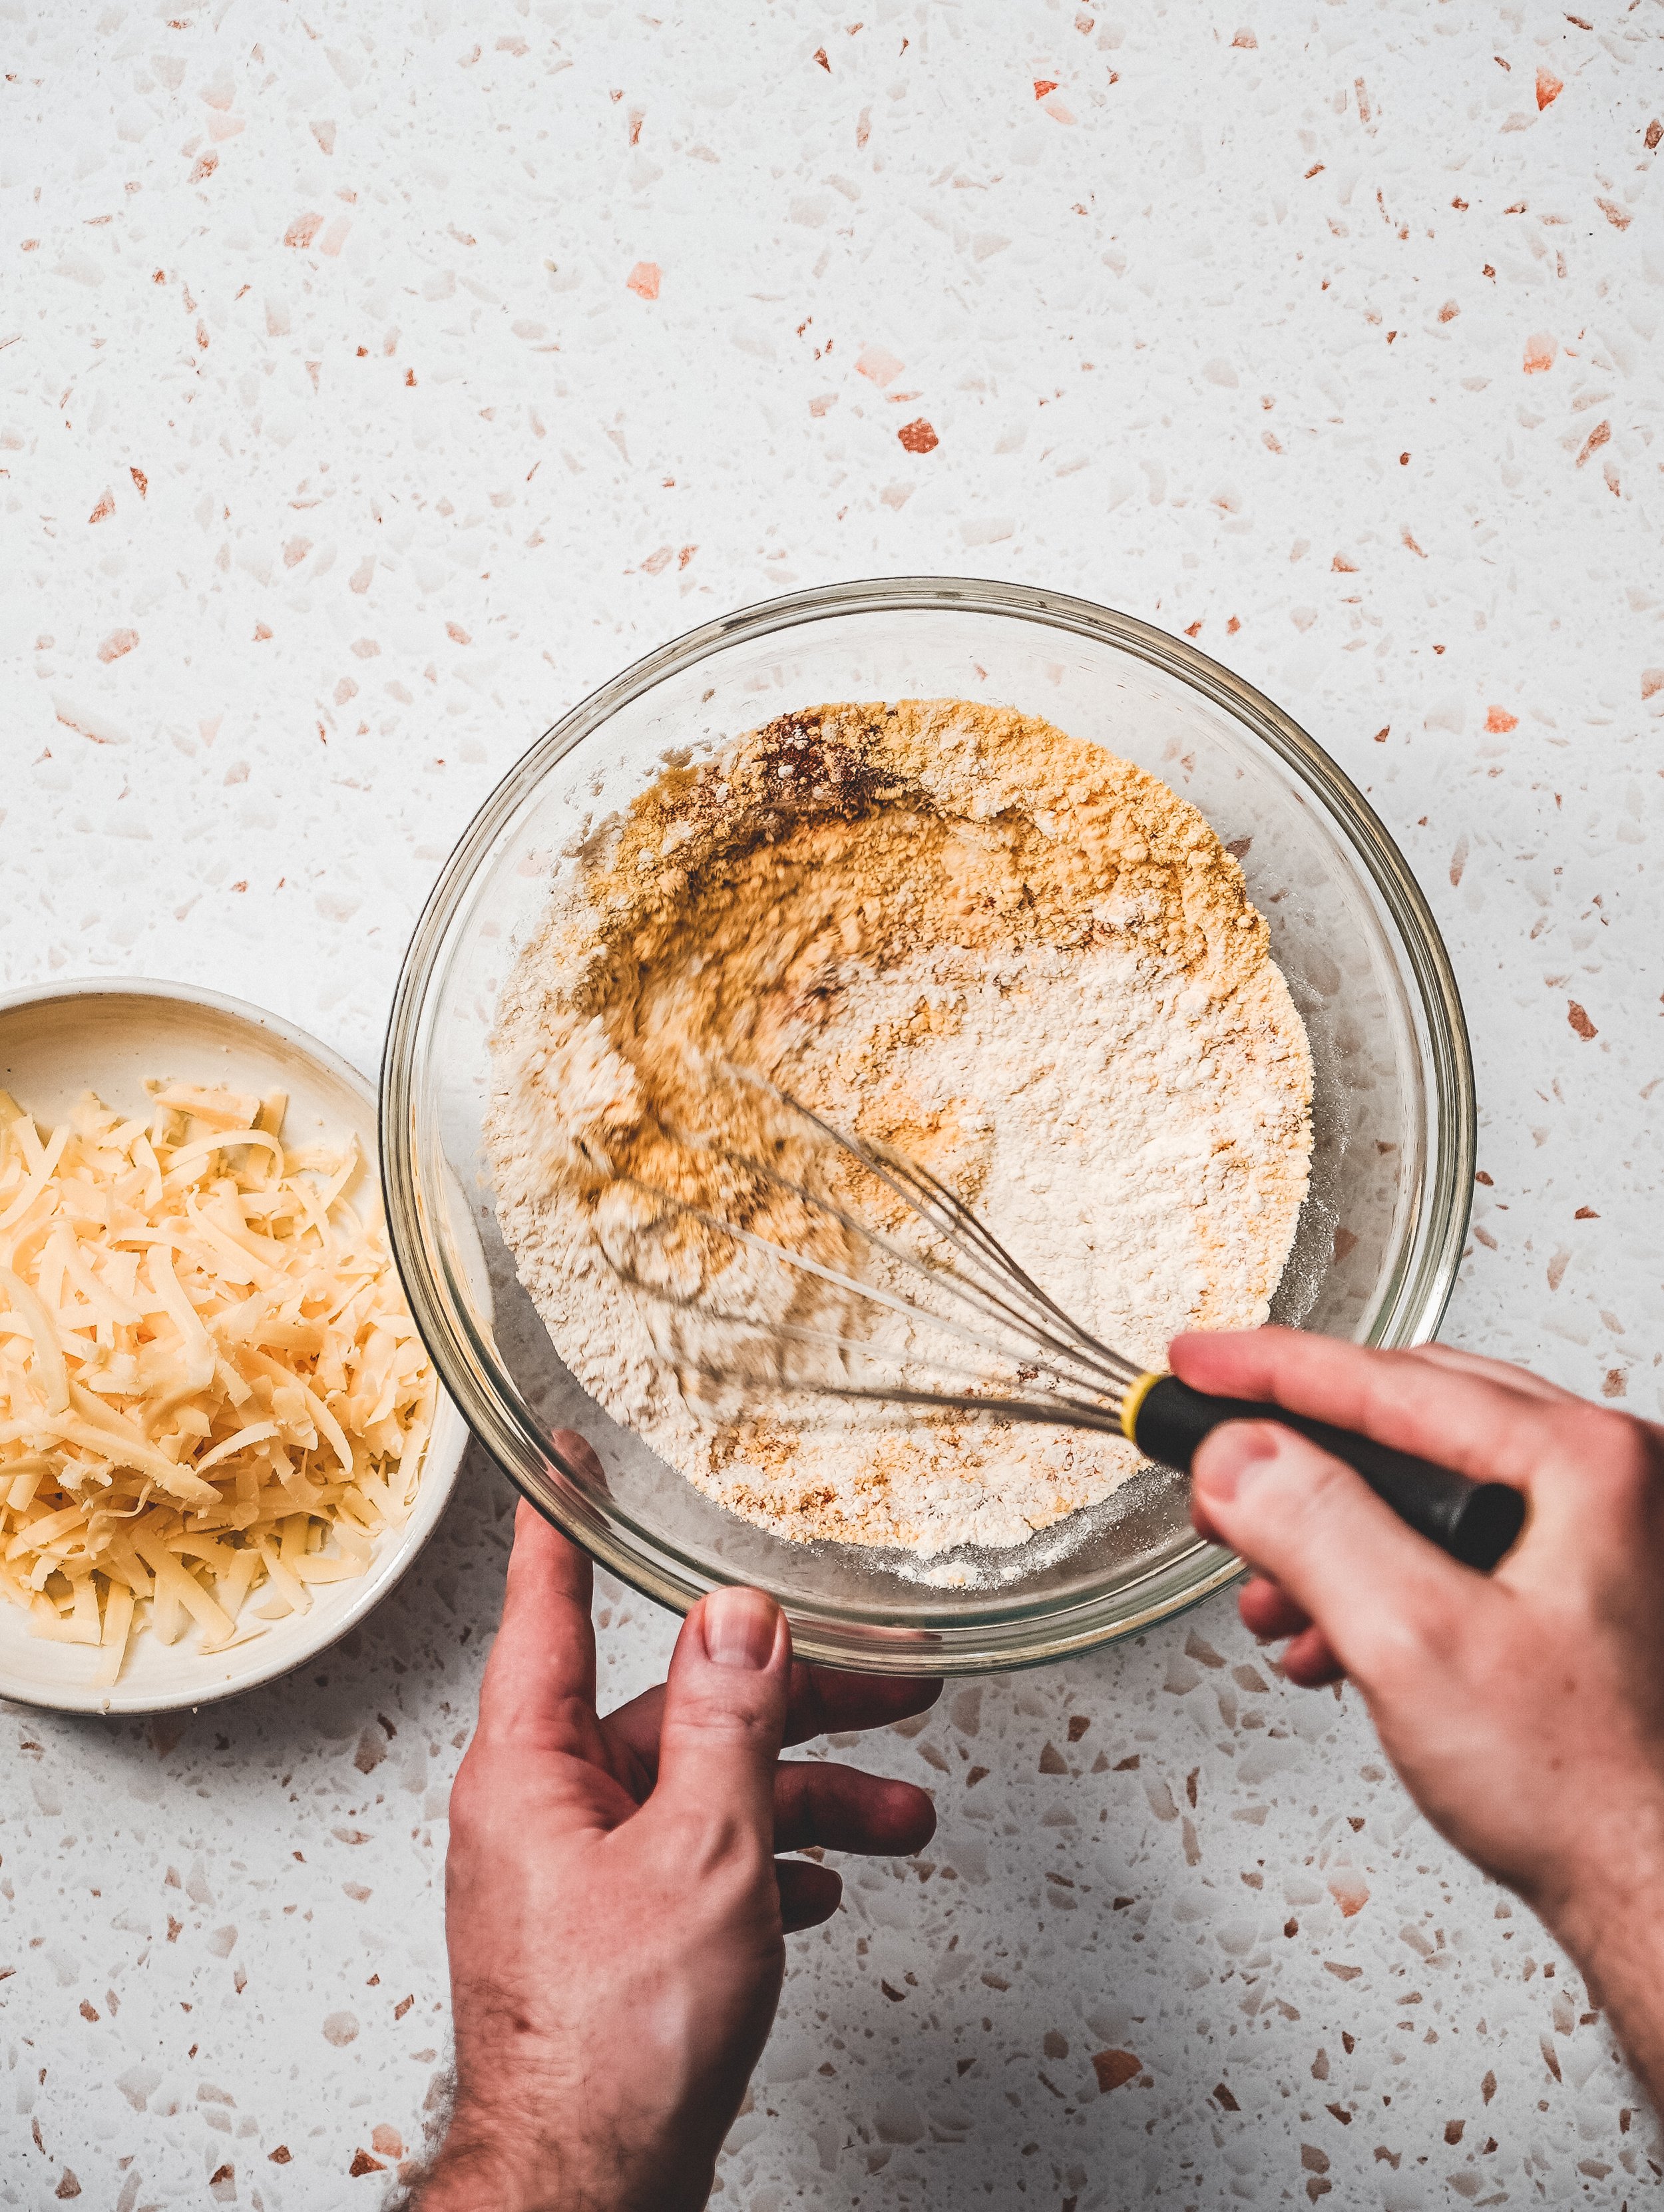
To make the craquelin beat the butter in a bowl until soft and creamy. Add the sugar and beat until smooth and combined. Add the flour and mix to form a crumble-esque dough. Use your hands to press together into a dough and press flat. Place the dough between two sheets of parchment and roll out until about a couple mm thick, it wants to be nice and thin. Place onto a baking tray and freeze while you make the pastry. 

Preheat the oven to 190º (170ºC Fan).

For the choux pastry place the water and milk into a saucepan and mix in the salt and sugar. Place over low/medium heat and cook until the butter has melted. Turn up the heat and bring the liquid to a rolling boil. Remove the pan from the heat and pour in the flour in one go, mixing immediately forming a soft dough. Place the pan back on the heat and cook for 1-2 minutes more until the dough leaves a fine film on the base of the pan. A tip I learnt from pastry chef Francisco Migoya is that you can also check the pastry is ready by checking its temperature. The point of cooking the choux pastry in this manner is to gelatinise the flour. This happens to the flour when the dough hits between 74-79ºC. At this point scrape the dough into a bowl and beat for a few minutes to cool enough that the dough wont cook the eggs. 

Add the eggs to a small bowl and whisk together to combine. Pour a little of the eggs into the pastry and beat together until fully combined. It may look a little separated or like cottage cheese but keep beating, it will eventually come together. Repeat adding more of the egg until the dough has a sheen is smooth. When lifted from the bowl using a wooden spoon or spatula the dough  should easily fall from the spoon forming a v-shape when it does. You can also draw your finger or the handle of a wooden spoon through dough, it should leave a channel that stays put for at least 5 seconds. 

Scrape the pastry into a piping bag fitted with a plain round piping tip. 

Line two baking trays with parchment paper and on the back of the paper use a 5cm round cookie cutter to draw circles to use as a template. The choux buns will expand so leave plenty of space between each ring. Turn the paper over so the templates are on the back of the paper (if you forget to do this the ink/pencil can transfer onto the choux, trust me I have done this far too may times to count). Pipe rounds of the pastry onto the baking tray, piping to edges of the templates you have drawn. 

Remove the craquelin from the freezer and peel of the top layer of parchment paper. Use the same cookie cutter to cut out discs of the topping. Place the discs onto the choux pastry, pressing very lightly to secure it in place.

Bake in the oven for about 30 minutes or until the craquelin is golden brown. Turn off the oven and allow the choux to sit in the cooling over for half an hour. This helps ensure the pastry remains crisp.

After 30 minutes remove the buns from the oven and allow to cool fully. To assemble, pierce a small hole in the base of each bun with a pairing knife. Remove the cream mixture from the fridge and pass through a fine mesh sieve to remove the coffee grounds (some very fine grains of coffee will remain in the cream). Pour in the condensed milk and vanilla and whisk until the cream holds soft peaks. Scrape the filling into a piping bag fitted with a plain round tip and use to fill each choux bun. Dust the finished buns with a little icing sugar.

Once assembled the buns are best on the day made when the pastry will remain crisp. You can serve them up to three days later, keeping them refrigerated. As they sit the pastry will lose its crisp texture and become soft.


In Pastry Tags choux, choux buns, coffee, craquelin, choux a la creme
1 Comment

Cheddar Jalapeno Cornbread Muffins with Lizi's Granola

Edd Kimber November 19, 2021

Lizi’s Granola Cornbread Muffins
This post is sponsored by Lizi’s Granola / @lizis_official 

It’s cold outside, its pouring down with rain and you want to stay inside where its warm and cosy, what do you make for dinner? For me, one of the most warming and comforting dishes is a big bowl of chilli, cooked slowly with plenty of deep earthy spices. To serve with it you could always go with a crusty loaf of bread, but when cornbread exists why would you choose anything else. For my cornbread recipe I like to make it as a muffin as they bake quicker which means you get to eat them sooner. I also like to add cheddar and jalapeños which both make it the perfect match for a big bowl of chilli. 

To give the muffins a little added crunch I like to sprinkle them with some Lizi’s Low Sugar Granola. I made these twice both using two different types of the Low Sugar granola.  The first was the low sugar variety because whilst I like a little sweetness in the muffins (which comes from honey) I want to keep the balance on the right side of savoury . The second time was with Low Sugar Maple & Pecan – this did give the muffins a slightly sweeter taste and crunch. Both just as good as each other! 

Whilst you can make and serve the muffins immediately if you want to make them ahead of time you can either reheat them in the oven or, my personal preference, you can split them in half and place them under the grill until lightly browned and then spread them generously with salted butter. 

Cheddar and Jalapeno Cornbread Muffins
Makes 6

75g fine cornmeal
125g plain flour
1 tsp fine sea salt
2 1/2 tsp baking powder
1/2 tsp smoked paprika
100ml unsalted butter, melted
1 tbsp honey
2 large eggs
75g cheddar, grated plus extra for topping
50g pickled jalapeños, plus extra for topping
6 tbsp Lizi’s Low Sugar Granola

Preheat the oven to 180C (160C Fan) and place 6 tulip muffin cases into a muffin pan. 

Add the cornmeal, flour, salt, baking powder and paprika to a large bowl and whisk together to combine. In a jug whisk together the butter, honey and eggs. Make a well in the dry goods and pour in the butter mixture, the cheddar and jalapeños. Use a spatula to fold together just until a thick uniform batter is formed. Scoop the batter into the prepared tulip cases and top with another jalapeño, a little extra grated cheddar and a tablespoon of granola. 

Bake the muffins in the preheated oven for about 25 minutes or until the muffins are lightly browned and spring back to a light touch. Remove from the oven and set aside to cool slightly before serving. 

Cornbread Muffins are best served warm on the day they are made. Leftovers can be split in half, toasted under the grill and served with a little salted butter. 

In Breads and Quickbreads Tags cornbread, muffins, jalapeno, cheese, granola
1 Comment

Espresso Caramel Sheet Cake

Edd Kimber November 16, 2021

Today I have a fabulous treat for you, a sneak peek at a seriously delicious recipe from my new book One Tin Bakes Easy which has now been out in the UK, Aus and NZ for a month and from today is also on sale in the USA and Canada.

If you haven’t heard about the book yet let me give a quick 30 second explanation. Last year I released my book One Tin Bakes, a collection of 70 recipes that are all made in the same 9x13 tin. I was blown away by the response, the book became a bestseller and even a year later I still see you guys baking from it every single day. The book came out in the midst of the pandemic and right in the middle of lockdowns all over the world. People were stuck at home and baking became one the things they relaxed with, everyone and their grandmother was making banana bread or turning out loaves of sourdough. When people picked up a copy One Tin Bakes it became really clear to me, through the emails and instagram DM’s I was receiving, that so many people baking last year were doing so for the very first time. Even though the recipes in One Tin Bakes are relatively simple there was still some nervousness with new bakers around many basics of baking. Because of this and the success of the book I decided to write a second volume in the series, a collection of 70 brand new recipes that were even easier than the original book. I am talking one bowl cakes that use the all in one method, treats that are no-bake, recipes that only use 5 ingredients. 

One Tin Bakes Easy shares the same DNA as One Tin Bakes but the recipes are as simple as I could possibly manage. They may be easy but the recipes never compromise on flavour, they’re easy but delicious. If that sounds like something you’d appreciate the book is now available everywhere books are sold in America, Canada, the UK, New Zealand and Australia. You can also buy copies anywhere in the world via The Book Depository.

If you are thinking you’d like to buy a copy as a present (the holiday season is upon us after all) There are a number of places you can buy signed copies. In the UK Waterstones have a stock of signed copies that you can buy online and from some stores in person (check their site for availability. In the US the Book Larder in Seattle have signed copies and they can ship anywhere in the country. I am also working on trying to get signed copies in more countries so bear with me if you’re looking to get one elsewhere. 

The recipe I have chosen to show you is my Espresso Caramel Sheet Cake. The cake is an all in one affair made with sour cream and a very healthy dose of espresso (or the strongest coffee you can make at home). The topping is a truly heavenly mix of dulce de leche, cream cheese and cream whisked until billowy and soft. It is spread over the cake and finished with a sprinkling of flaked sea salt. Trust me when I say you need to make this.

Espresso and Caramel Sheet Cake
Recipe from my new book One Tin Bakes Easy

Note: as you will see the measurements in this recipe are in both metric and imperial and this is how they appear in the book so no matter what style of measurement you prefer you are covered

170g (6oz/11⁄2 sticks) very soft unsalted butter, plus extra for greasing
320g (111⁄4oz/21⁄2 cups + 1 tablespoon) plain (all-purpose) flour
3 teaspoons baking powder 1⁄2 teaspoon fine sea salt
175g (6oz/3⁄4 cup + 2 tablespoons) caster (superfine) sugar
175g (6oz/3⁄4 cup + 2 teaspoons) light brown sugar
3 large eggs
2 teaspoons vanilla extract 100ml (31⁄2fl oz/1⁄3 cup + 4 teaspoons) cold espresso or very strong black coffee
75ml (23⁄4fl oz/5 tablespoons) sour cream Flaked sea salt, for sprinkling 

Caramel Cream Cheese Frosting

170g (6oz/3⁄4 cup) cream cheese, at room temperature
397g (14oz) can dulce de leche
240ml (81⁄2fl oz/1 cup) double (heavy) cream, chilled 

Preheat the oven to 180oC (160oC Fan) 350oF, Gas Mark 4. Lightly grease your 23 x 33cm (9 x 13in) baking tin and line it with a strip of parchment paper that overhangs the long sides, securing it in place with two metal clips. 

Place the flour, baking powder, salt and sugars in a large bowl and whisk to combine. Add the butter, eggs, vanilla, espresso and sour cream and mix until a smooth batter forms. Pour it into the prepared tin and spread evenly. 

Bake for about 35–40 minutes, or until the cake springs back to a light touch. Set aside to cool in the tin for 15 minutes before using the parchment paper to lift the cake onto a wire rack to cool completely. 

For the frosting, place the cream cheese and dulce de leche in a large bowl and whisk until smooth. Add the cream and whisk until the mixture holds soft peaks. Spread the frosting all over the cold cake and sprinkle with flaked sea salt just before serving. 

The cake can be made a couple days in advance if stored in a sealed container, but the frosting needs to be made and served on the same da

In Cakes Tags one tin bakes easy, one tin bakes, sheet cake, caramel, espresso, coffee, all in one, easy
2 Comments
Doves Cherry Pie-2.jpg

Sour Cherry Pie

Edd Kimber October 15, 2021

Sour Cherry Pie with Rye Flour Pastry
Sponsored by Doves Farm

Pie season is well and truly here, and nothing quite beats a slice of warm pie made with a super flaky crust. One of my all-time favourites is a sour cherry pie but, here in the UK, finding fresh sour cherries is nigh on impossible but thankfully there is a solution, frozen berries. One of my favourite ingredients to have in the freezer is bags of frozen sour cherries which you can buy from many organic or eastern European supermarkets (this is the brand I buy). The difference between a pie made with sweet cherries versus a pie made with sour cherries is huge, the sour cherries have that tang, that brightness, that almost Bakewell flavour with just a hint of almond to them. Sweet cherries can be amazing but I find a pie made with them can be a little one dimensional. Thankfully this recipe is pretty adaptive, and should cherries not be your thing, it would be equally delicious made with a bag of frozen black forest fruits or any other favourite frozen berry. The only thing to remember is that sour cherries are particularly tart and with other berries, you may want to reduce the sugar slightly to avoid overpowering the flavour of the fruit.

The method below works great for frozen berries because as they defrost they tend to release a lot of juice and we all know that a soggy pastry is not what we are looking for. By pre-cooking the filling, you lessen the chances of a soggy bottom. It also happens to be a great element to prepare ahead. 

Doves Cherry Pie-4.jpg

You’ve got a delicious filling, the next step is a flaky and fully flavoured pie crust. Flaky, we will get to, but fully flavoured is easy. You can make amazing pastry with plain flour, especially when made with good quality organic flour, like Doves Farm. Buying organic flour can make a big difference to your baking and it doesn’t just have to be for the month of Organic September, the flavour improvements alone can be more than enough but one of the main reasons I prefer to use organic flour is it’s better for us. In the UK over 300 pesticides can be used in non-organic farming but only 15 are licensed for organic farming. Defra found that 60% of supermarket wholemeal bread had traces of 3 of the UK’s leading pesticides. Buying organic flour and baking your own bread means you know exactly what you are eating. Talking of bread organic flour is also better for making sourdough as the microbial activity needed for sourdough starters is much higher in organic flour, it’s a no brainer as far as I am concerned. In pie crust, the flavour will often come mainly from the butter, but to add another layer of flavour and make a much more interesting pastry I love to add some Doves Farm Organic Wholemeal Rye Flour. Rye has such a wonderful depth of flavour that makes a rich nutty pastry that is a great foil to the fruit filling. For the flour I use 2/3 plain flour and 1/3 rye flour, this ratio makes for a pastry that is easy to handle but has all the benefits of flavour that comes with using rye flour.

Making a flaky pastry isn’t hard but you do need to keep some simple things in mind, mainly the temperature and size of the butter pieces. If you are someone that worries about hot hands you can make a great head start by chilling everything, the flour, the butter, the bowl and the water. Also, don’t worry about throwing the mixture back in the fridge if you’re worried about it warming up, the pastry will wait for you. It is always better to take your time than to rush the process. When it comes to the butter, the key thing to remember is the bigger the butter pieces are at the start the more flaky the pastry will be at the end. When you initially add the butter, resist the urge to rub it together with the flour to make a breadcrumb texture, that will eliminate any potential flakiness and this pastry is all about the flakiness. 

Doves Farm Organic Plain White Flour is available from Sainsbury’s, Ocado and dovesfarm.co.uk and Organic Wholemeal Rye Flour is available from Sainsbury’s, Tesco, Ocado and dovesfarm.co.uk.

Doves Cherry Pie-3.jpg

Flaky Rye Pie Dough
200g Doves Farm Plain Flour, plus extra for dusting
100g Doves Farm Wholemeal Rye Flour
2 tbsp caster sugar 
250g unsalted butter, diced into 1cm pieces
2 tbsp vodka
1 large egg, for glazing
demerara sugar for sprinkling

Sour Cherry Filling
1kg frozen sour cherries
200g caster sugar
3 tbsp cornflour
1/2 tsp almond extract 

For the sour cherry filling place the cherries and the sugar into a large saucepan and heat over medium heat until the fruit has released its juice but the fruit is still whole. Pour the contents of the pan through a fine-mesh sieve into a bowl and set aside for a few minutes until all the juice has drained into the bowl. Pour the liquid back into the pan and whisk in the cornflour. Cook on medium-high heat until the mixture is reduced and thickened to a gel-like consistency. Scrape into the bowl with the fruit and stir gently to combine. Cover the bowl and refrigerate until needed.

For the pastry place the Doves Farm Plain Flour and Doves Farm Wholemeal Rye Flour, sugar and salt into a large bowl and mix together. Add the butter and toss in the flour to coat and, using your fingers, press each piece of butter flat. Put the bowl into the freezer for 10 minutes for the butter to firm up.

Remove from the freezer and mix the vodka with 6 tbsp of ice-cold water. Pour over the dough and, using a spatula, stir gently together until a shaggy dough is formed. Tip this mixture onto the worksurface and use your hands to bring together. On a lightly floured work surface roll out into a square roughly 30x30cm. Cut into 4 smaller squares and stack them together. Flatten with a rolling pin and wrap in clingfilm and refrigerate for an hour. 

Once the dough is chilled roll into a rectangle roughly 20x40cm and roll up like a Swiss roll. Cut into two pieces, one slightly larger than the other. Press the larger piece into a rectangle and the smaller into a round, wrap both in clingfilm and refrigerate for at least an hour before using, but preferably overnight. 

Remove the smaller piece of dough from the fridge and, on a lightly floured worksurface, roll out until 2-3mm thick and about 5cm wider than the pie plate (I use a deep 9-inch plate). Roll the dough onto the rolling pin and carefully unroll it into the pie plate, trimming the overhang to about 2.5cm. Chill. Remove the second piece of dough and roll out into a rectangle as thick as before. Cut into strips (the width is up to you but I find strips about 2.5cm wide are easier to work with and look a little more modern).

Doves Cherry Pie-5.jpg
Doves Cherry Pie-6.jpg

Remove the pie tin from the fridge and sprinkle the ground almonds into the base of the pie, spreading so it covers the base evenly (this helps to soak up excess juices and ensure a crisp base) and scrape in the cherry filling, spreading into an even layer.

Now it’s time for the lattice crust and, thankfully, it’s easier than it looks. Lay enough strips vertically onto the pie to cover and fold every other strip back on themselves. Add a strip perpendicular to the first batch, on top of the unfolded strips. Unfold the folded strips – they should now run over the top of the piece you’ve just put in, and fold back the opposite horizontal pieces, that weren’t folded back last time. Repeat this process until the whole pie is covered.

Trim the lattice crust so the strips of pastry end sat on the rim of the pie plate. Roll up the overhanging dough into a thin sausage, that sits on the rim of the pie plate. Use the thumb and forefinger of one hand and the forefinger of the other to crimp the pie. Brush the pie with the beaten egg and sprinkle liberally with demerara sugar. Chill for 30 minutes or until the pastry is firm.

Heat the oven to 200ºC (180ºC Fan). Bake on a baking tray for 15 minutes then reduce the temperature to 180ºC (160ºC Fan) and bake for 1 hour or until the pastry is a deep golden brown and the filling is bubbling. Allow to cool fully before serving. 

In Pastry Tags pie dough, pie, sour cherry, rye flour, rye, frozen berries, berry, cherry, lattic, lattice crust
Comment
  • Recipes
  • Older
  • Newer

Twitter

  • Was 8 original films, 3 spin off films, a two part play not enough. Can we have something new. https://t.co/cBZdGEGeyv
    Apr 4, 2023, 1:46 PM
  • RT @deliciousmag: Cacio e pepe, but make it buns! These seriously cheesy bread rolls from @TheBoyWhoBakes are inspired by his favouri… https://t.co/oDZlaDgnN2
    Apr 2, 2023, 11:08 AM
  • RT @TheDailyShow: Congrats to Donald Trump on finally winning a majority of votes! https://t.co/ezP55HZgl0
    Mar 31, 2023, 12:43 AM

Instagram

This weeks bonus recipe, for subscribers to my newsletter, is this gorgeous sour cherry and coconut gateau basque. The crust is a buttery cross between pastry and cake, think a cakey cookie. The filling is a layer of sour cherry topped with a rich coconut custard. A real fun one to make too! Link to my newsletter can be found in my bio - #gateaubasque #pastrycream #coconut #sourcherry
In this months @olivemagazine (out today) the team came and photographed my petit kitchen and we talked about how we put our stamp on the place, without spending a fortune. We hated the bland kitchen that we inherited but, as it was relatively new an
In this months @olivemagazine (out today) the team came and photographed my petit kitchen and we talked about how we put our stamp on the place, without spending a fortune. We hated the bland kitchen that we inherited but, as it was relatively new and in good condition, it felt a waste to rip it out and we also didn’t want to spend the money it would take to rip out the whole thing and replace it (it’s a howdens shell so we could have done something cheaper like @plykeakitchens @holte.studio @madebyhusk) so instead I painted all of the cabinets, using @makeitrustoleum kitchen cabinet paint, to give it some personality and lighten the whole thing. Check out the magazine for the full run down. - #kitchendesign #kitchenremodel #rustoleumcabinettransformations #rustoleumkitchencupboardpaint #kitcheninspiration #theboywhobakes #olivemagazine
Are you making scones all wrong? Maybe, maybe not? But I do want to show you how I make them! This recipe is based on the method I learnt at @belmondlemanoir 12 years ago when I did a stage, and it makes the absolute lightest scones. And shock horror, it involves kneading the dough, albeit very lightly. You can get the full recipe in this weeks newsletter (free) linked in my bio. - #scones #bakingday #worldbakingday #afternoontea #hightea #englishscones #clottedcream #creamtea #theboywhobakes
facebook
  • Contact

The Boy Who Bakes

Edd Kimber

facebook